How To: Setup 5 free email accounts against your domain


BitmapBytes.com uses the Oracle Cloud to host this blog - in a 6 part series I will be taking you through how you can quickly and easily spin up a website with 200gb of free space hosted on the Oracle Cloud. Connect it with your domain with https support, setup the domain with free email service for 5 emails provided by ZOHO mail - and finally install the Ghost blogging platform and configuring it with Mailgun for sending out newsletters to your followers.
- Part 1 - Setting up an account with Oracle Cloud
- Part 2 - Spinning up an Oracle Virtual Machine
- Part 3 - Configuring your Oracle Virtual Machine as a webserver
- Part 4 - Install Ghost CMS
- Part 5 - Setup free email provider
- Part 6 - Configure Mailgun
Now that Google started charging for their mail service the next best free email provider - if you are just starting up and want to connect your domain is ZOHO Mail.
You get Up to five users:
- 5GB/User, 25MB attachment limit.
- Web access and free mobile apps*.
- Email hosting for single domain.
Signup
The signup page for the free service is a little hidden; so, here is the direct link to signup for the free service - https://mail.zoho.eu/signup?type=org&plan=free
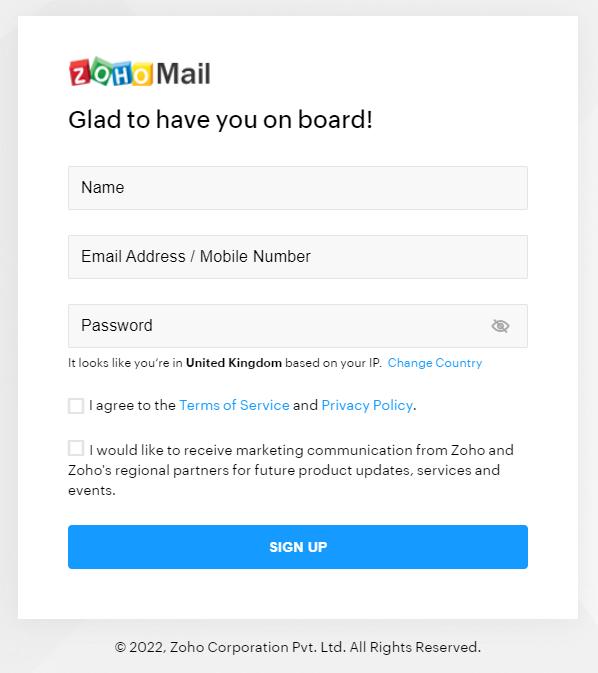
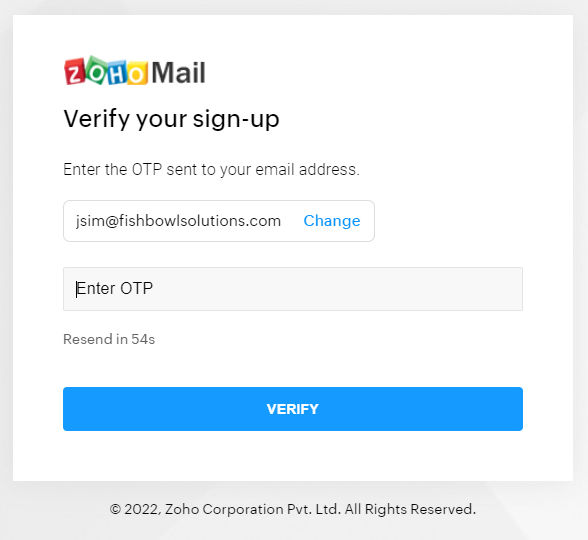
You'll need to validate/verify with either your mobile or another email account
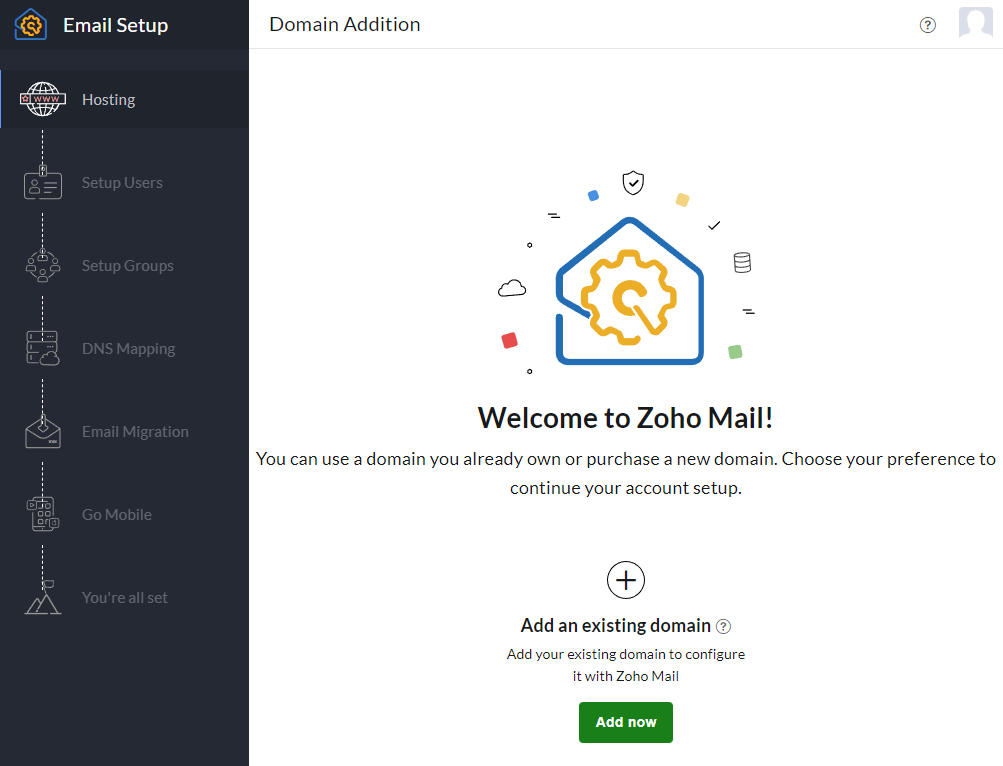
Once in you get a nice step by step guide to configuring your domain.
Start by selecting the "Add now" button and will go through the configuration step-by-step..
Configuration
Ok now you are signed up lets configure ZOHO Mail and get it hooked up with your domain..
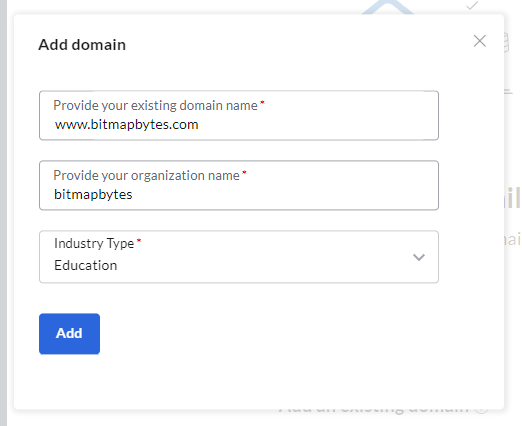
Add your domain -
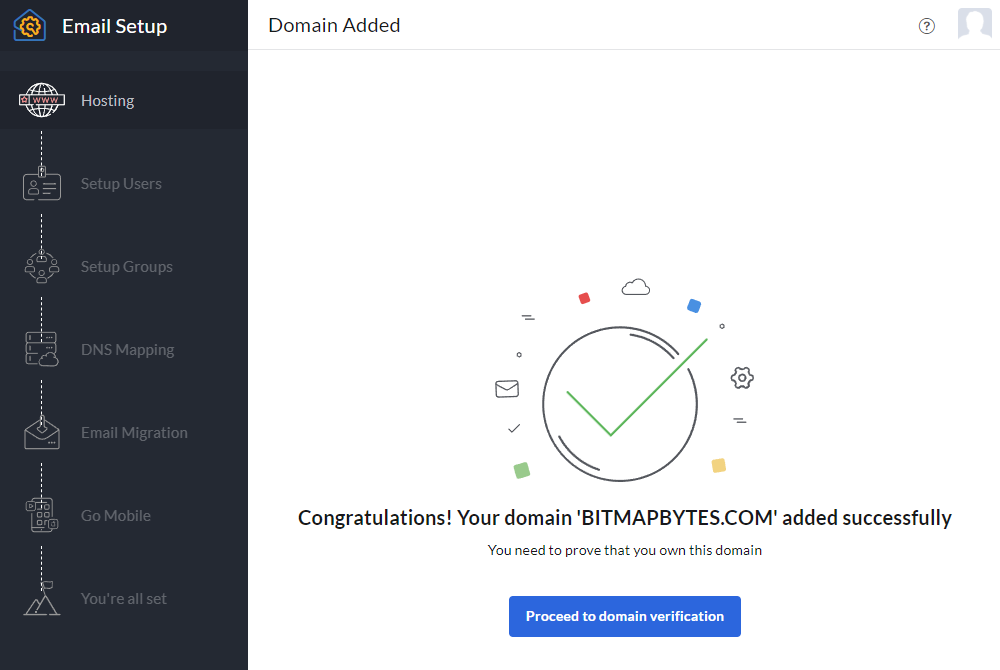
Once added let's verify that you own the domain select the "Proceed to domain verification" button.
Ok you have three options at this point to verify you own the domain
- Add TXT record in the DNS
- Add a CNAME record in the DNS
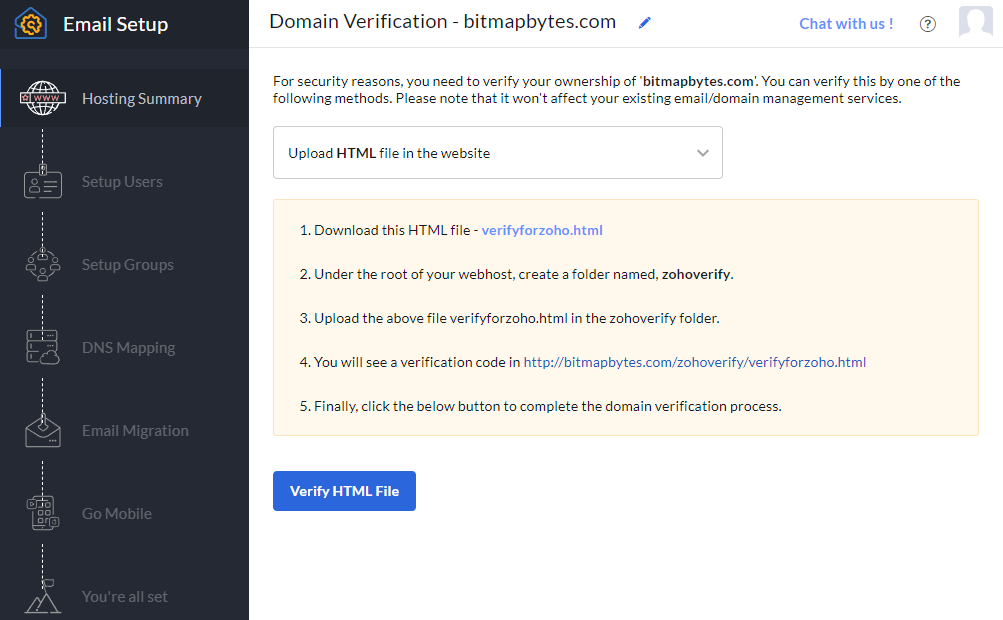
- Upload HTML file in the website
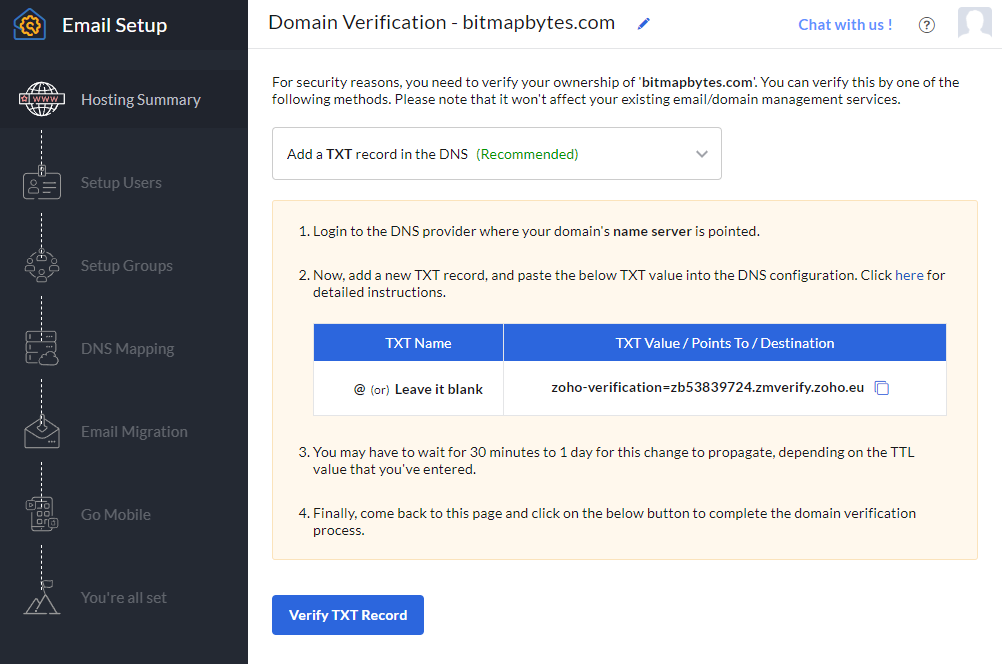
They are all pretty easy so lets go through each - you only need one.
Adding TXT or CNAME record in the DNS
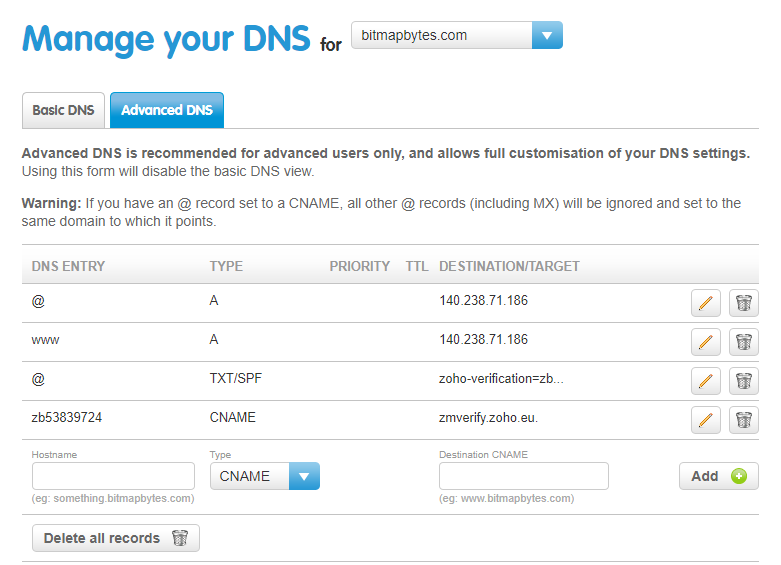
Open up you Domain registrars DNS panel - I'm using 123-reg but it's pretty much the same approach with any registrar ie godaddy etc. And add the info asked for by ZOHO Mail -
Upload HTML file in the website
Download the html file create a folder "zohoverify" and upload it into there.
If you've been following the other series of setting up the Oracle Cloud Virtual Machine with ghost then these are the steps - launch your terminal I'm using mobaXterm.
 # cd into your domain root
 cd /var/www/<yourdomain_or_ghostCSMS>/

 # make the zohoverify dir
 mkdir zohoverify

 # go into the new folder
 # cd zohoverify

 # upload the html file I just dragged it in through mobaXterm but you can recreate it and copy and paste the contents if you really want..
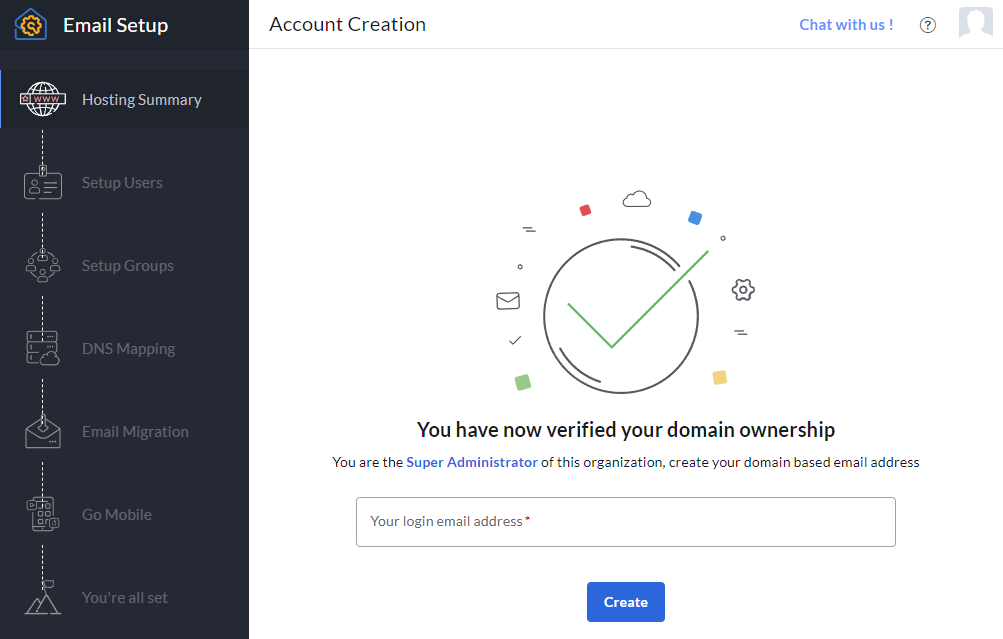
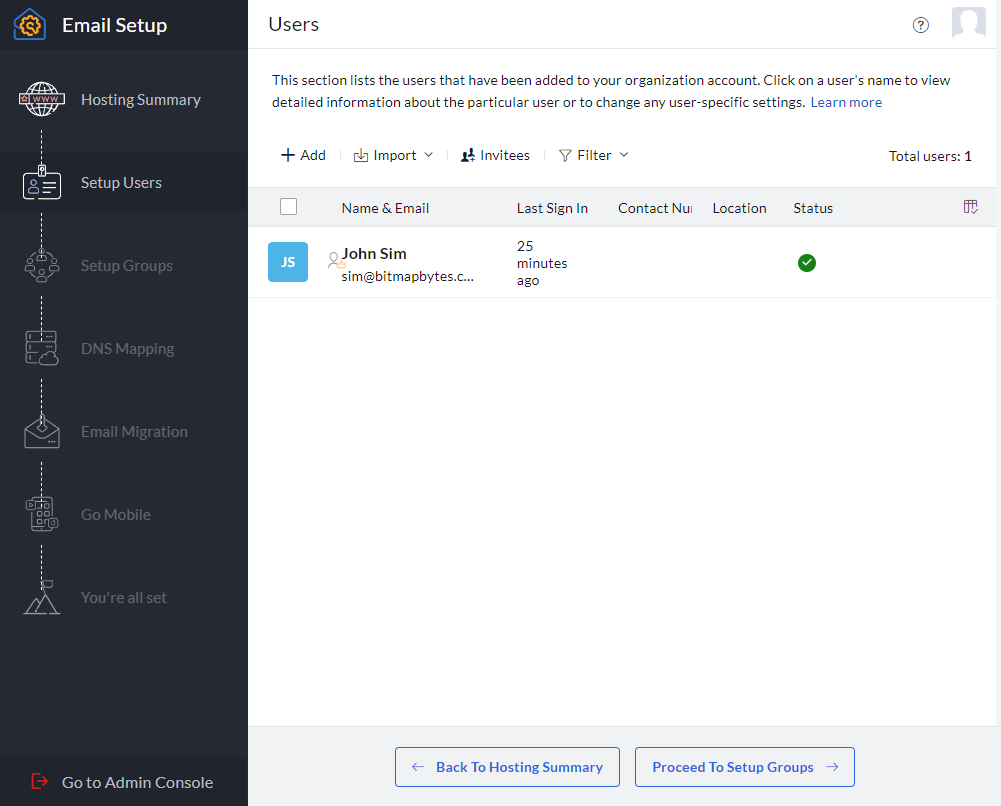
Once verified - create your primary admin account email
Now that your primary email account has been created you can easily create 4 more accounts now or later.
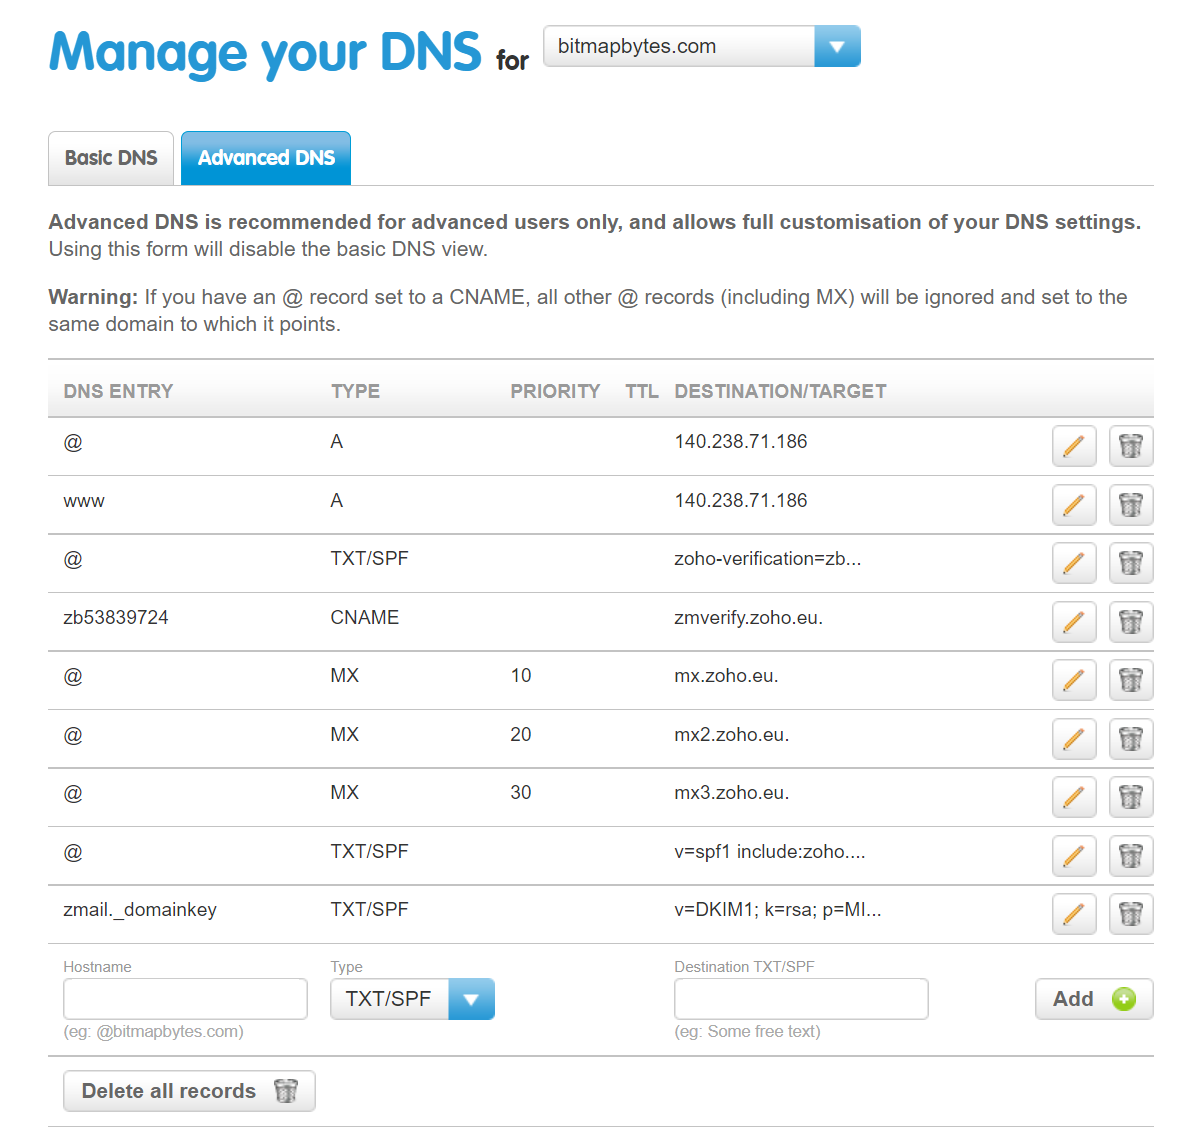
From the DNS Mapping panel lets configure the MX records so that we can receive emails. - To do that go back into you domain registrars DNS Panel and add the records provided by ZOHO Mail as the below example.
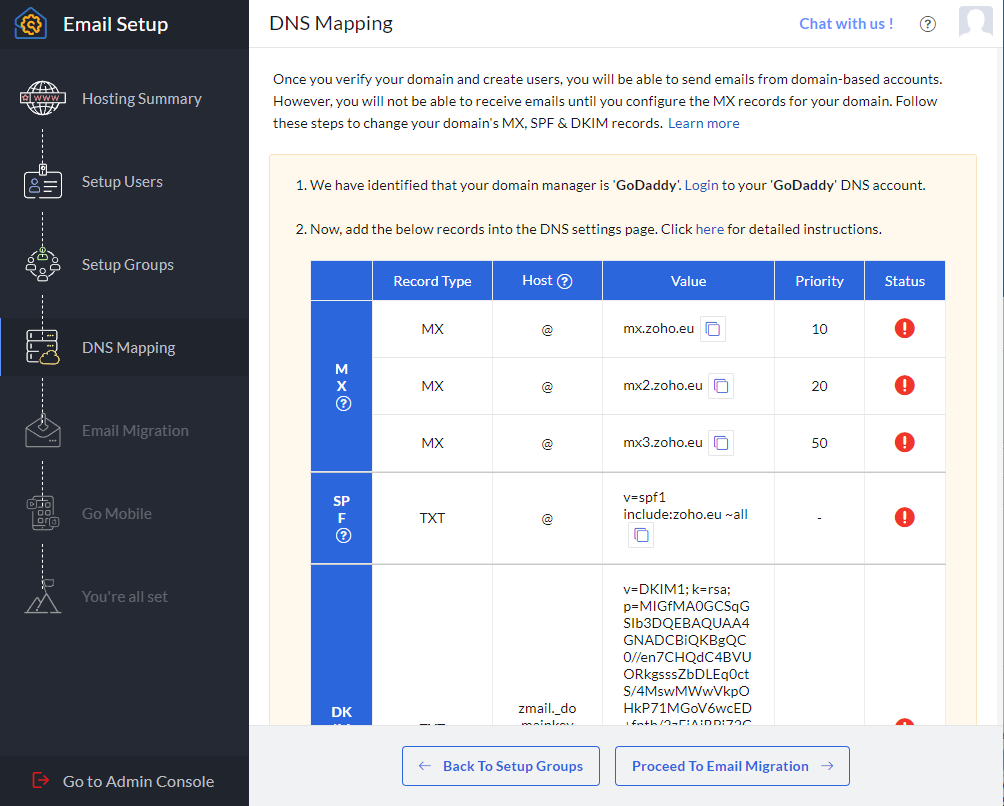
Here is a quick example of mine once added - go back to ZOHO dashboard and select "Verify All Records" button.
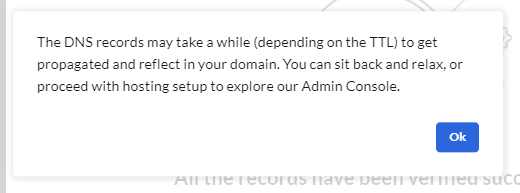
You may get this notification - so sit back and give it 24hrs..
Once everything has been verified you should see something like this -
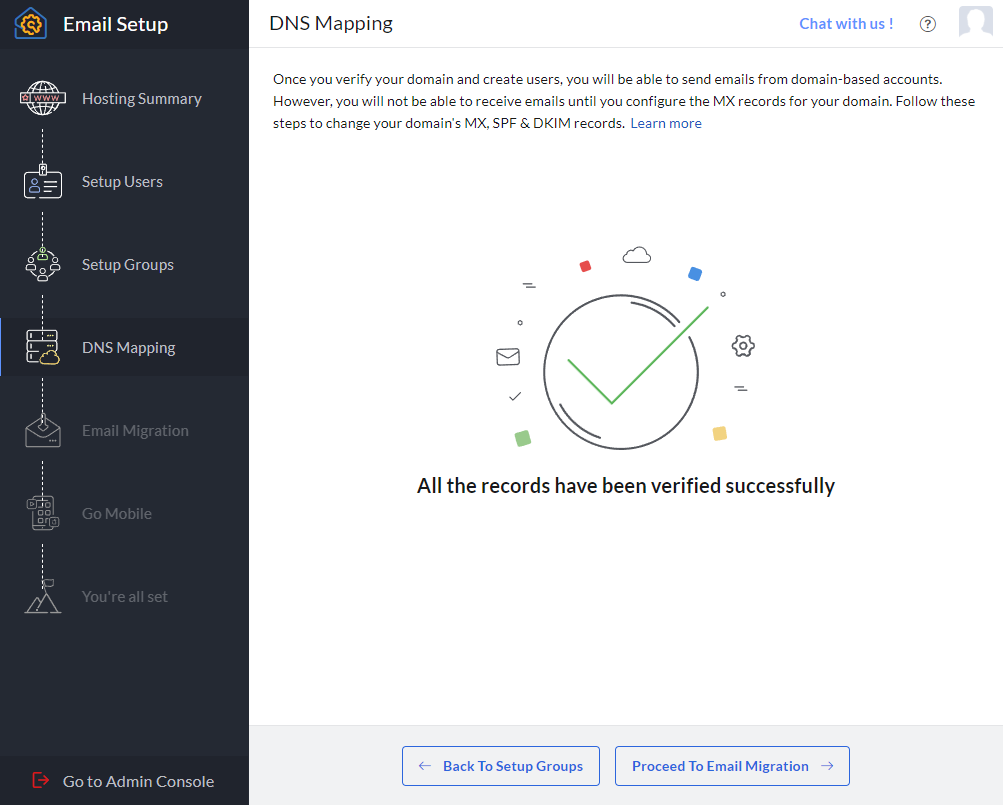
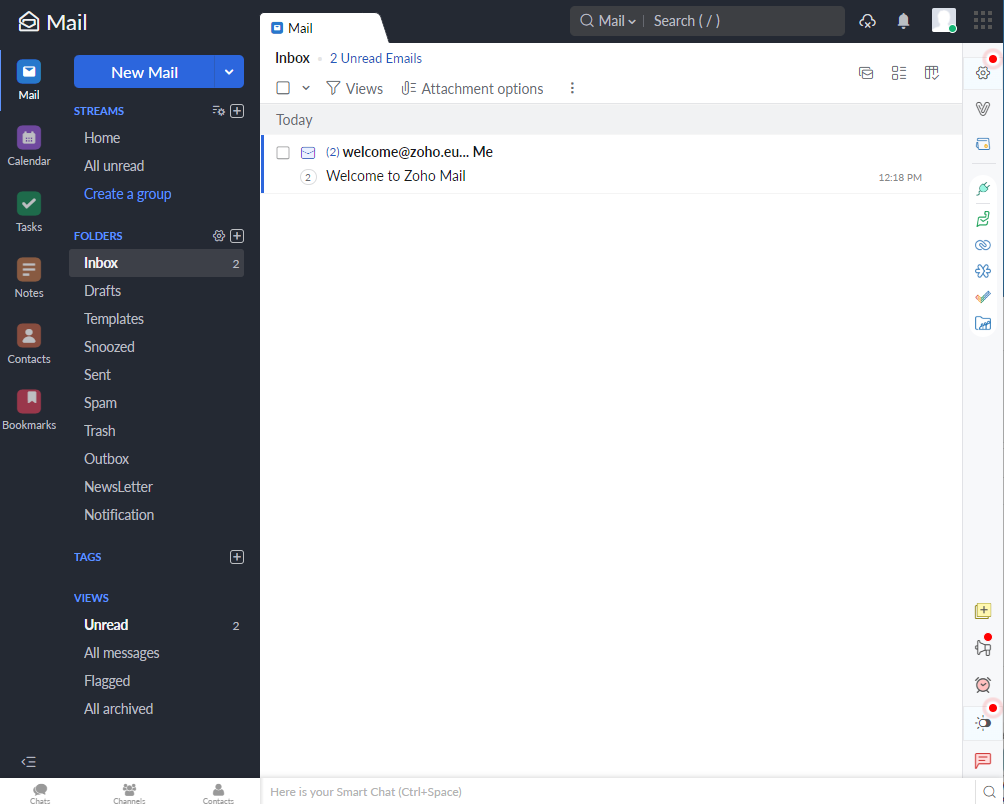
Now skip to the end and select "Check out your inbox" button.
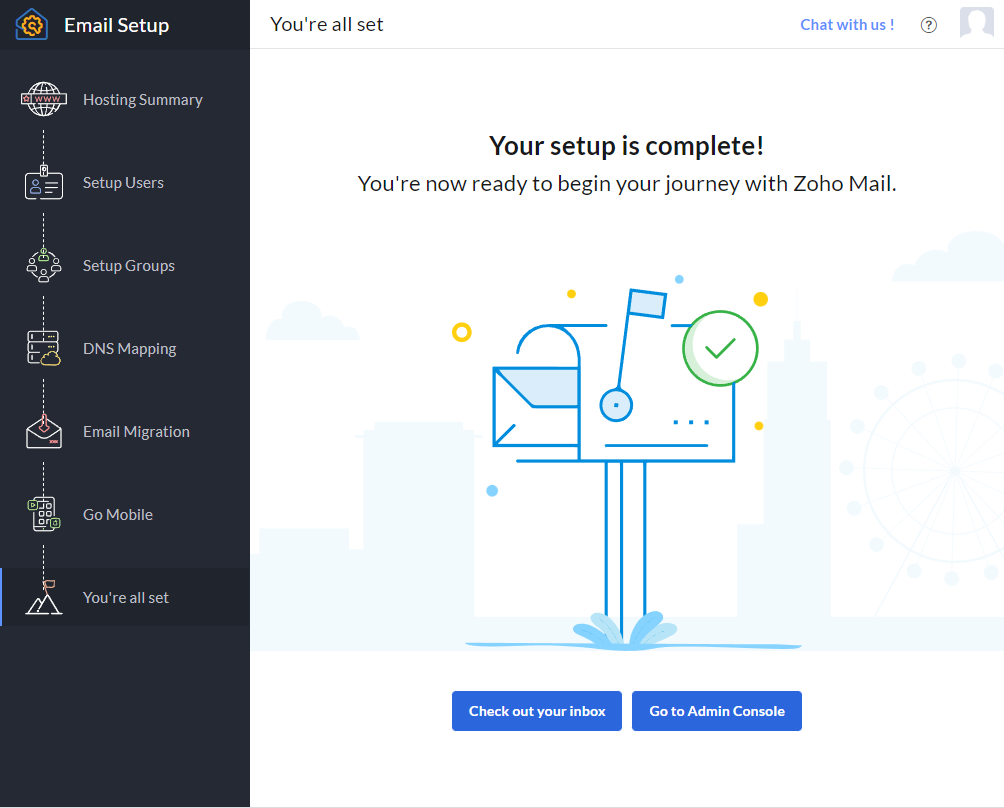
Congratulations!
You should now have access to your new free email provider service and with the ability up to create 4 more free email accounts.