Hosting Guide: Oracle Cloud Infrastructure with Sveltekit

If you are new to Oracle Cloud hosting and are looking to setup Sveltekit on your own server - I've pulled together this quick guide to help you get through the basics of getting your domain connected and up and running.
Guide Overview
- Create an Oracle Compartment
- Setup an OCI Instance
- Connect to OCI Instance and configure
- Enable server rules ingress for public access
- Build Sveltekit with node-adapter
- Configure Socket Activation
If you haven't already created a cloud account here is a step by step guide:
Create an Oracle Compartment
Lets start by creating a compartment where you will setup your new server:
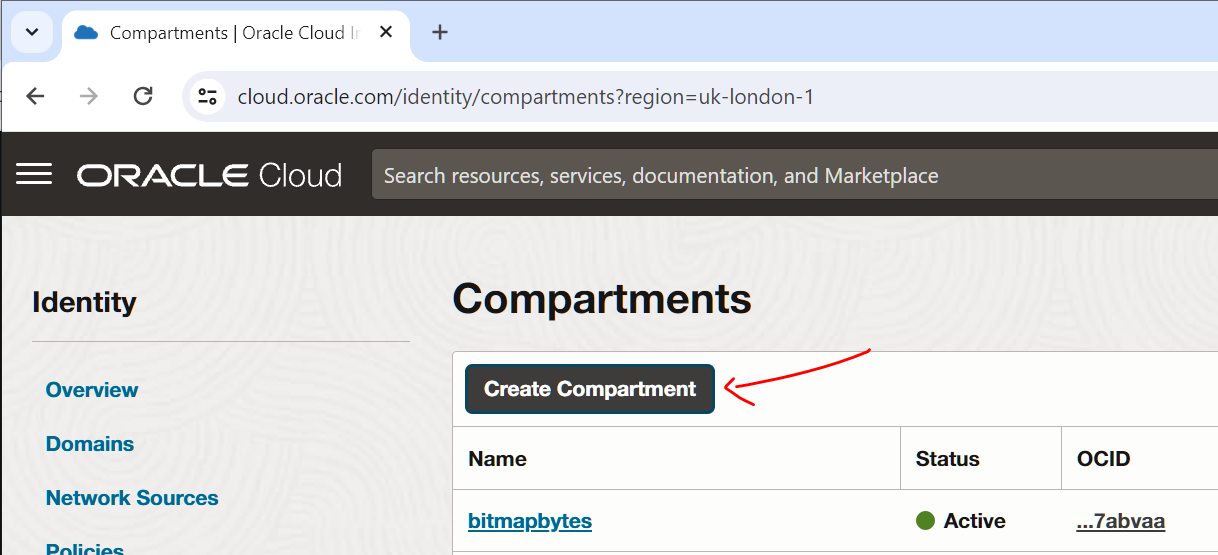
Within your Oracle Cloud Account - Select the menu > Identity & Security and Compartments.
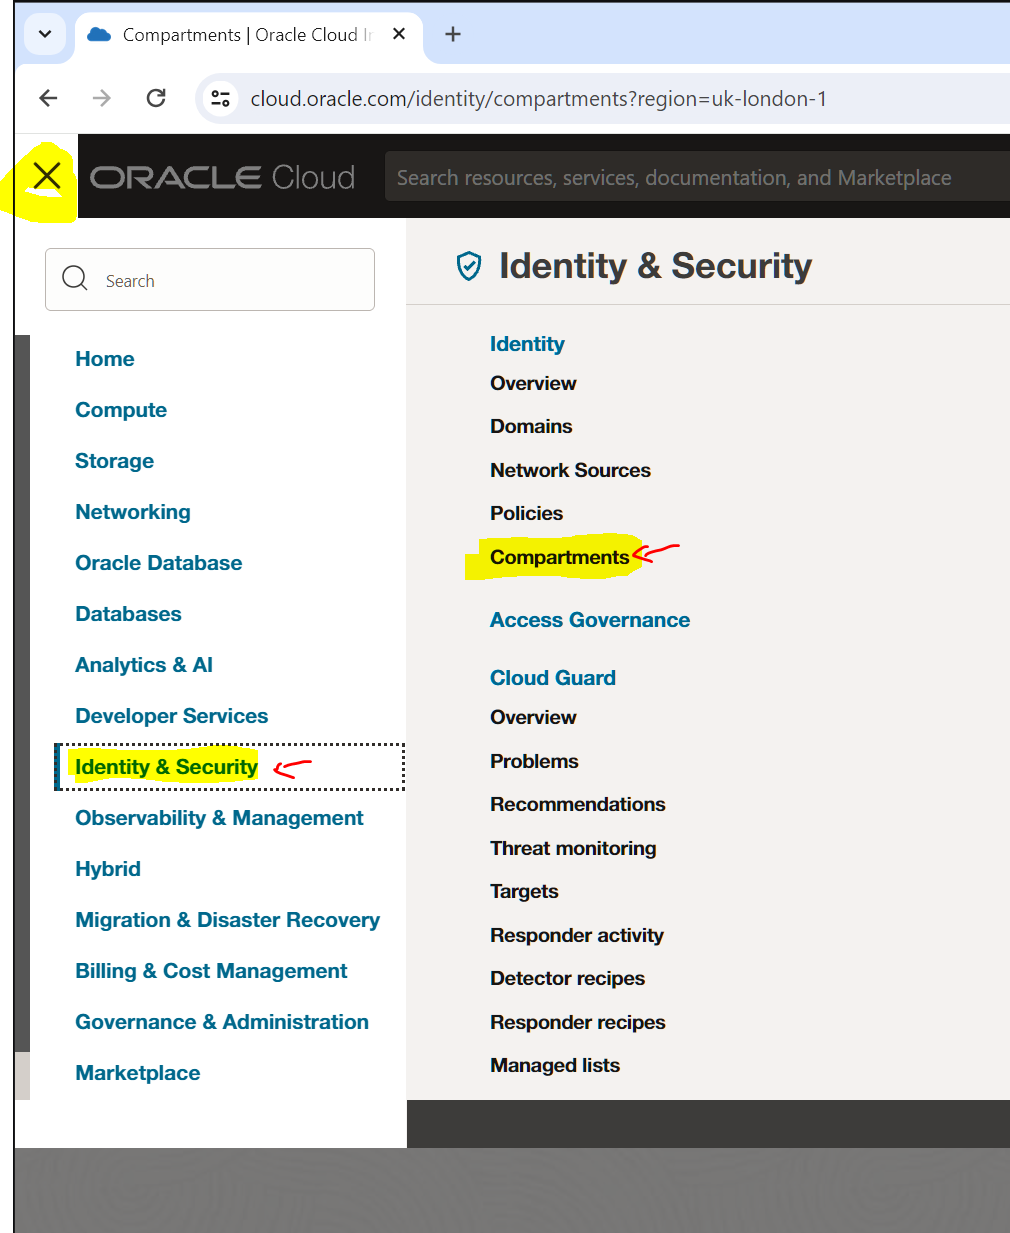
Select the create compartment button:
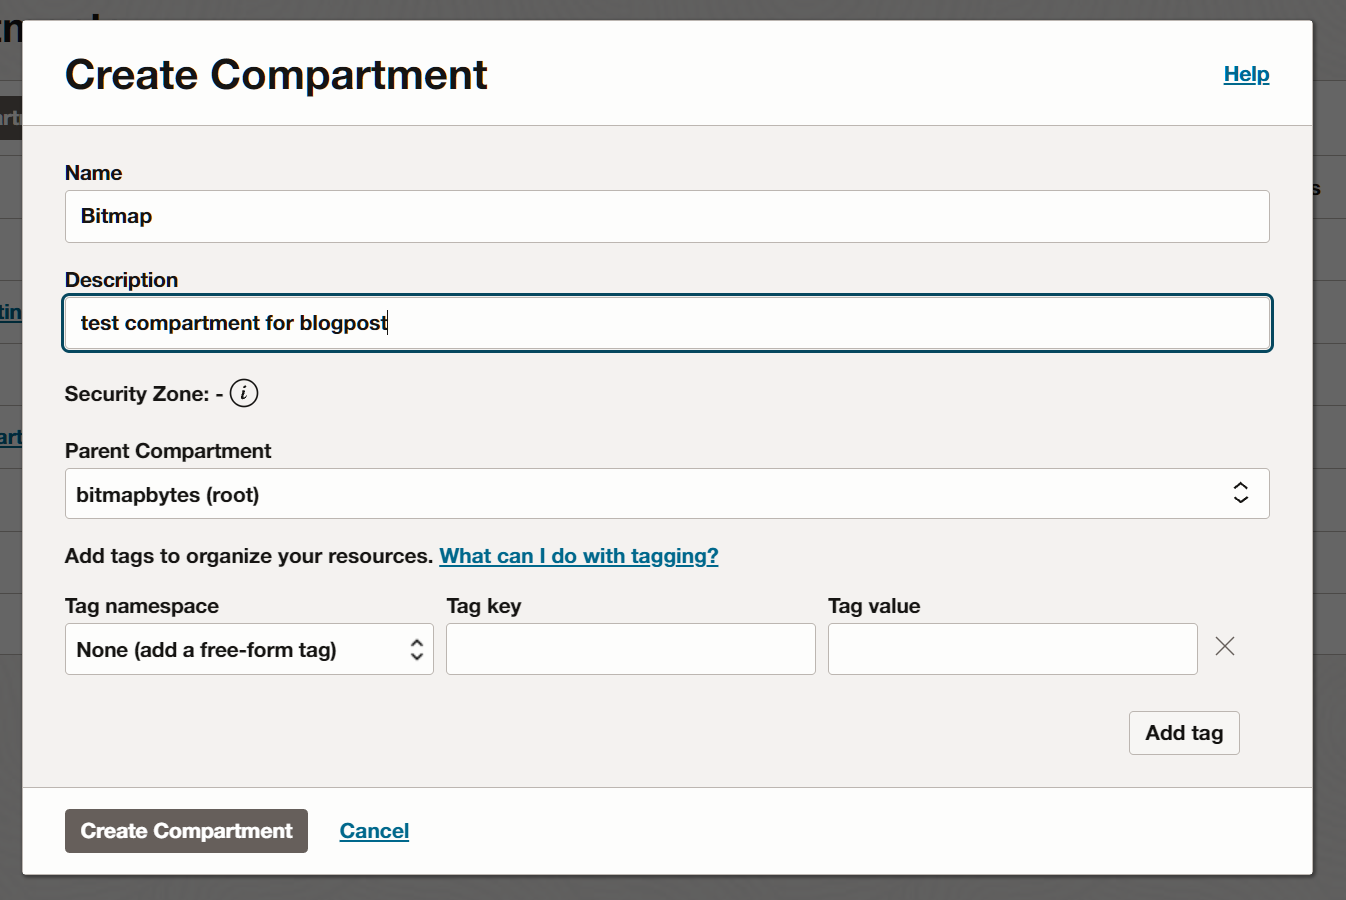
Add your compartment name and description. If you have compartments already you can assign a parent compartment to place this within:
Setup an OCI Instance
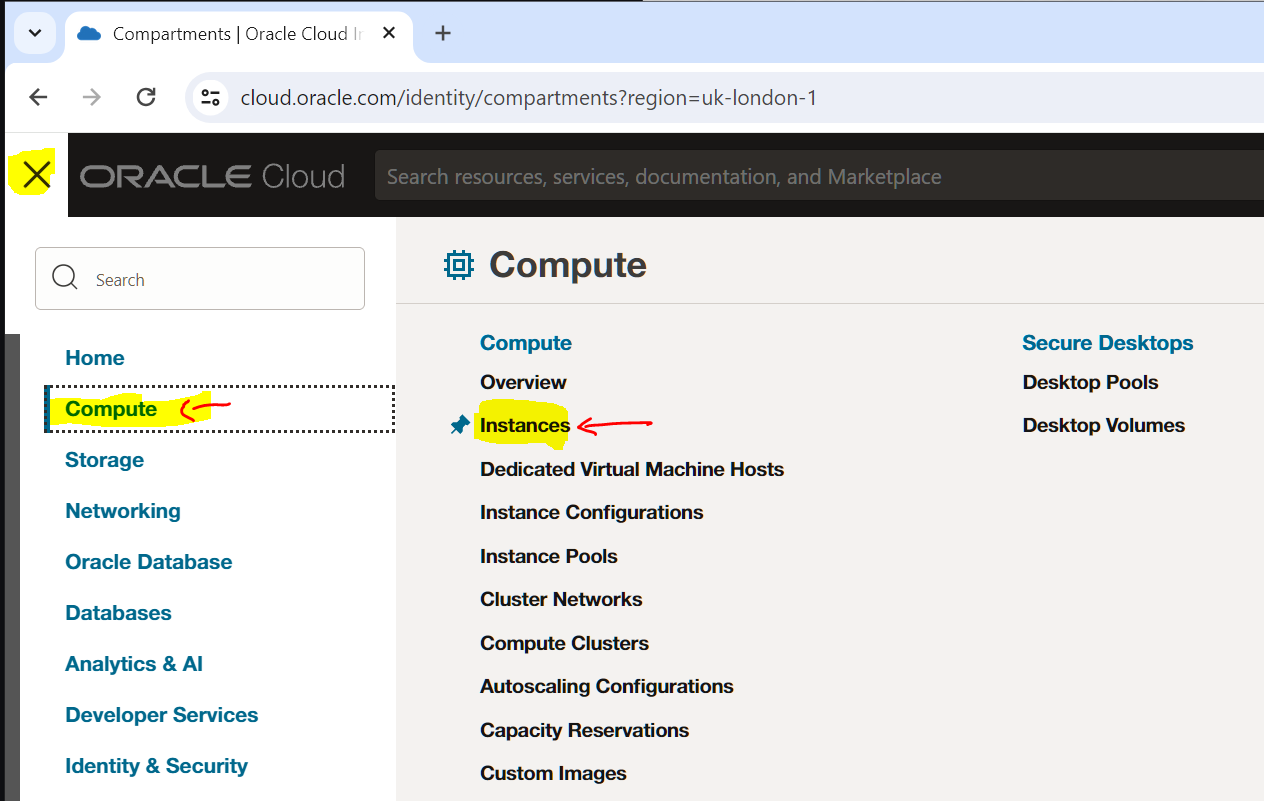
Create an instance Select the cloud menu and select Compute > Instances
Select the Create Instance button.
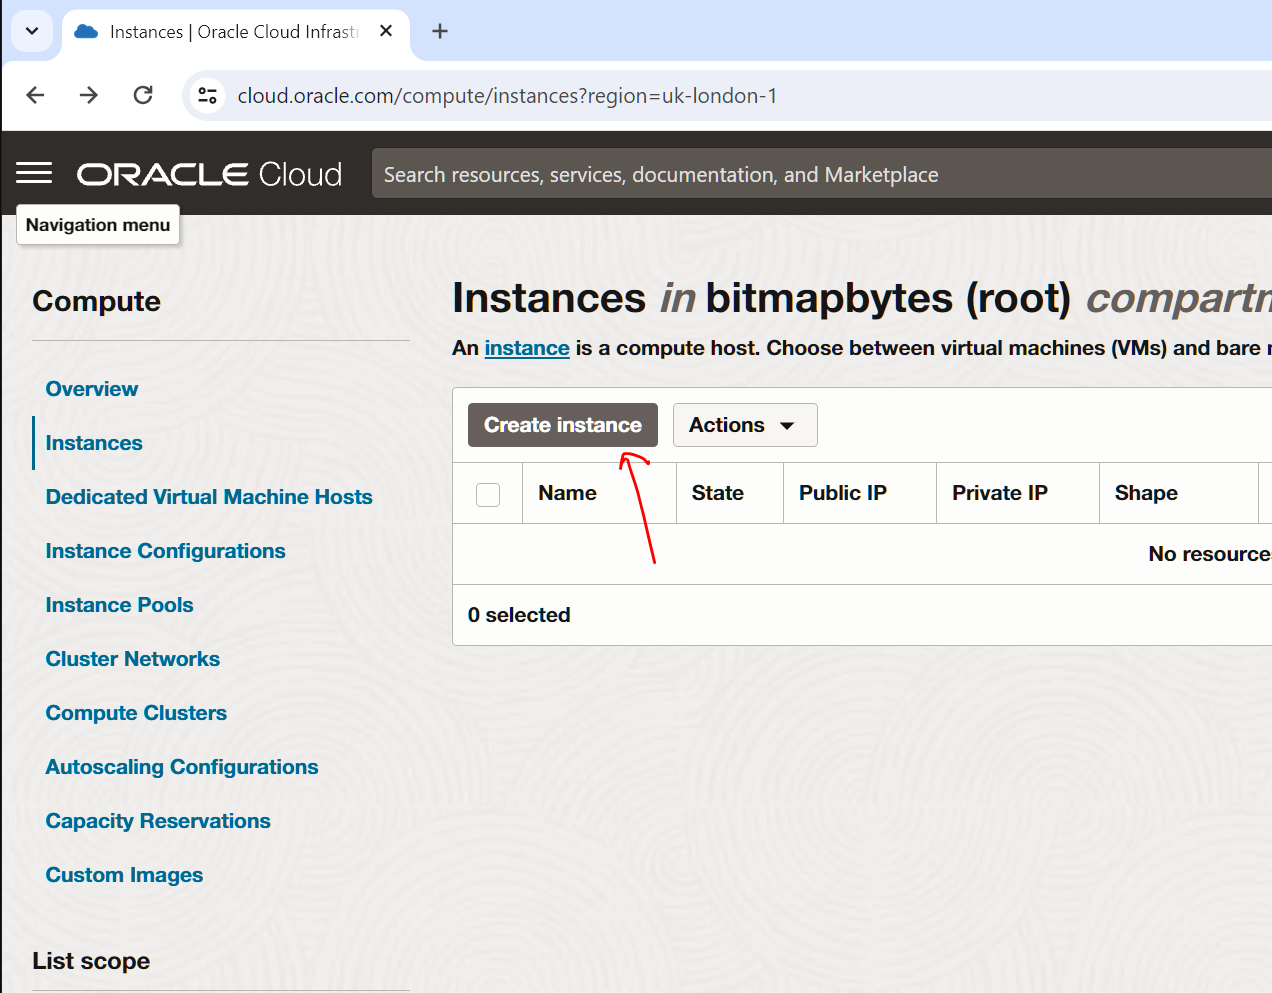
- Add your instance name
- Select the compartment
- If you want to create an ubunti instance here is a previous post on it:
https://bitmapbytes.com/setting-up-an-oracle-cloud-virtual-machine-web-server/
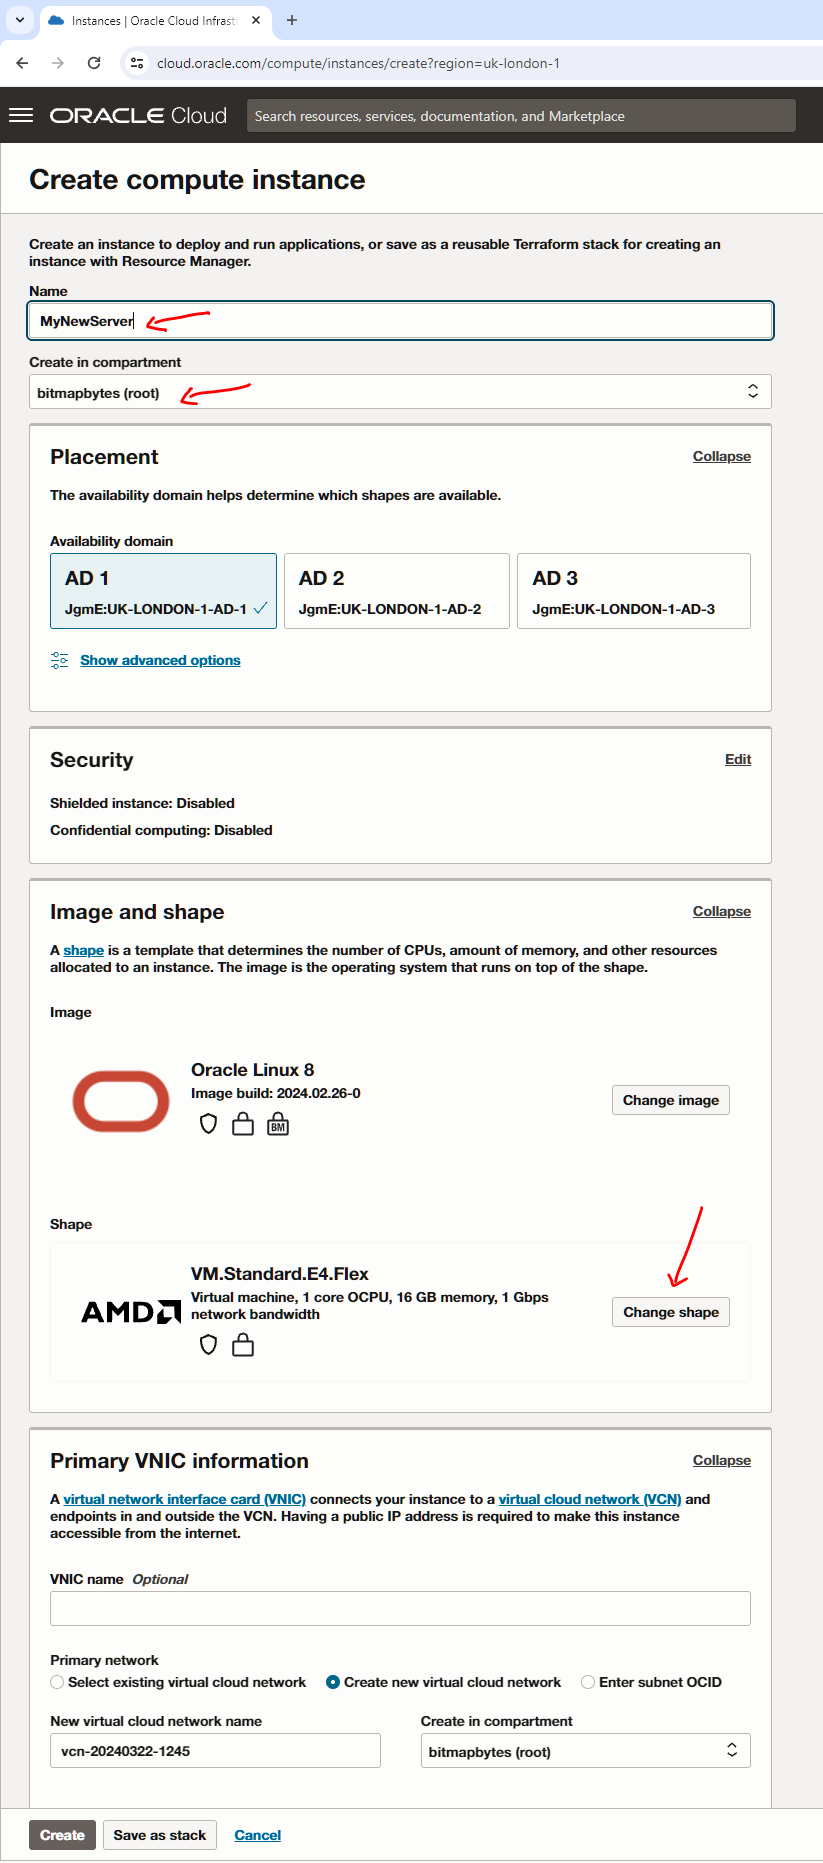
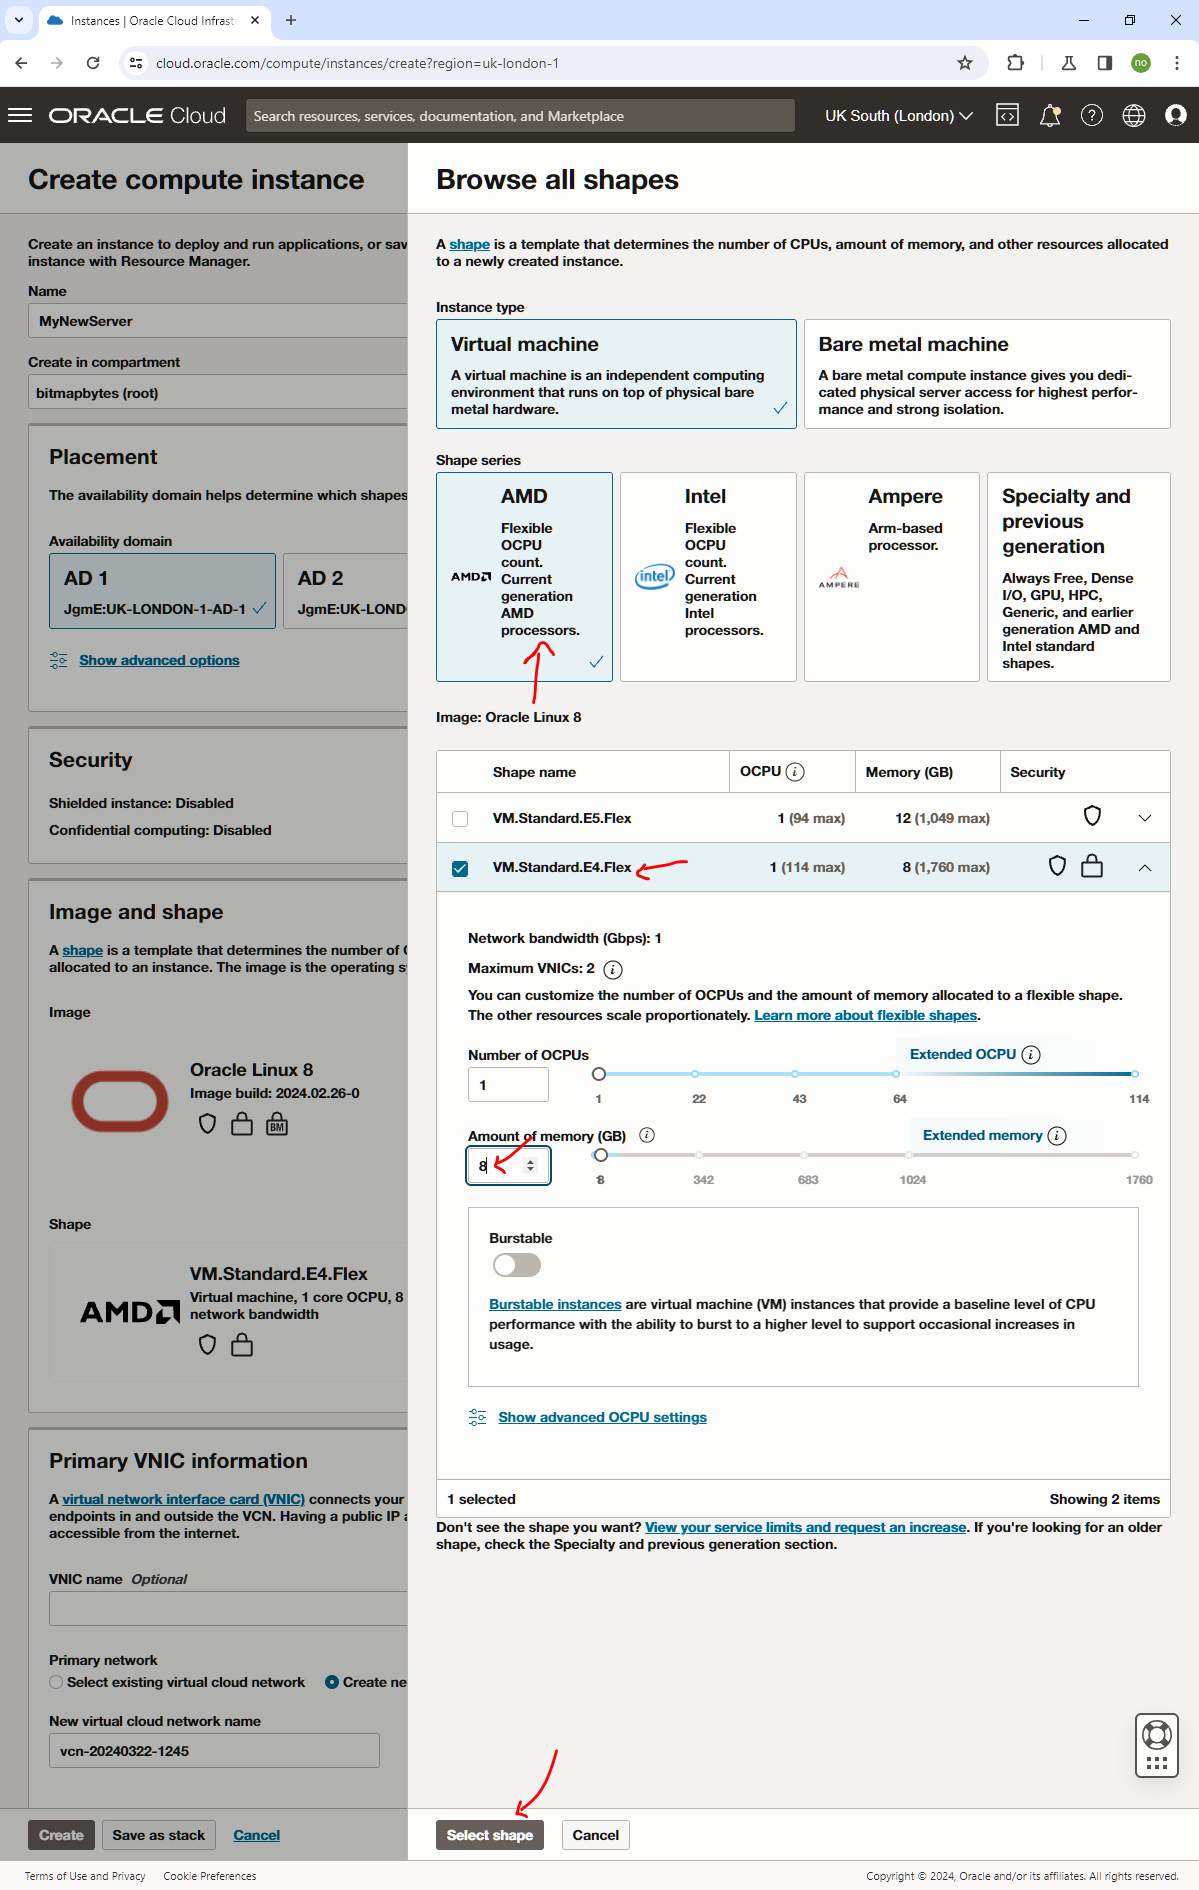
I reduce the Shape size of the server from 16GB to 8GB like this - 8GB should be more than enough for a sveltekit site.
Select Create -
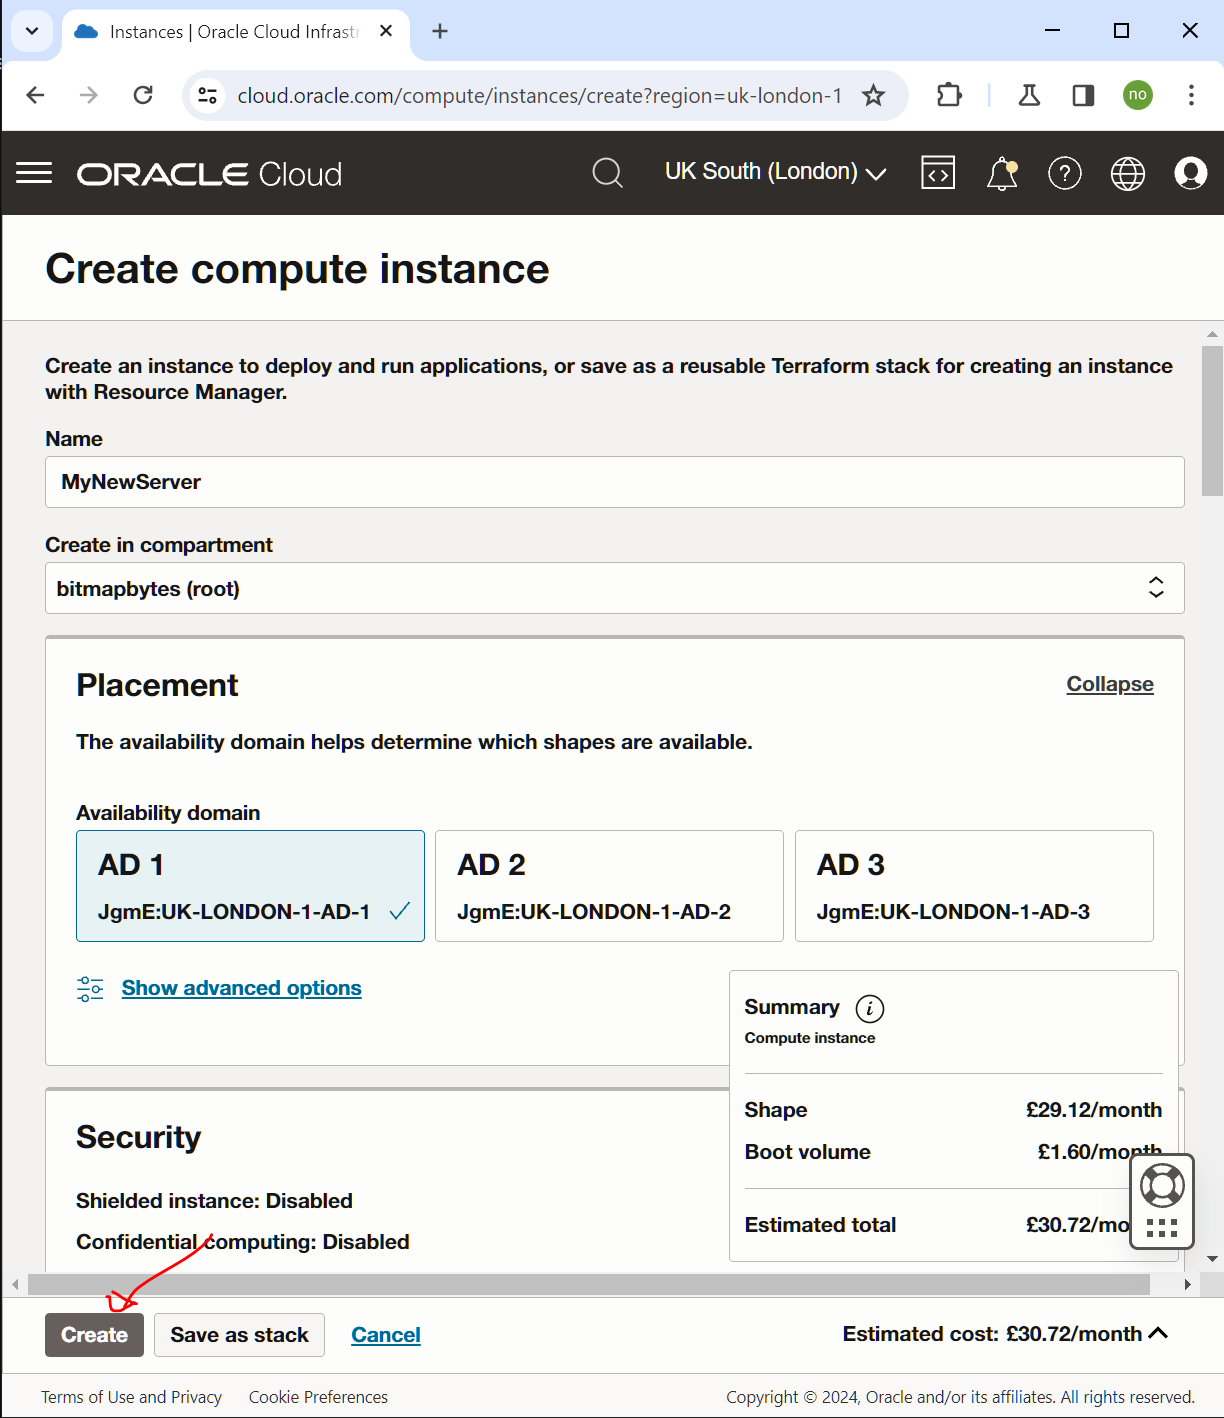
Make sure to save the private key.
Connect to OCI Instance and configure
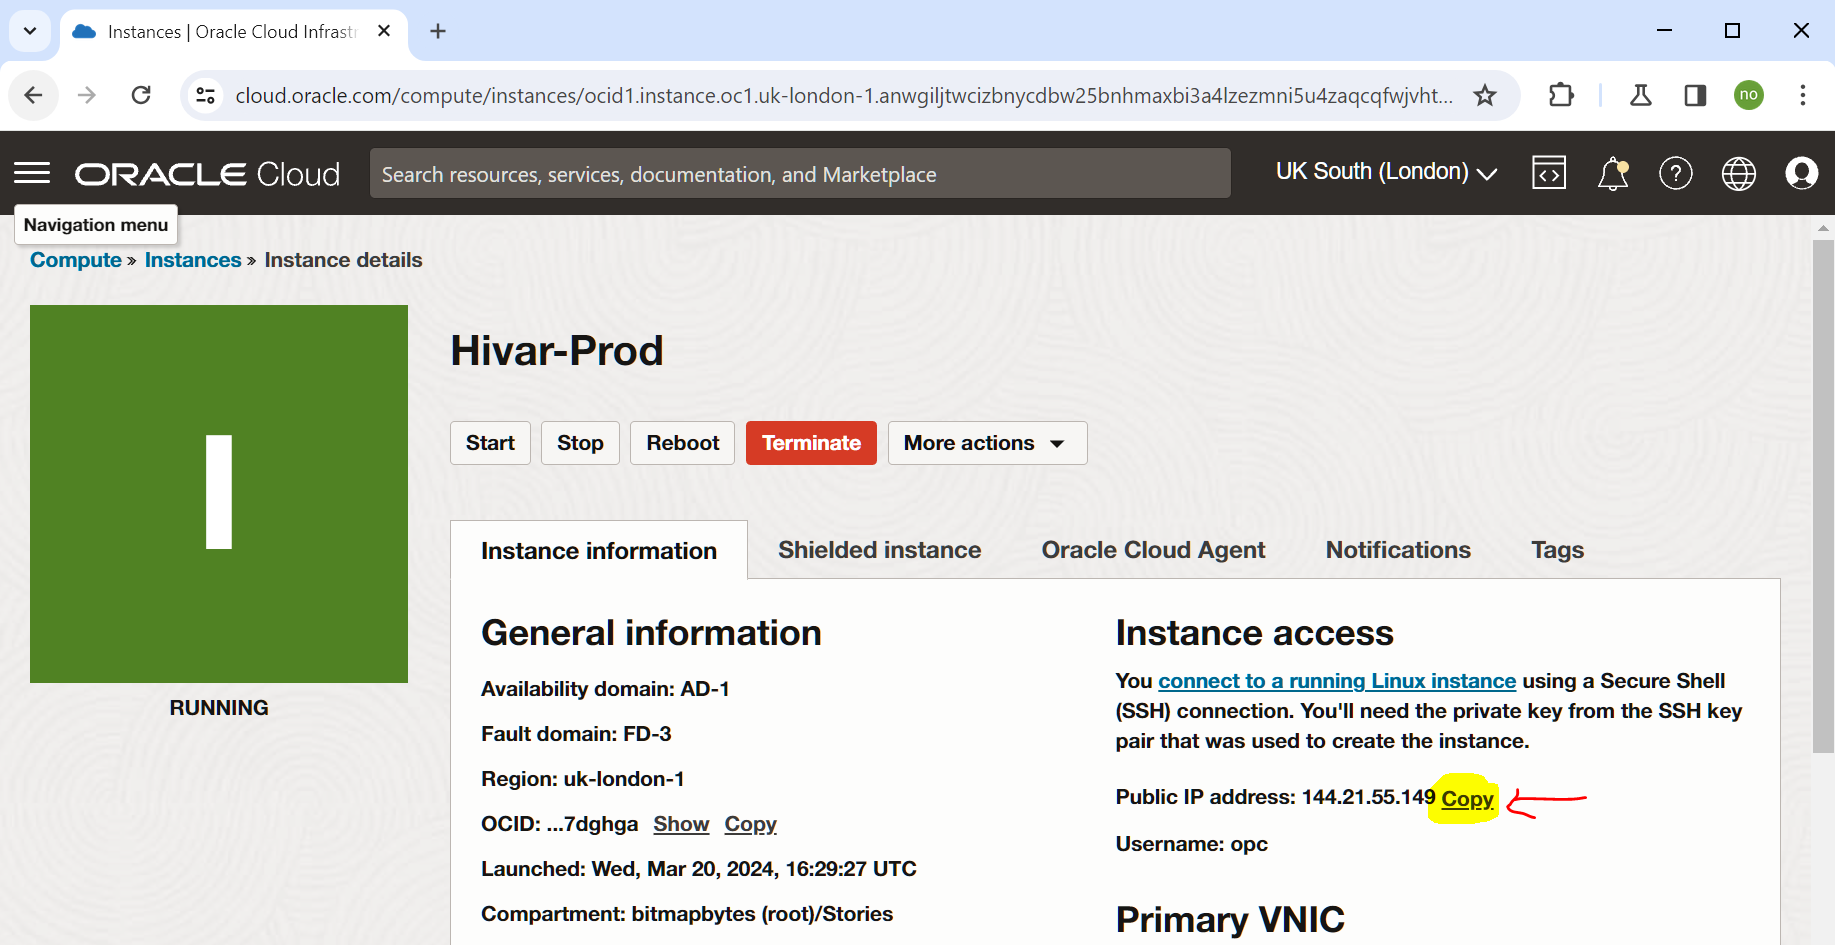
Let go grab the public ip of your new server - goto your instance details page and select Copy the Public IP:
Install MobaXterm - https://mobaxterm.mobatek.net/ this will allow you to easily connect to and configure your server.
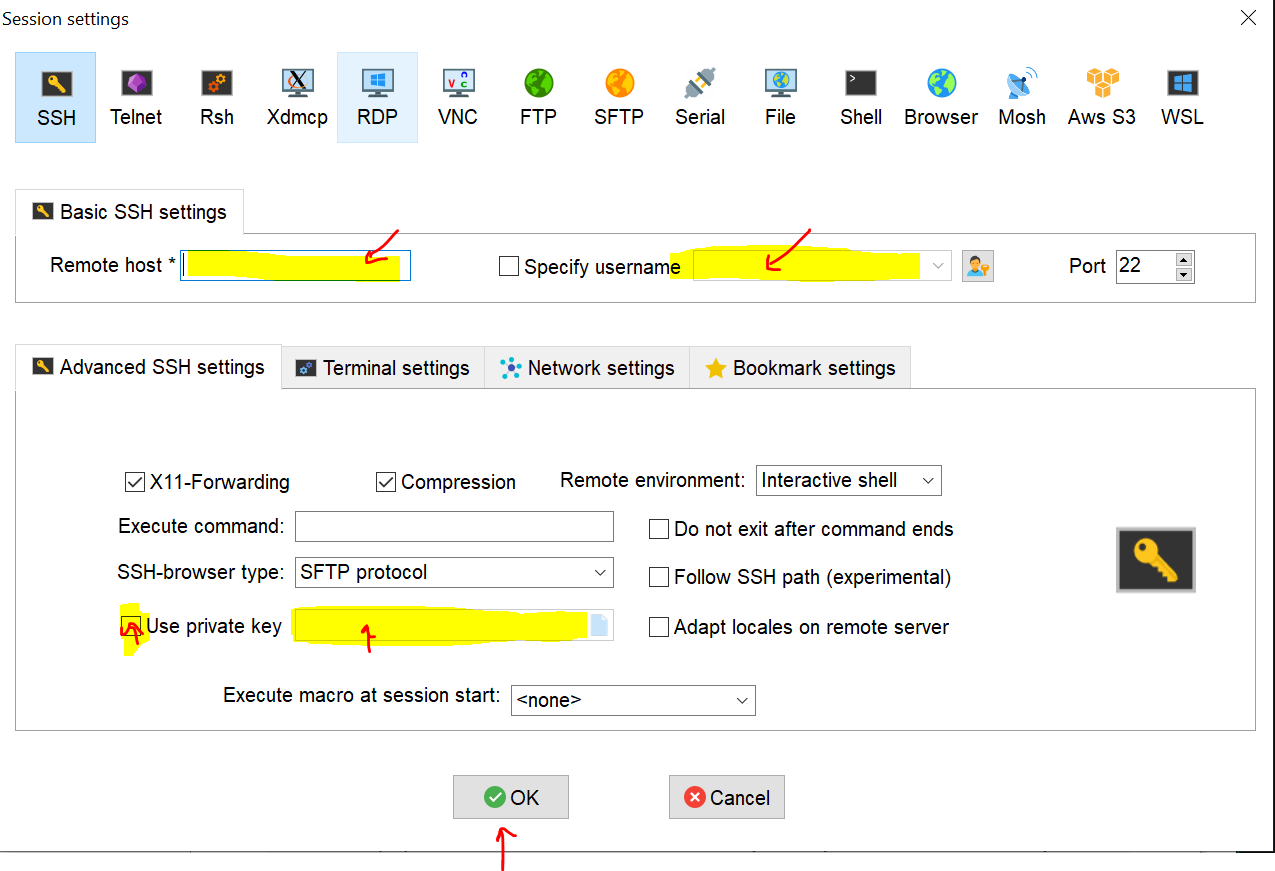
- Select Session to create your connection

2. Add the IP under remote host
3. Add Username "OPC"
4. Select your private key and select OK button
5. You should now be able to connect to your instance.
Update and refresh your package manager -
sudo dnf upgrade --refreshInstall nodeJS and confirm it has been installed
dnf module list nodejs
sudo dnf module enable nodejs:20
sudo dnf module install nodejs:20
node -v
Open up the ports
sudo firewall-cmd --zone=public --add-port=80/tcp --permanent
sudo firewall-cmd --zone=public --add-port=443/tcp --permanent
sudo firewall-cmd --reload
sudo iptables-save | grep 80
sudo iptables-save | grep 443
If you build and run your sveltekit site on port 80 you will need to enable node with permission to run on port 80 like this -
sudo dnf install libcap
sudo setcap 'cap_net_bind_service=+ep' $(which node)
sudo getcap $(which node)
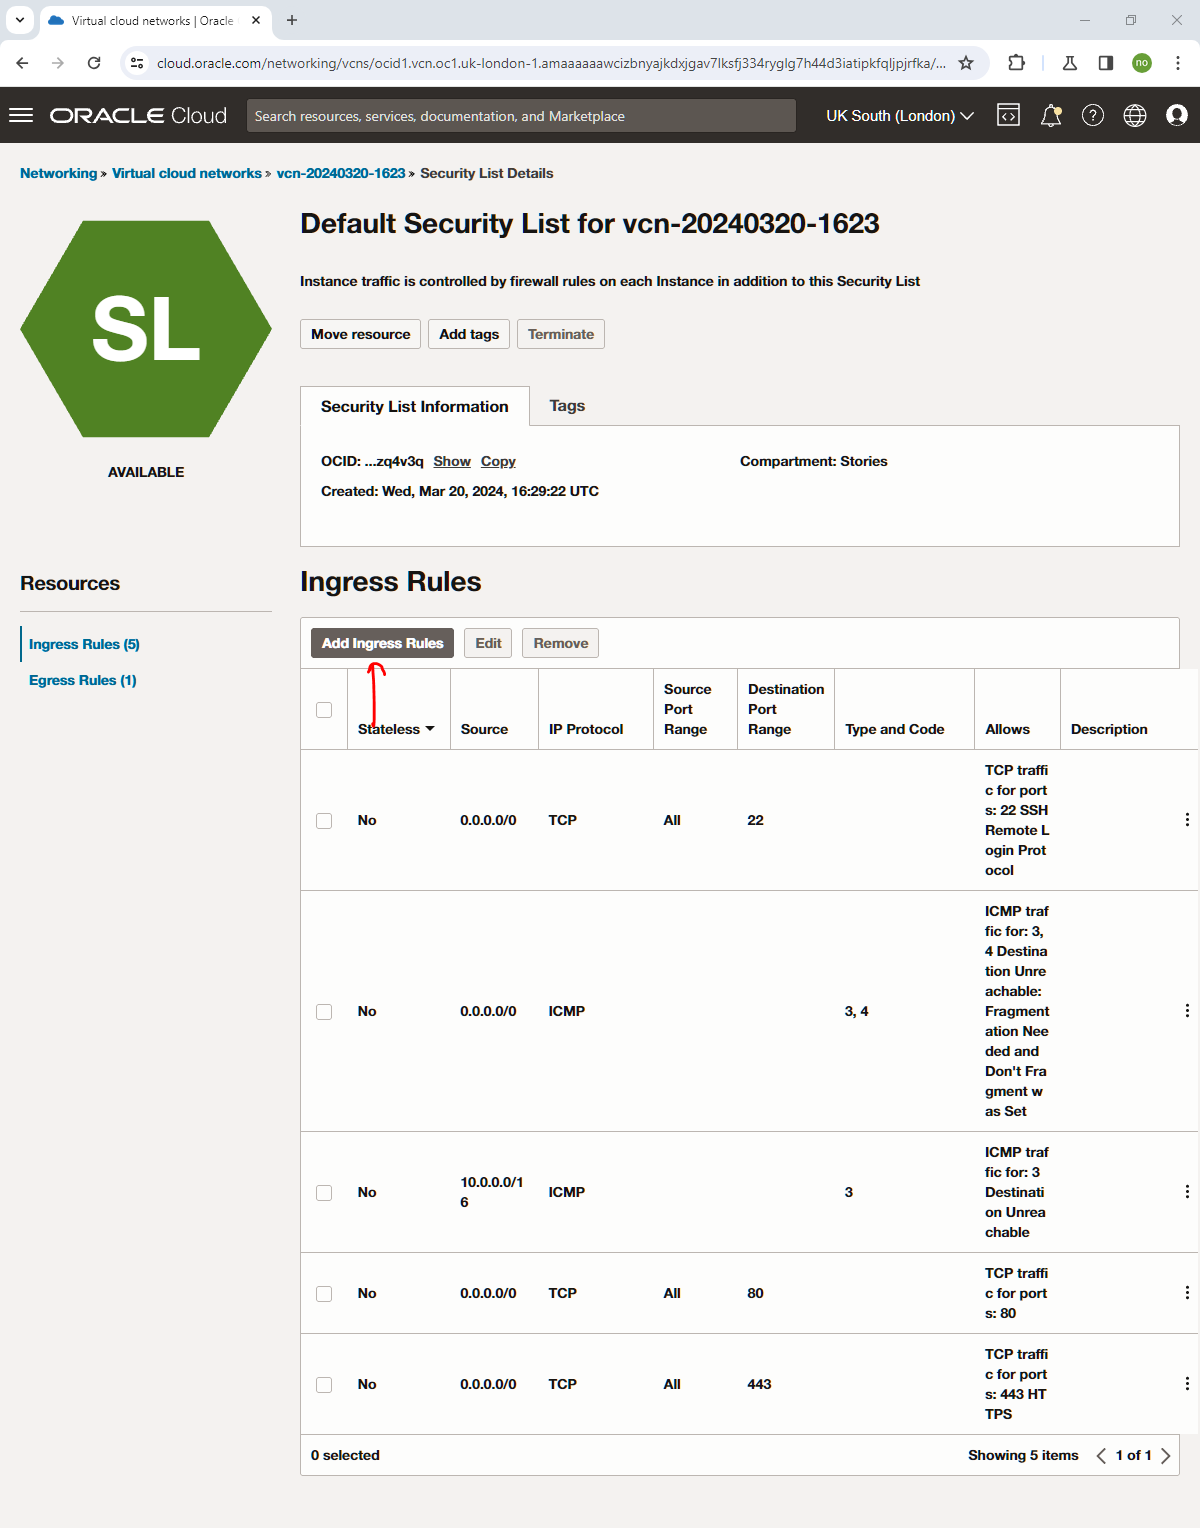
Enable server rules ingress for public access
Lets now setup the Ingress rules to enable traffic through the virtual network onto the cloud instance!
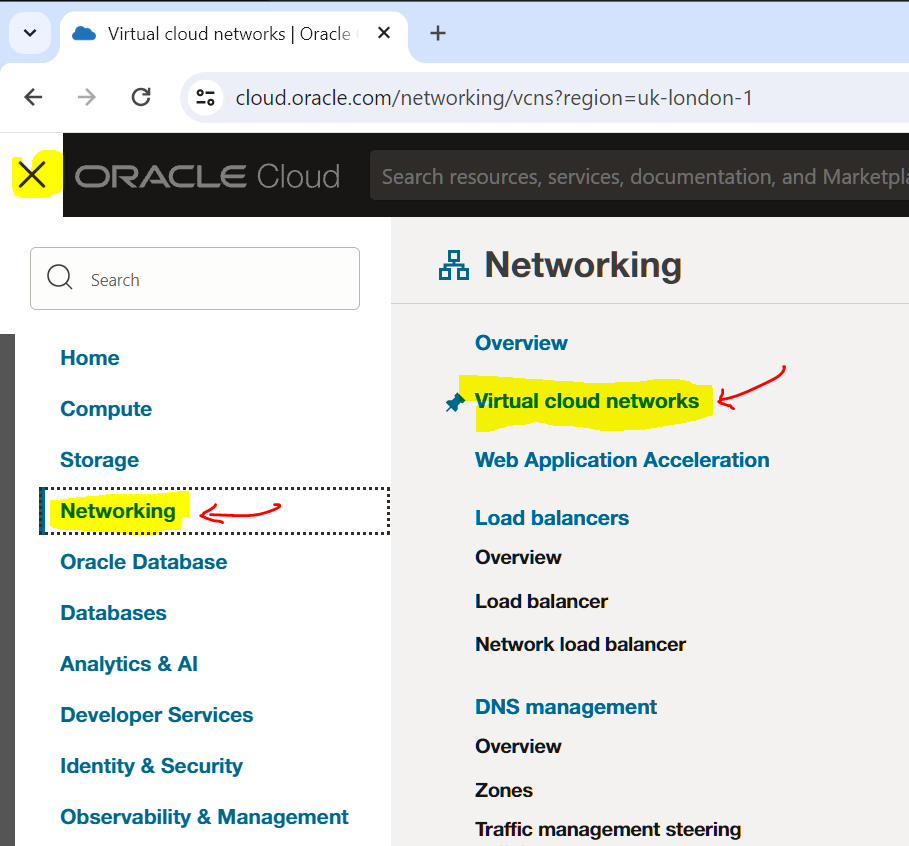
Goto Oracle Cloud Menu > Networking > Virtual cloud networks
Go into the right compartment where your Instance would be located and you will see VCN - click on it.
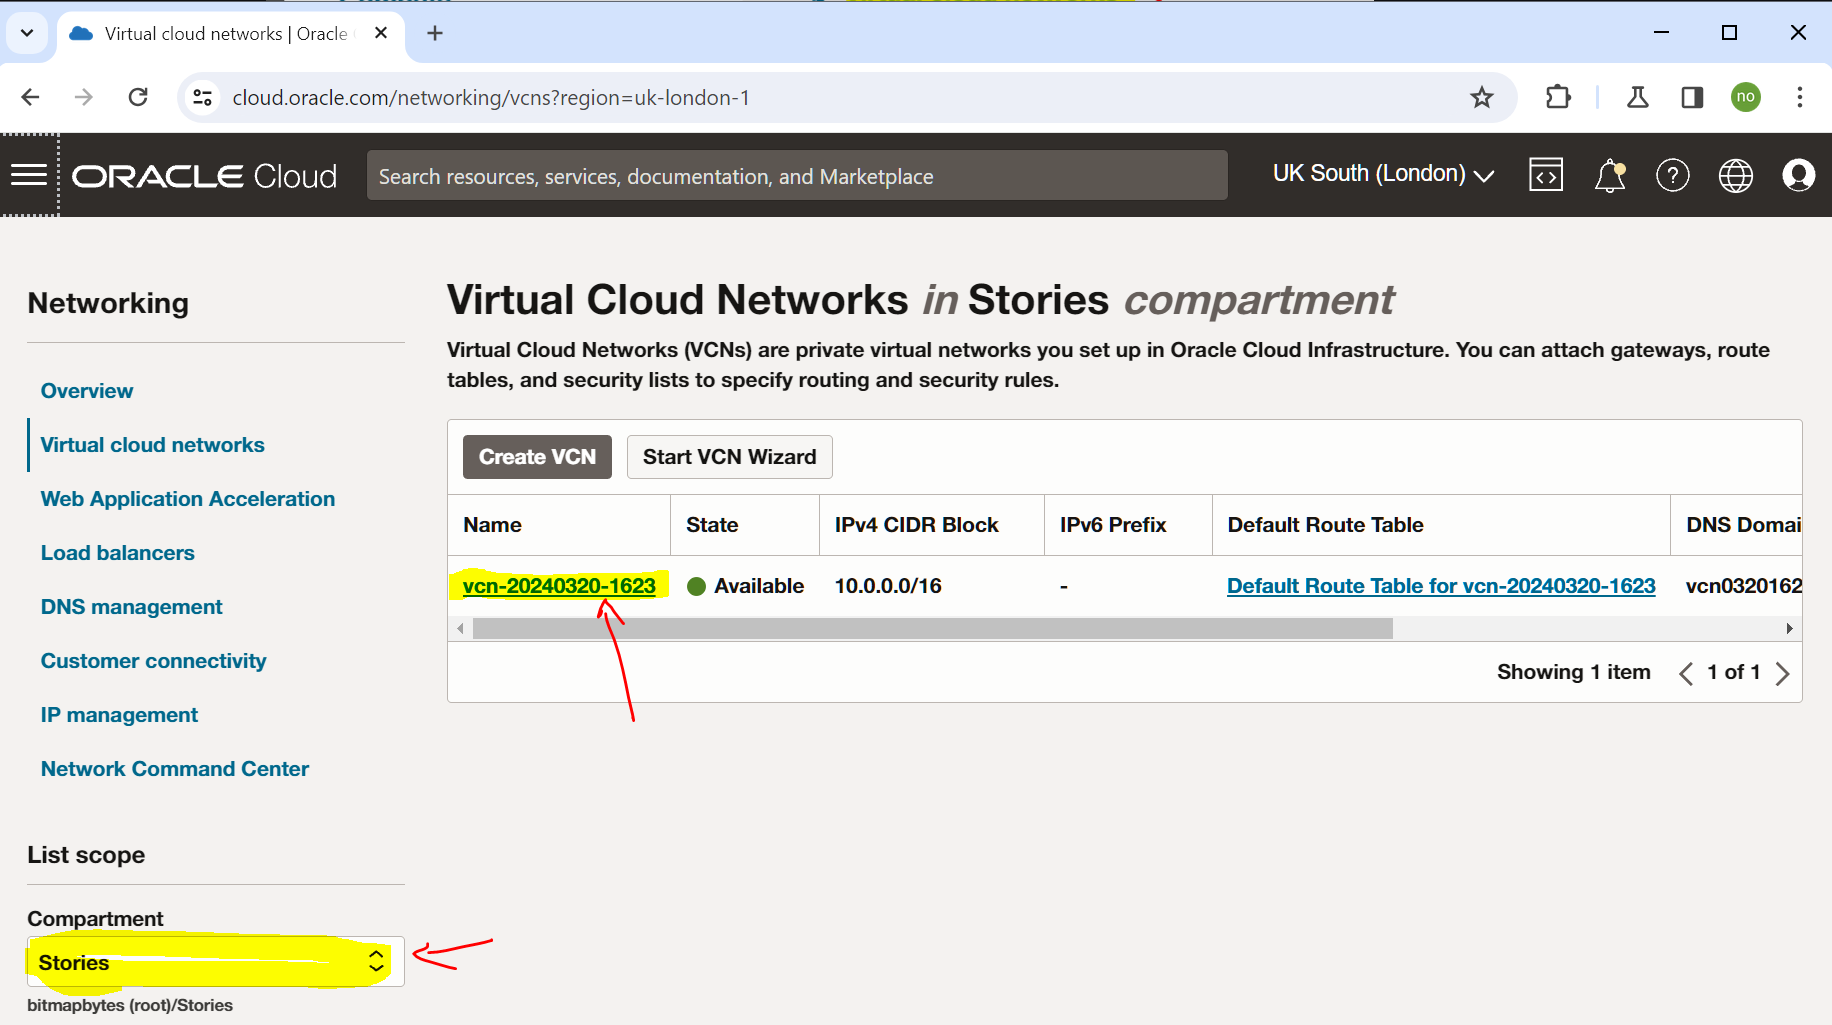
Select your subnet

Select security list name
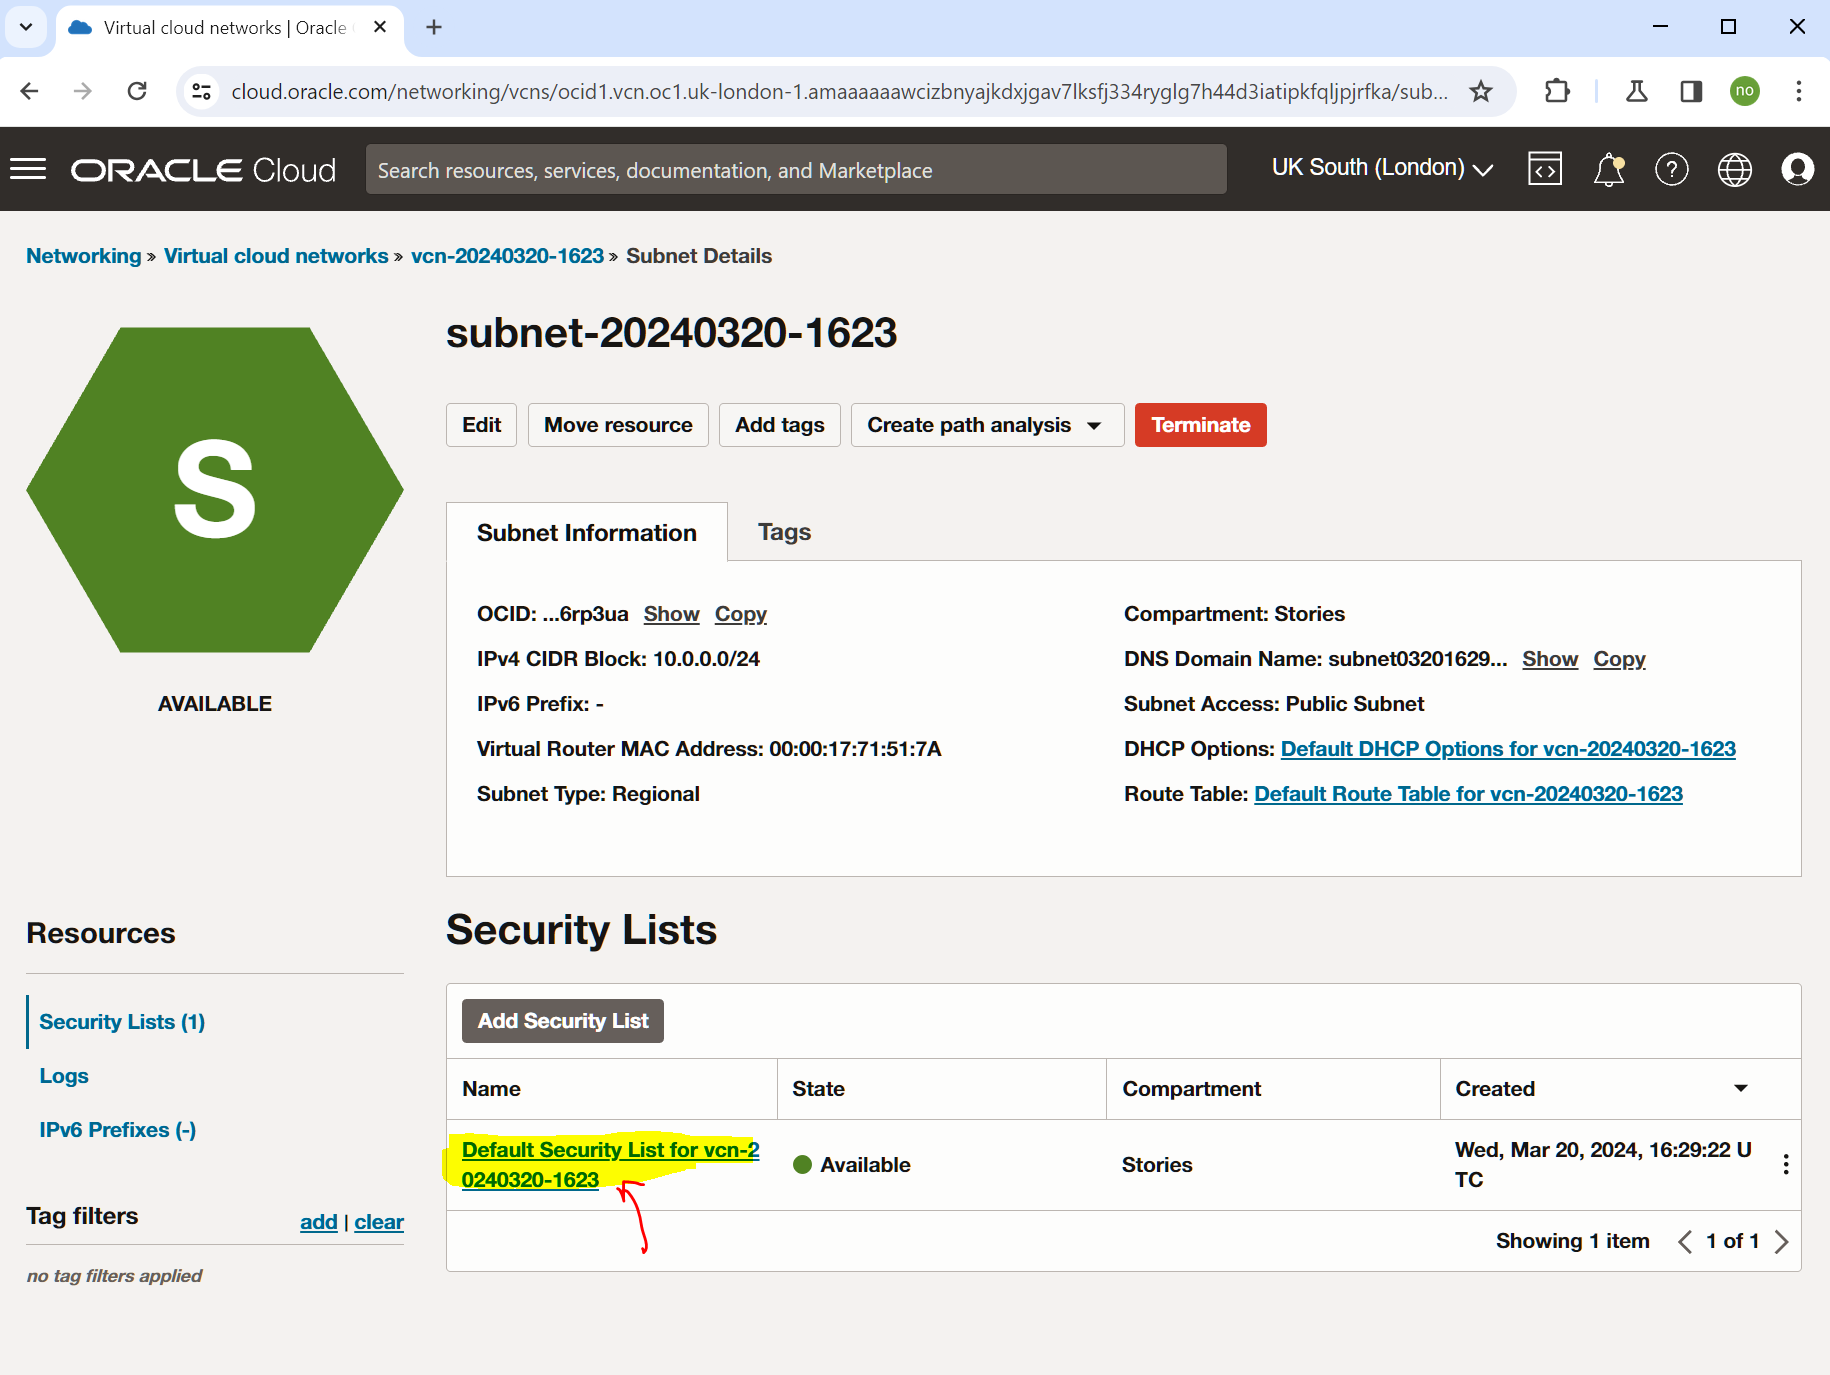
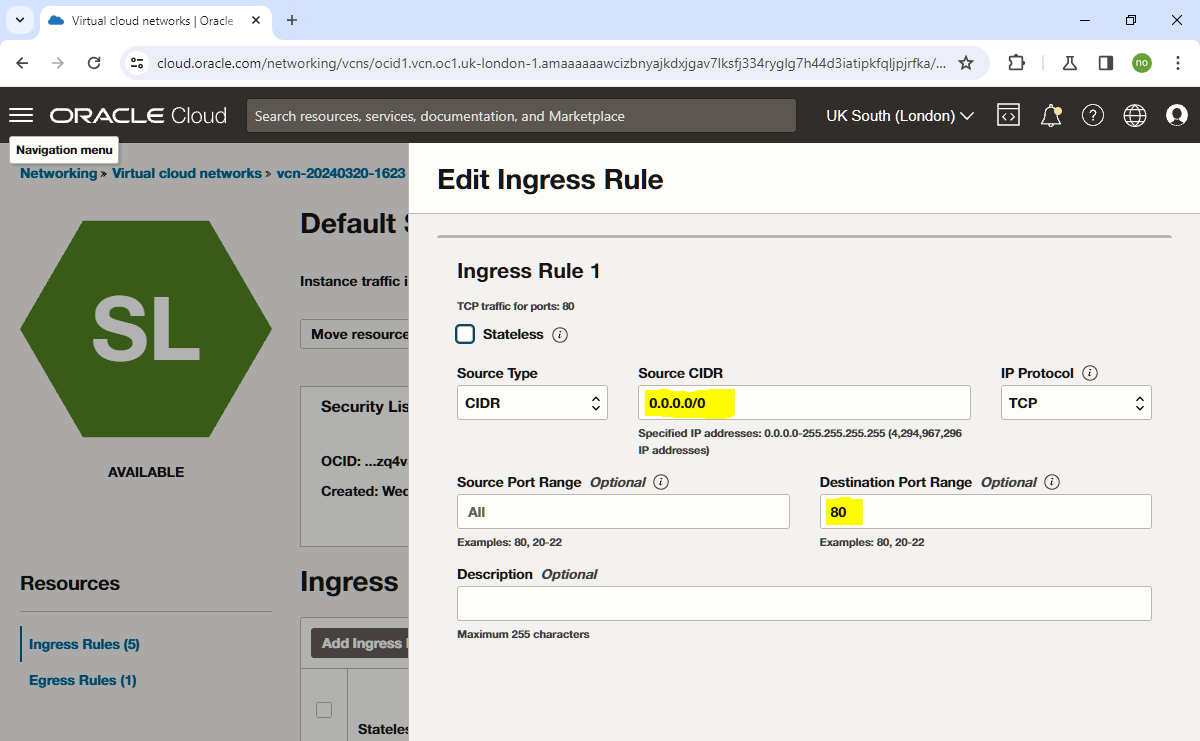
Select Add Ingress Rules button
Add CIDR 0.0.0.0/0
Add Port 80
Select Save changes button
Do the same for port 443
Build Sveltekit with node-adapter
Create a folder for your sveltekit app/site to sit by right clicking the dir panel and selecting new directory give the folder a name ie myApp
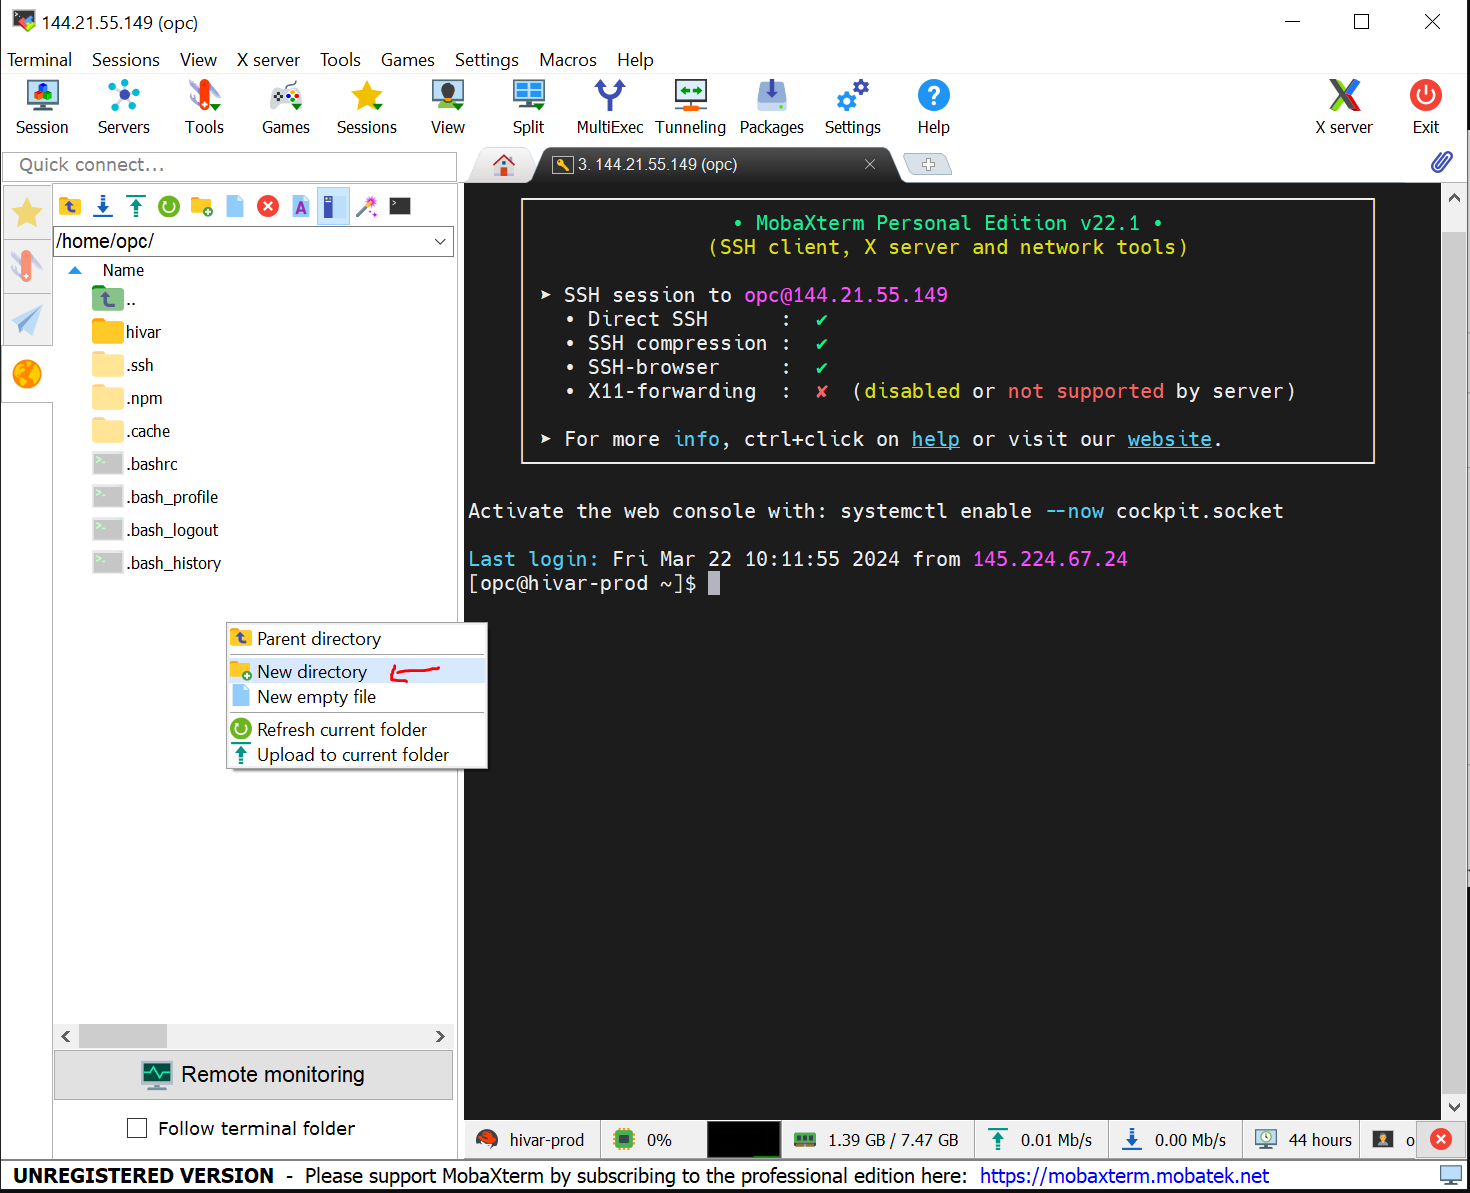
Open the myApp folder and drag drop your sveltekit project into here.
In svelte.config.js make sure you replace adapter-auto with adapter-node and that you have it installed
//import adapter from '@sveltejs/adapter-auto';
import adapter from '@sveltejs/adapter-node';
npm i -D @sveltejs/adapter-nodeIn the terminal make sure you have dotenv installed otherwise your env will be ignored on build.
npm install dotenvupdate or create .env file with the port you want your app to run on and it's domain under origin:
PORT=80
ORIGIN=https://www.myapp.com
Build your site (pulls across the envs and updates the build)
npm run buildRun the build with env
node -r dotenv/config buildYou should now be able to goto http://{yourOCI_IP} and see your app running.
Configure Socket Activation
If you close MobaXterm it will shutdown your site.. So lets make sure it keeps running with socket activation.
Create 2 files in /etc/systemd/system you can rename myapp to your site ie blog
- myapp.service
- myapp.socket
myapp.service
[Unit]
Description=Sveltekit Node.js Application
Requires=myapp.socket

[Service]
Environment=NODE_ENV=production IDLE_TIMEOUT=60
ExecStart=/usr/bin/node /home/opc/myApp/build/
WorkingDirectory=/home/opc/myApp
Restart=always
User=opc
Group=opc

[Install]
WantedBy=multi-user.target
myapp.socket
/etc/systemd/system/myapp.socket
[Socket]
ListenStream=80

[Install]
WantedBy=sockets.target
sudo systemctl enable myapp.service
sudo systemctl enable myapp.socket
sudo systemctl daemon-reload
sudo systemctl start myapp.serviceThats it!!
Close mobaxterm and your site should now be available to be hooked up to your domain and connected via a CDN like cloudflare.