Setting Up Oracle Content Management Integrated Assets Workflows with Process Cloud Service


In September the OCM team released enhanced integrated workflow capabilities built on-top of PCS. In this post I'm going to setup one of the OCM process samples and connect it to a asset type and show you the newly integrated functionality. You now no longer have to go into OIC My Tasks to review your workflow tasks - all of these features are now integrated within the OCM UI.
This is part 3 of a 4 part series on integration with process cloud.
- Setting Up Oracle Integration Cloud with Content Management for Workflows
- Setting Up Oracle Content Management Documents Workflow with Process Cloud Service
- Setting Up Oracle Content Management Integrated Assets Workflow with Process Cloud Service
- Exploring the new Oracle Content Management integrated Process workflow features with Assets
Download OCM PCS Samples
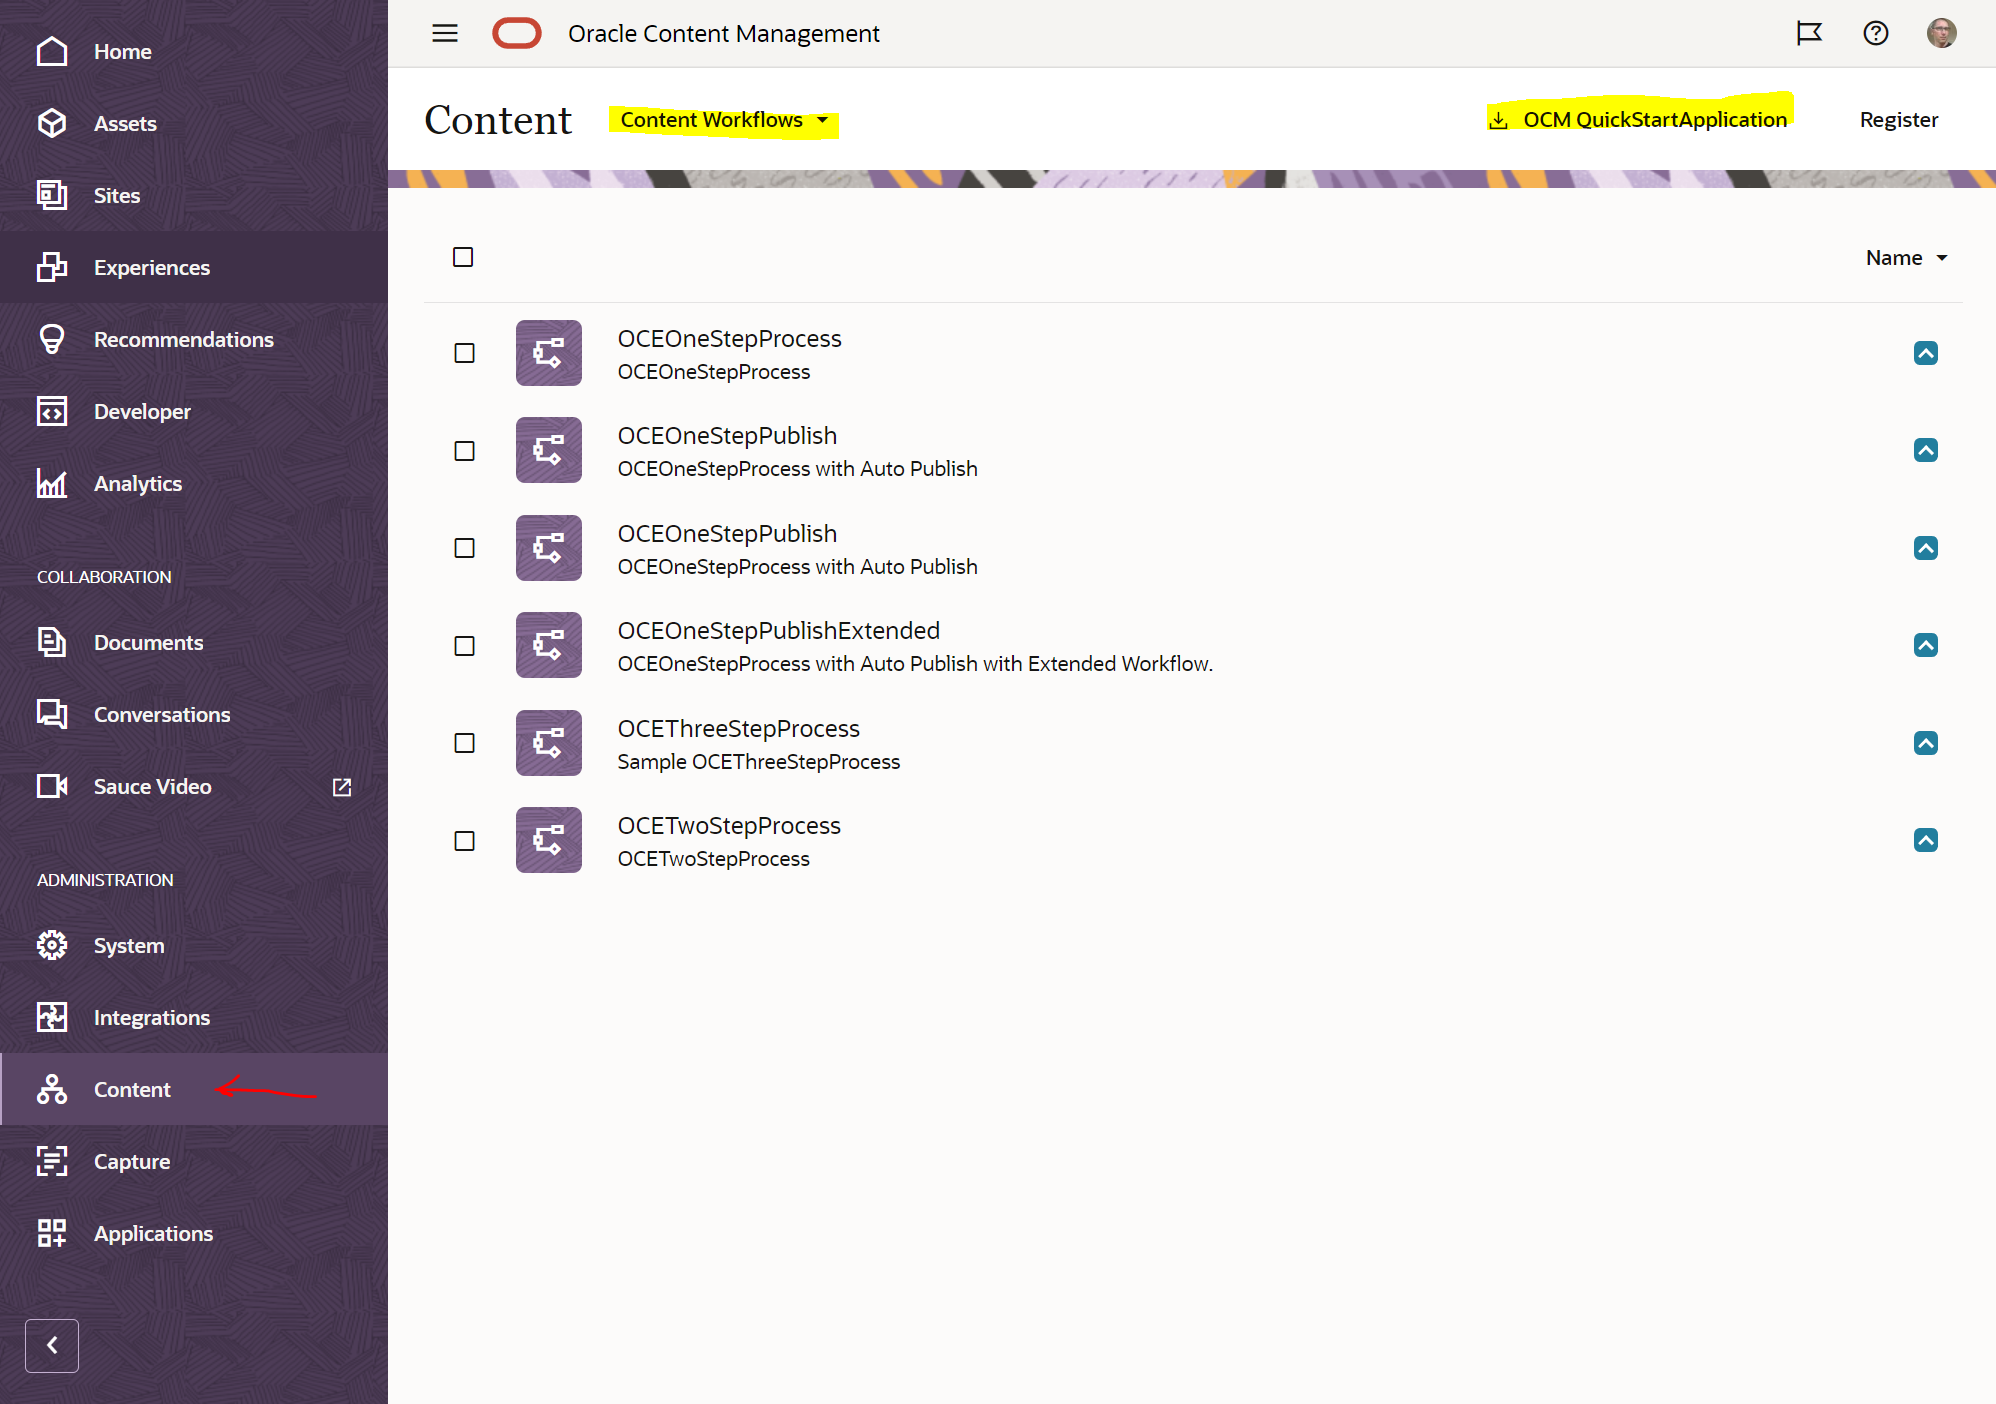
Launch Oracle Content Management and open up "Content" >> "Content Workflows".
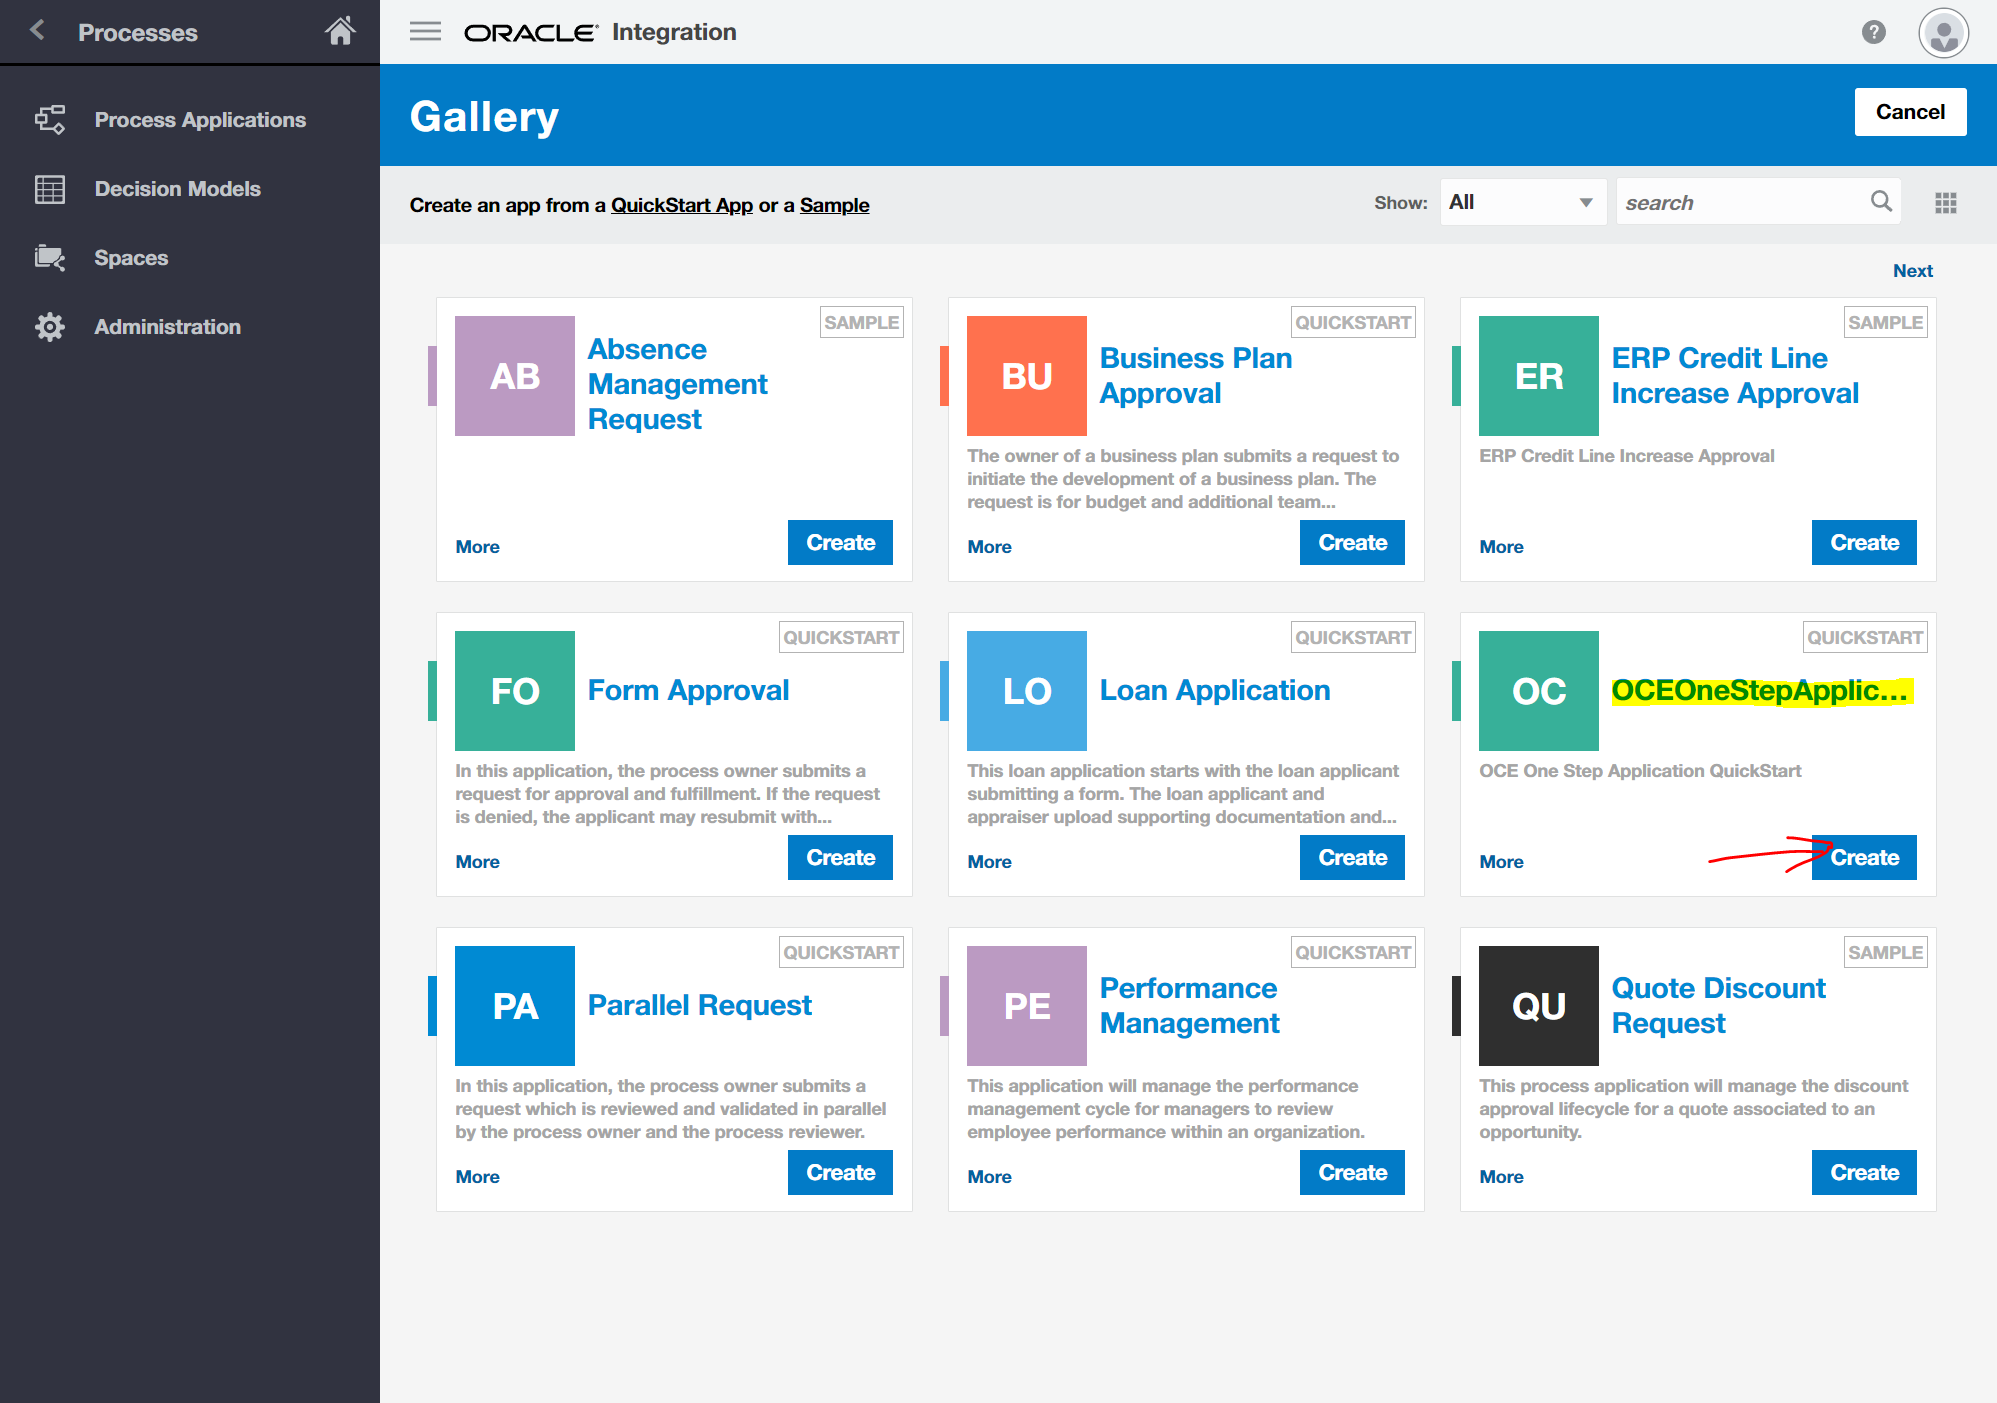
Select the "OCM QuickStartApplication" button to download a zip of prebult processes.
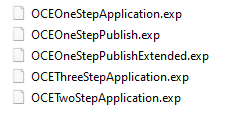
Within the Zip you should find 5 process apps packaged in ".exp" fileType.
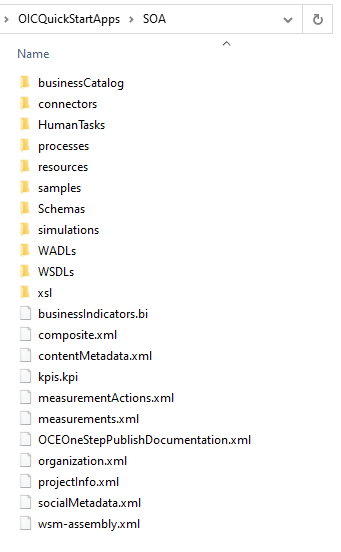
If you want you can open and extract this with zip - I used 7Zip to explore the contents within the SOA folder.
Setup Process App in OIC
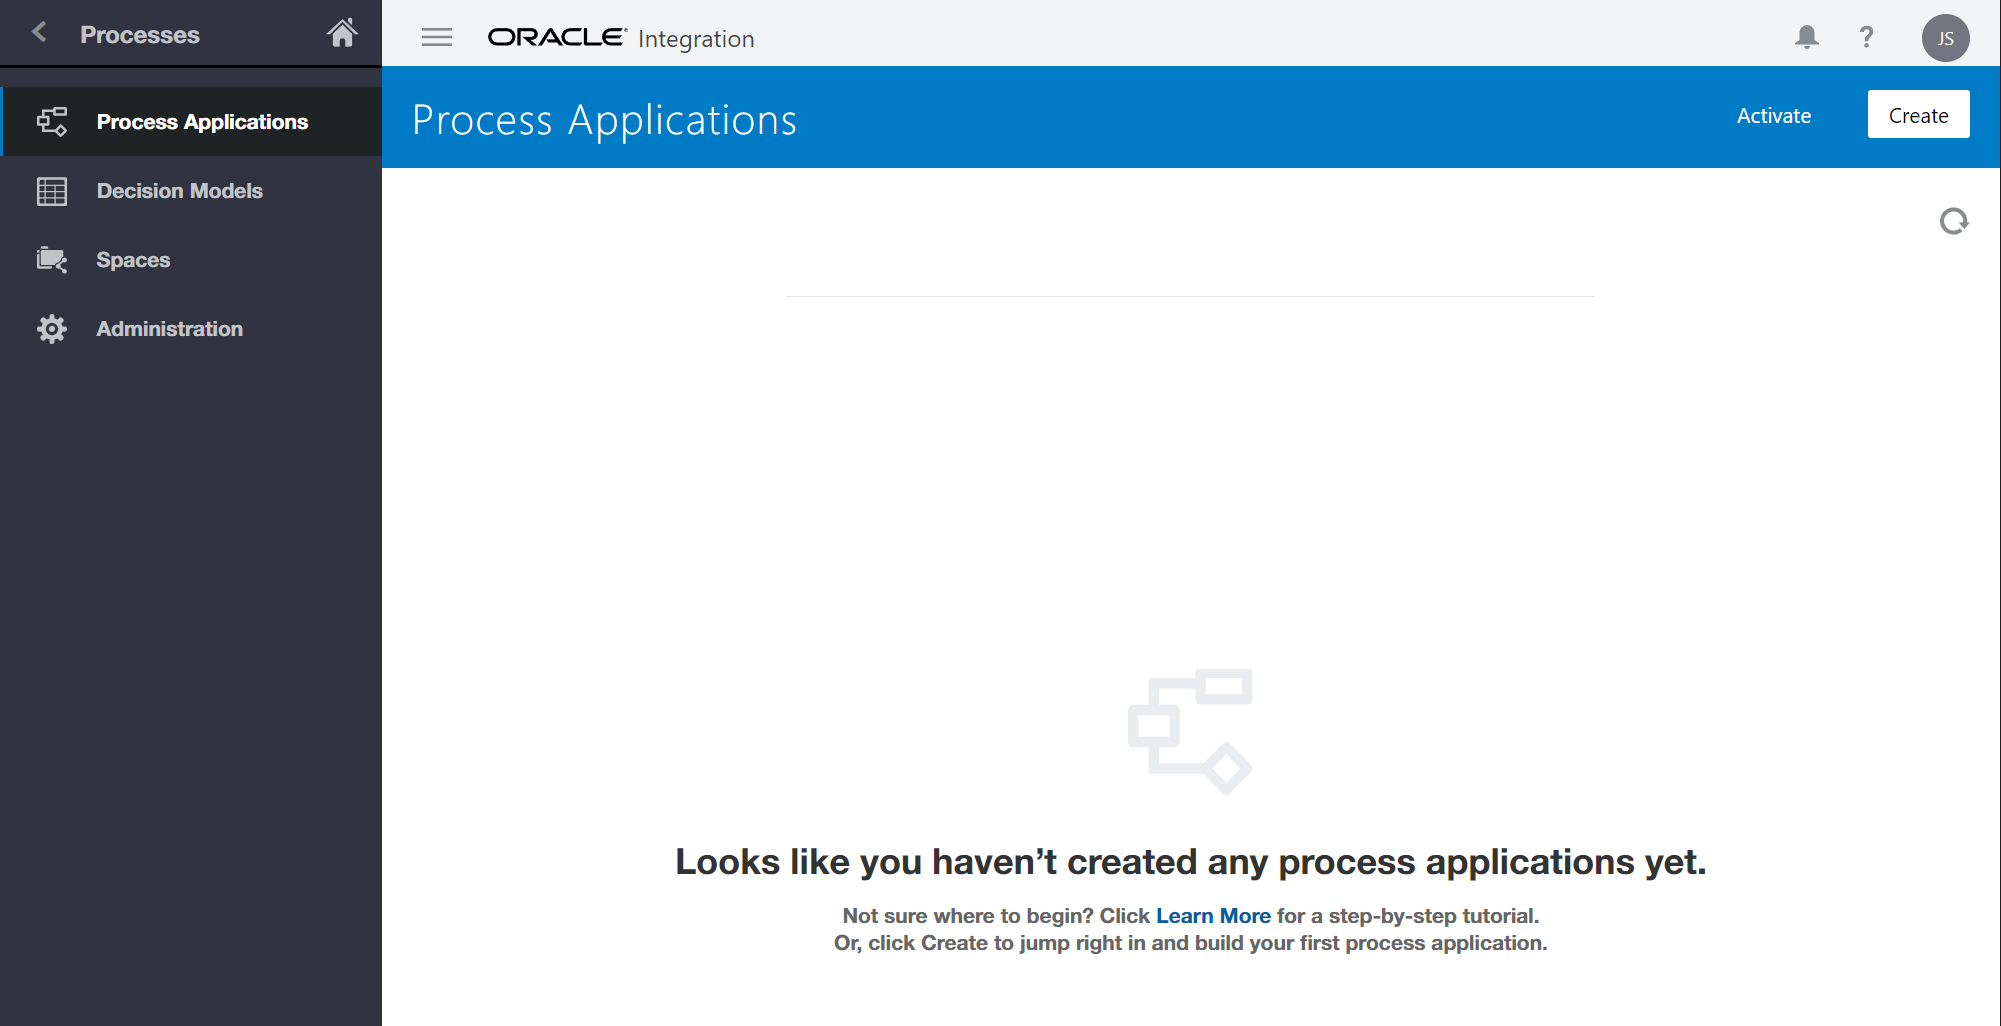
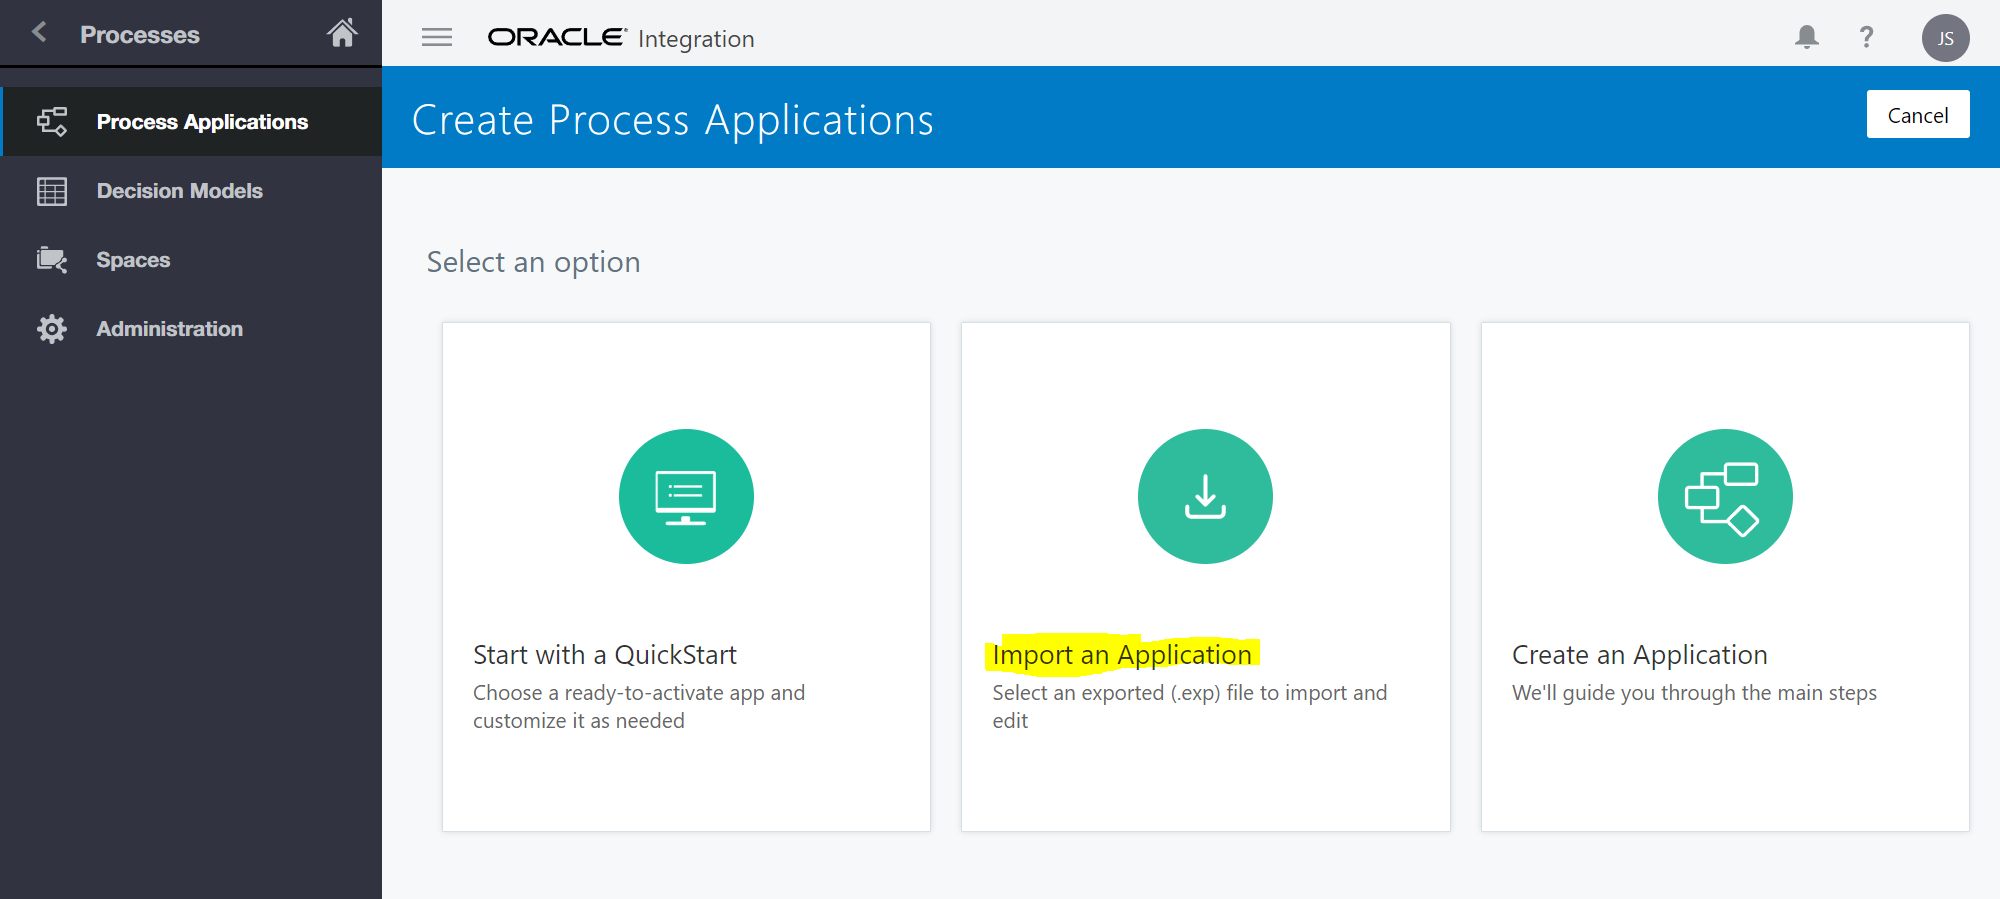
Now you have some processes to tryout launch OIC and head to "Processes" >> "Process Applications".
Create a Process Template
Select the "Create" button and we will import the Process Template.
Select the "Import an Application" block.
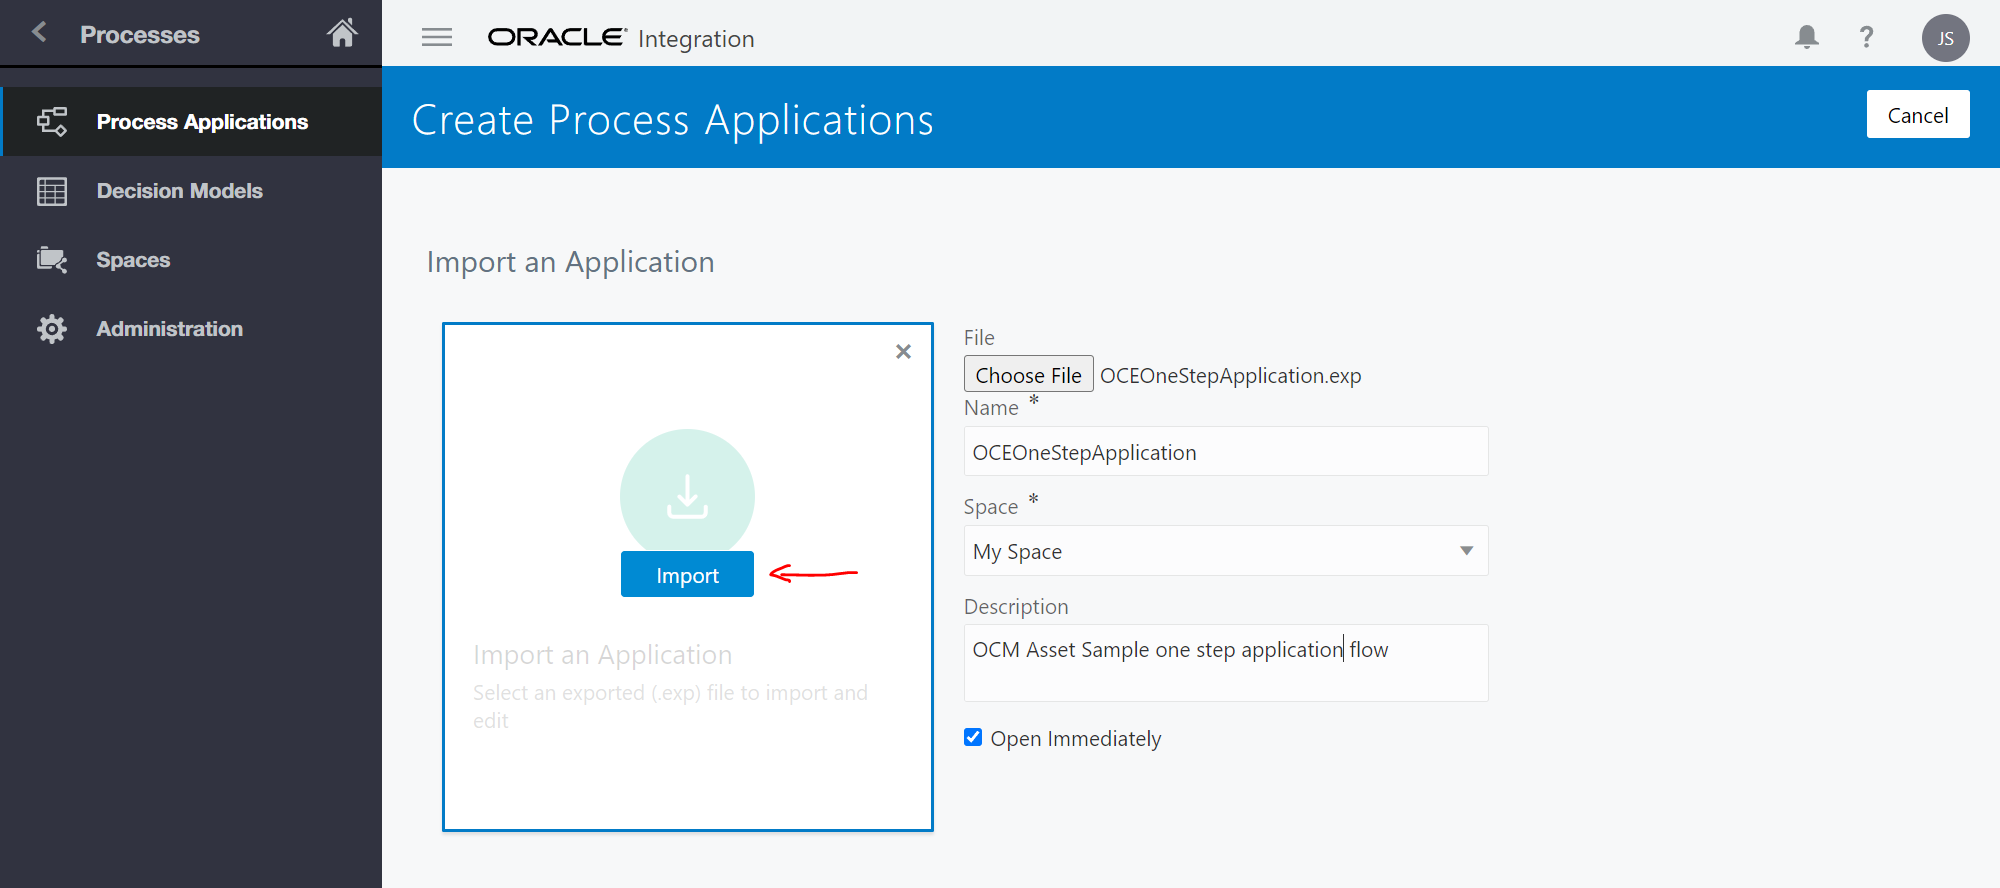
Browse to your 5 flows that you downloaded and select one
- for this example I chose the simple "OCEOneStepApplication.exp"
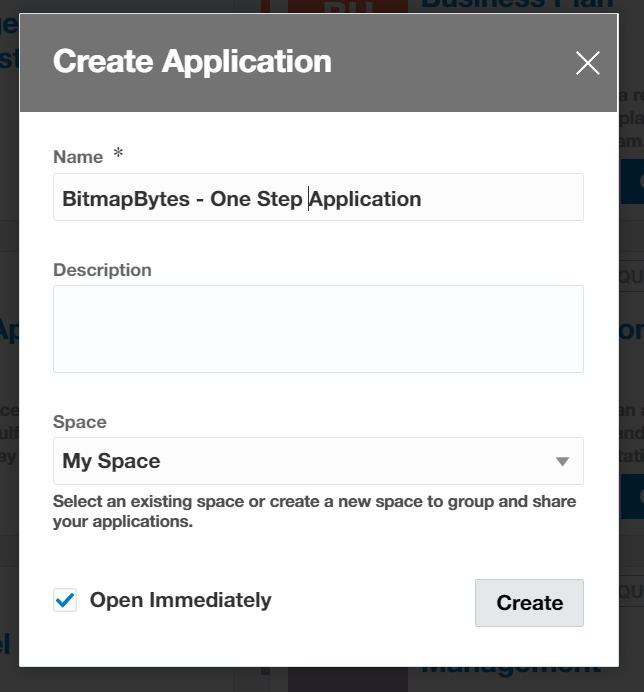
Enter the "Name" of the flow and select "Import".
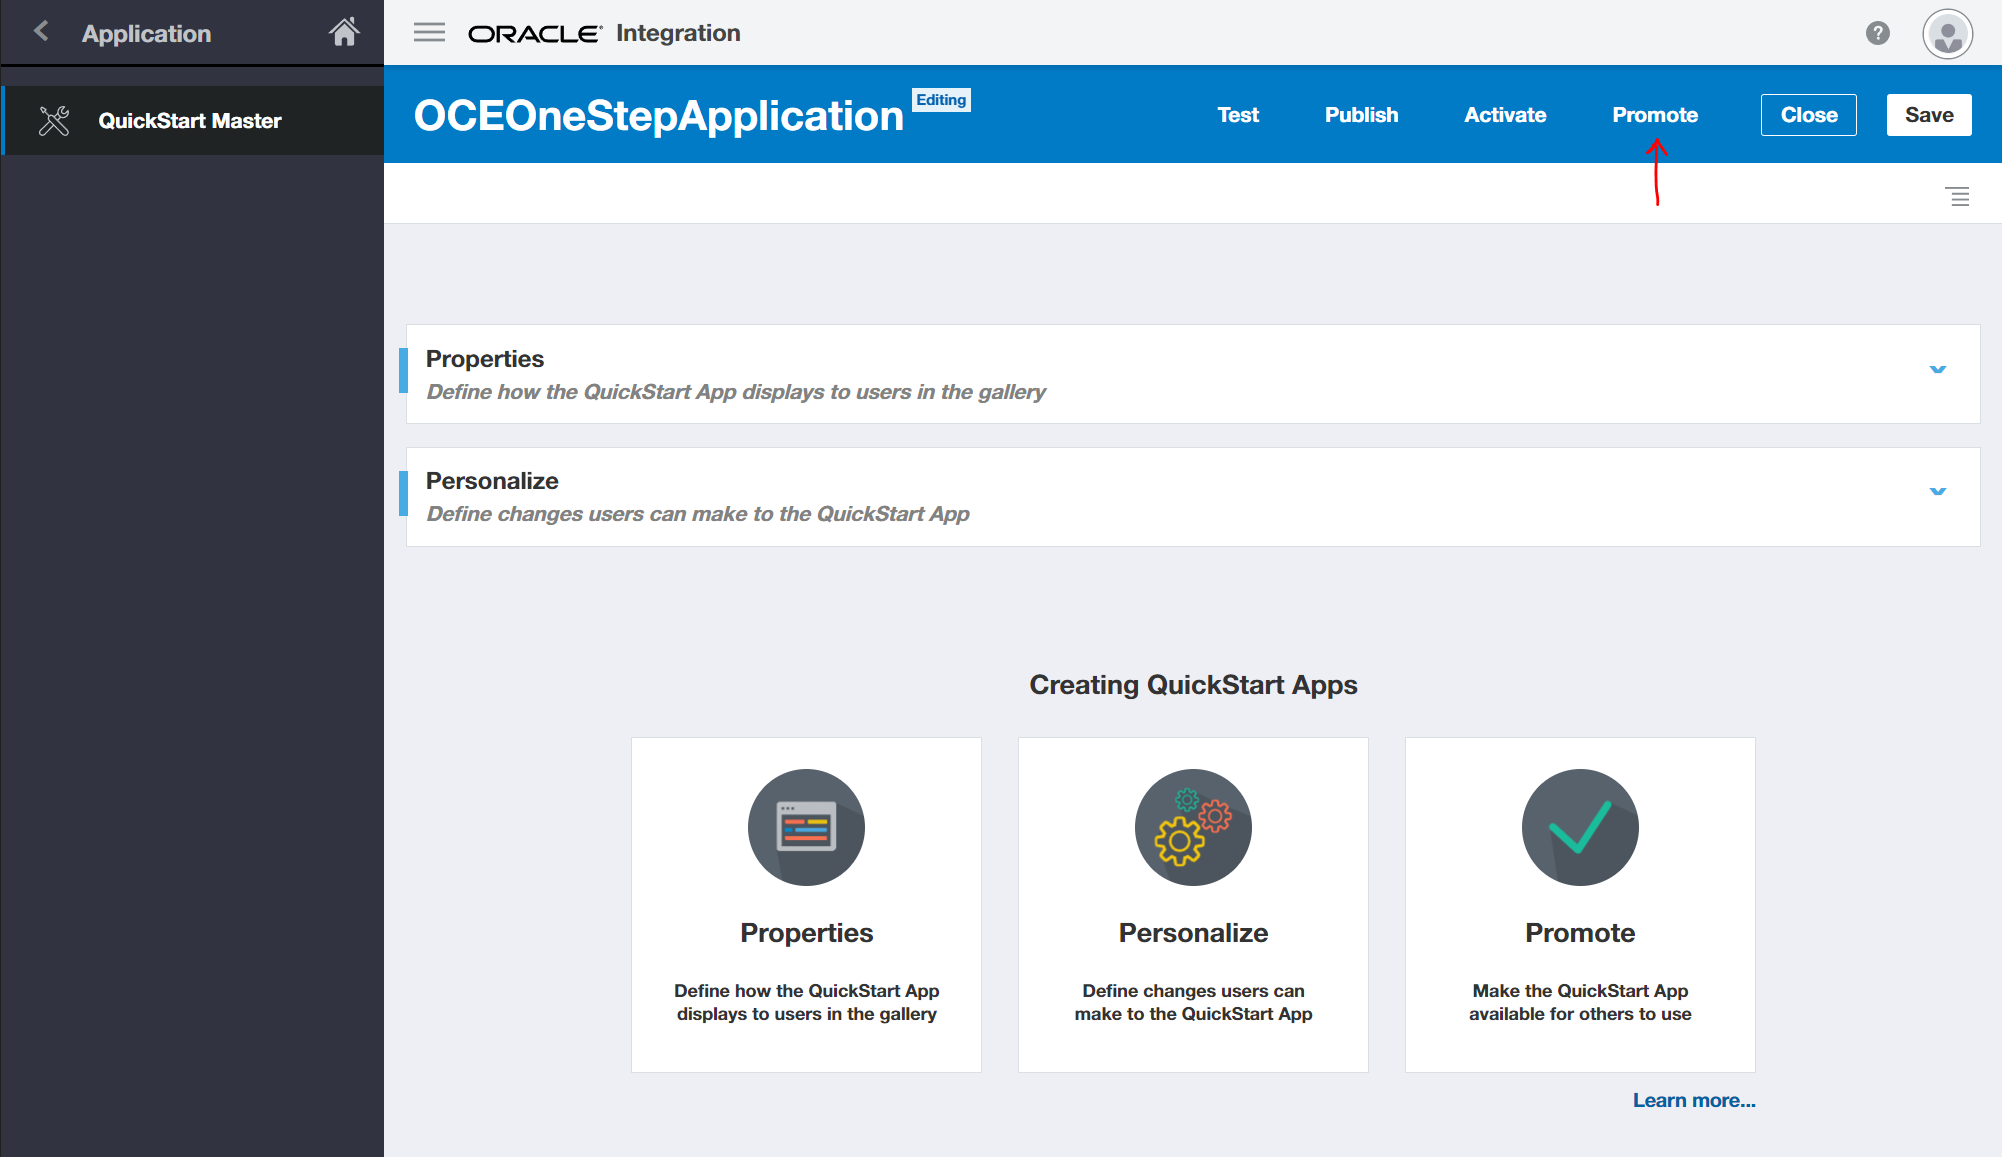
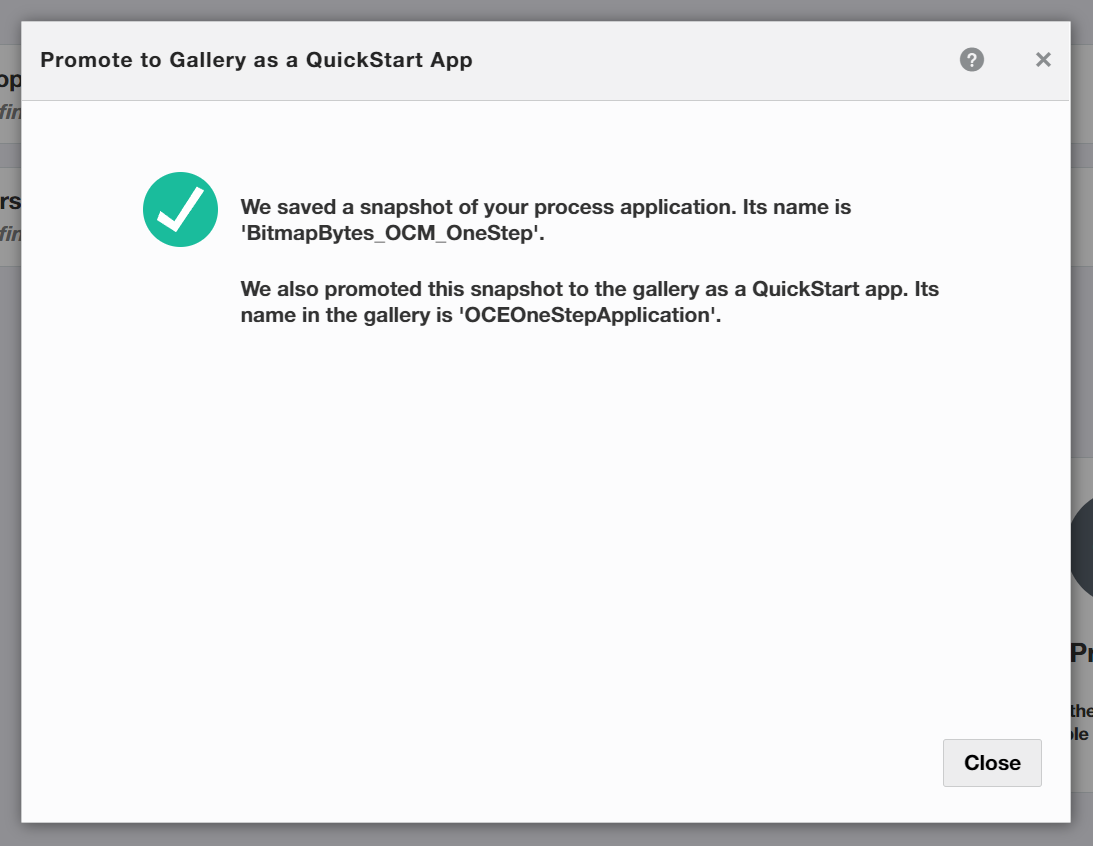
Lets go ahead and promote this as a re-usable base template to create our Asset Processes from.
Select the "Promote" button.
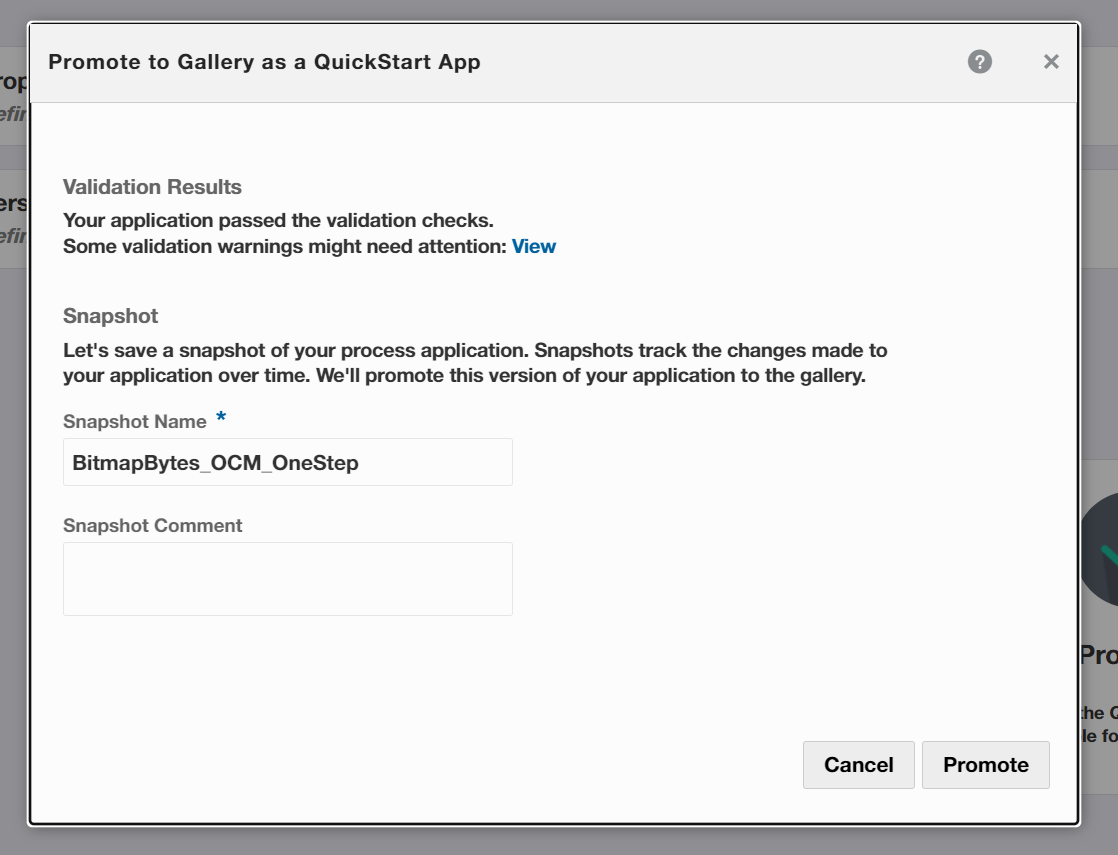
Enter a snapshot name and Select the "Promote" button.
Once created select the "Close" button.
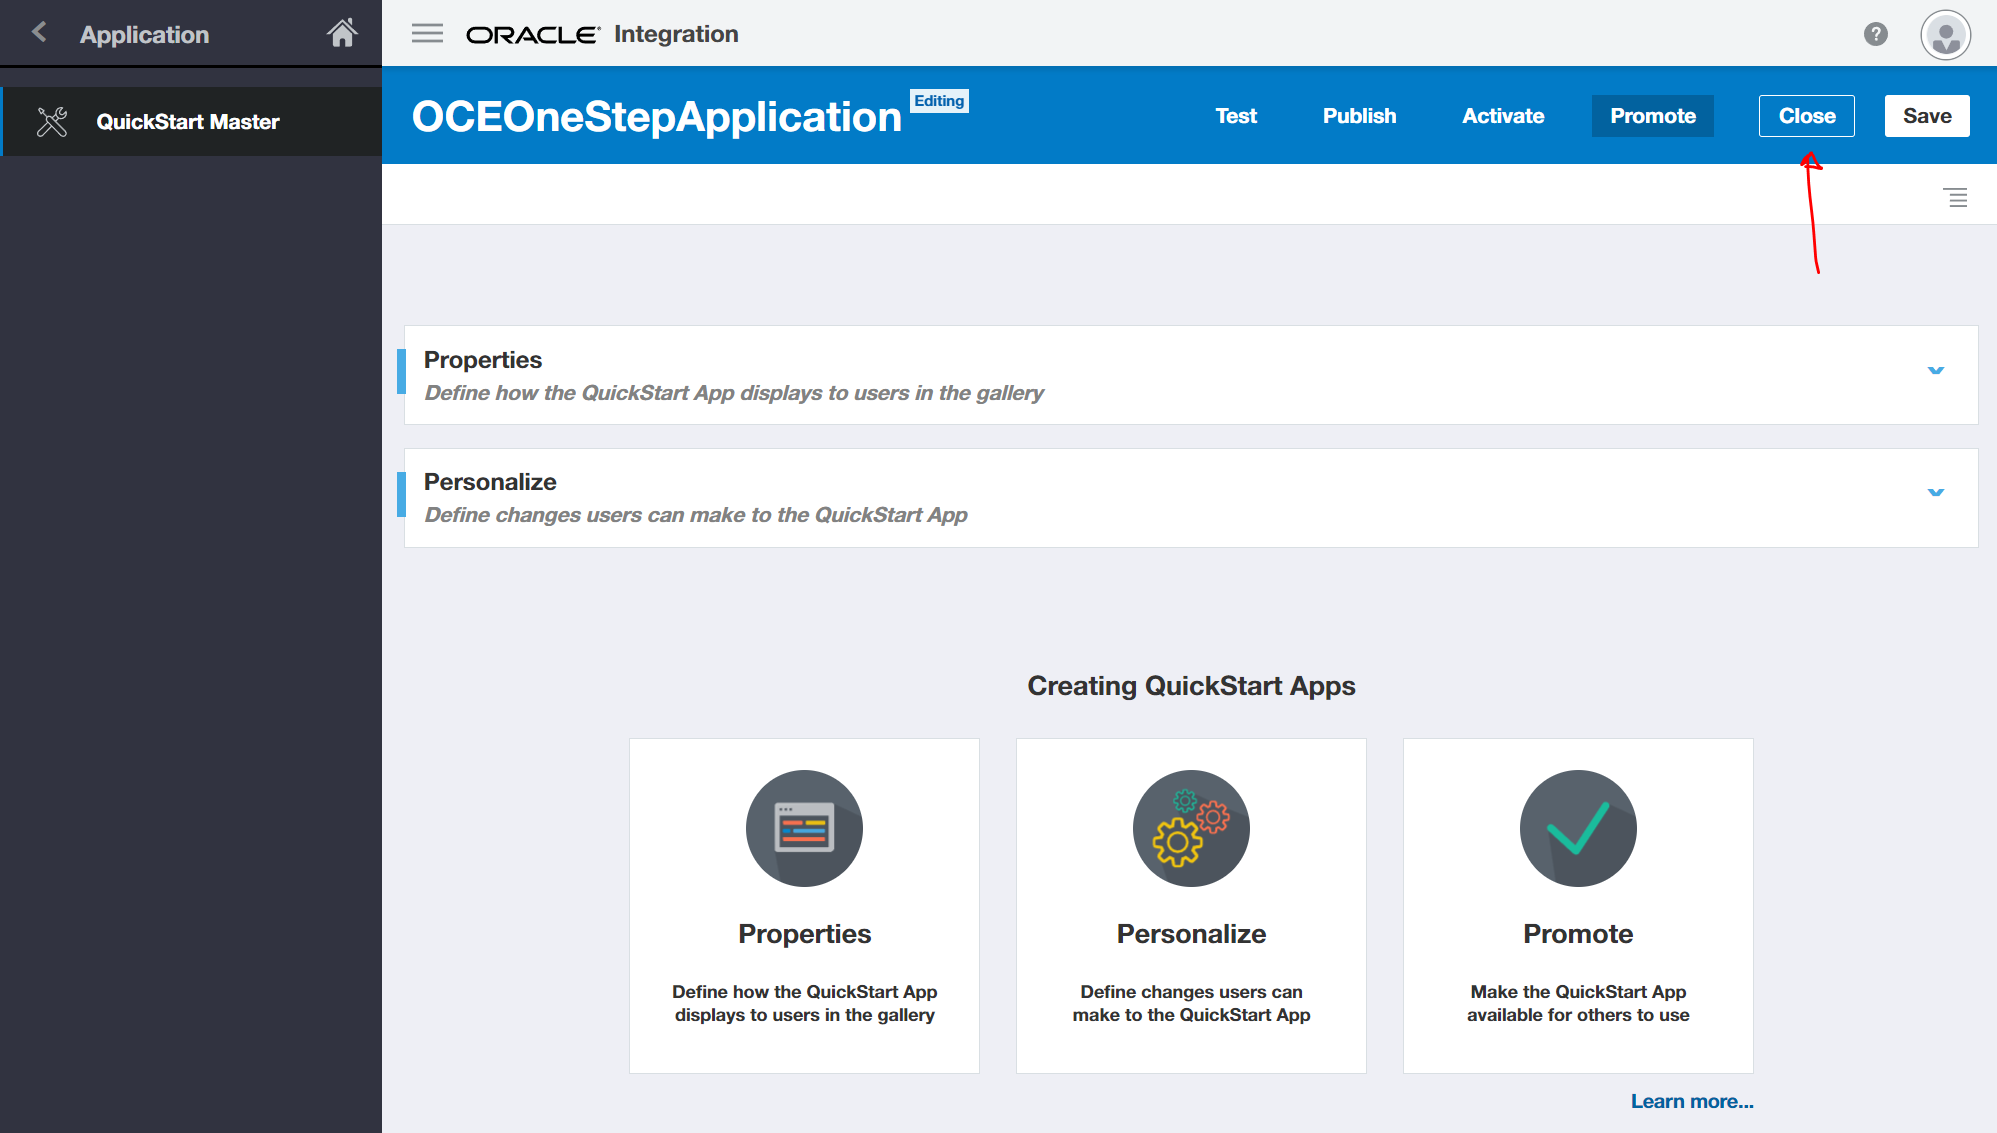
Lets exit out of this now we have a template available - Select the "Close" button.
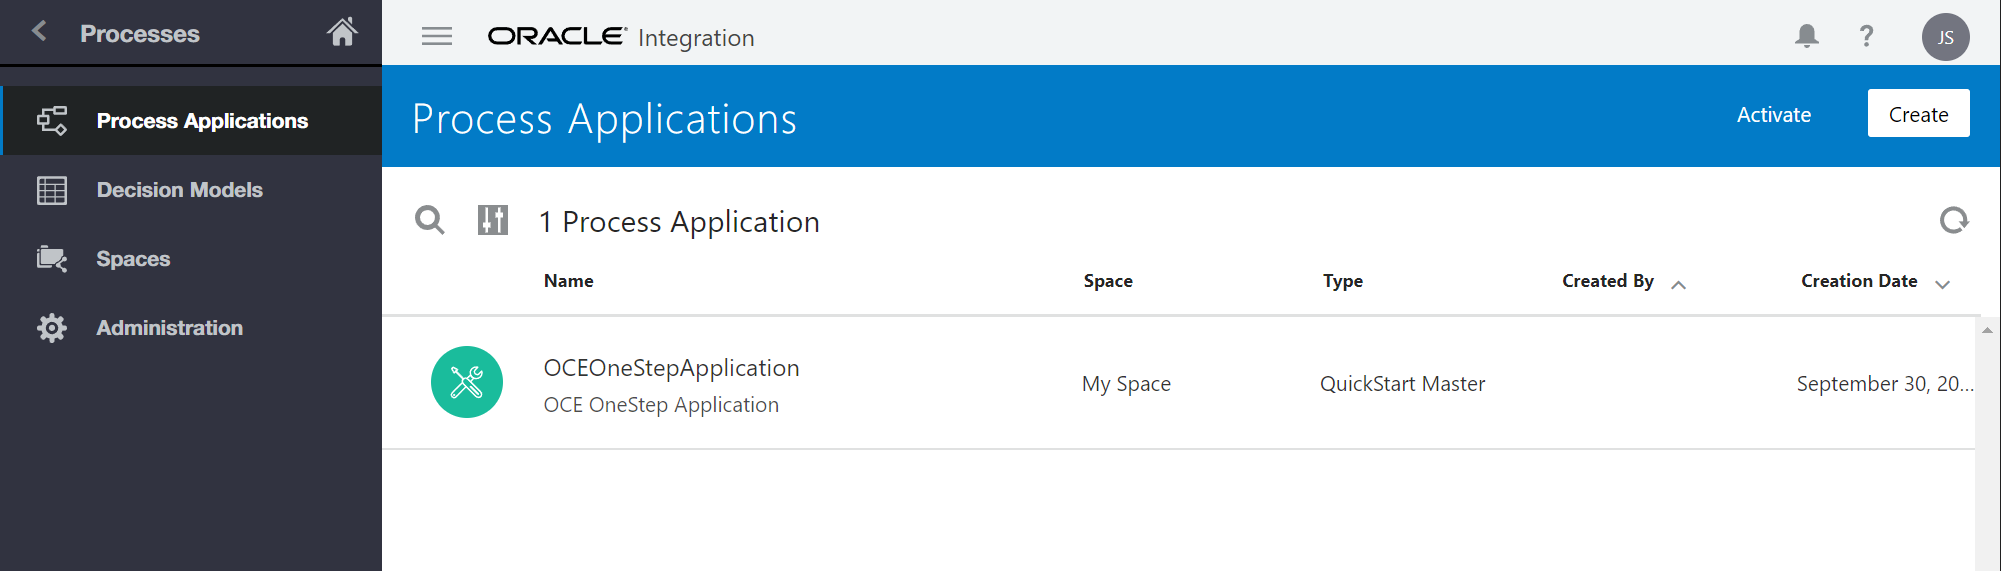
You should now see your process template - lets create the process from it.
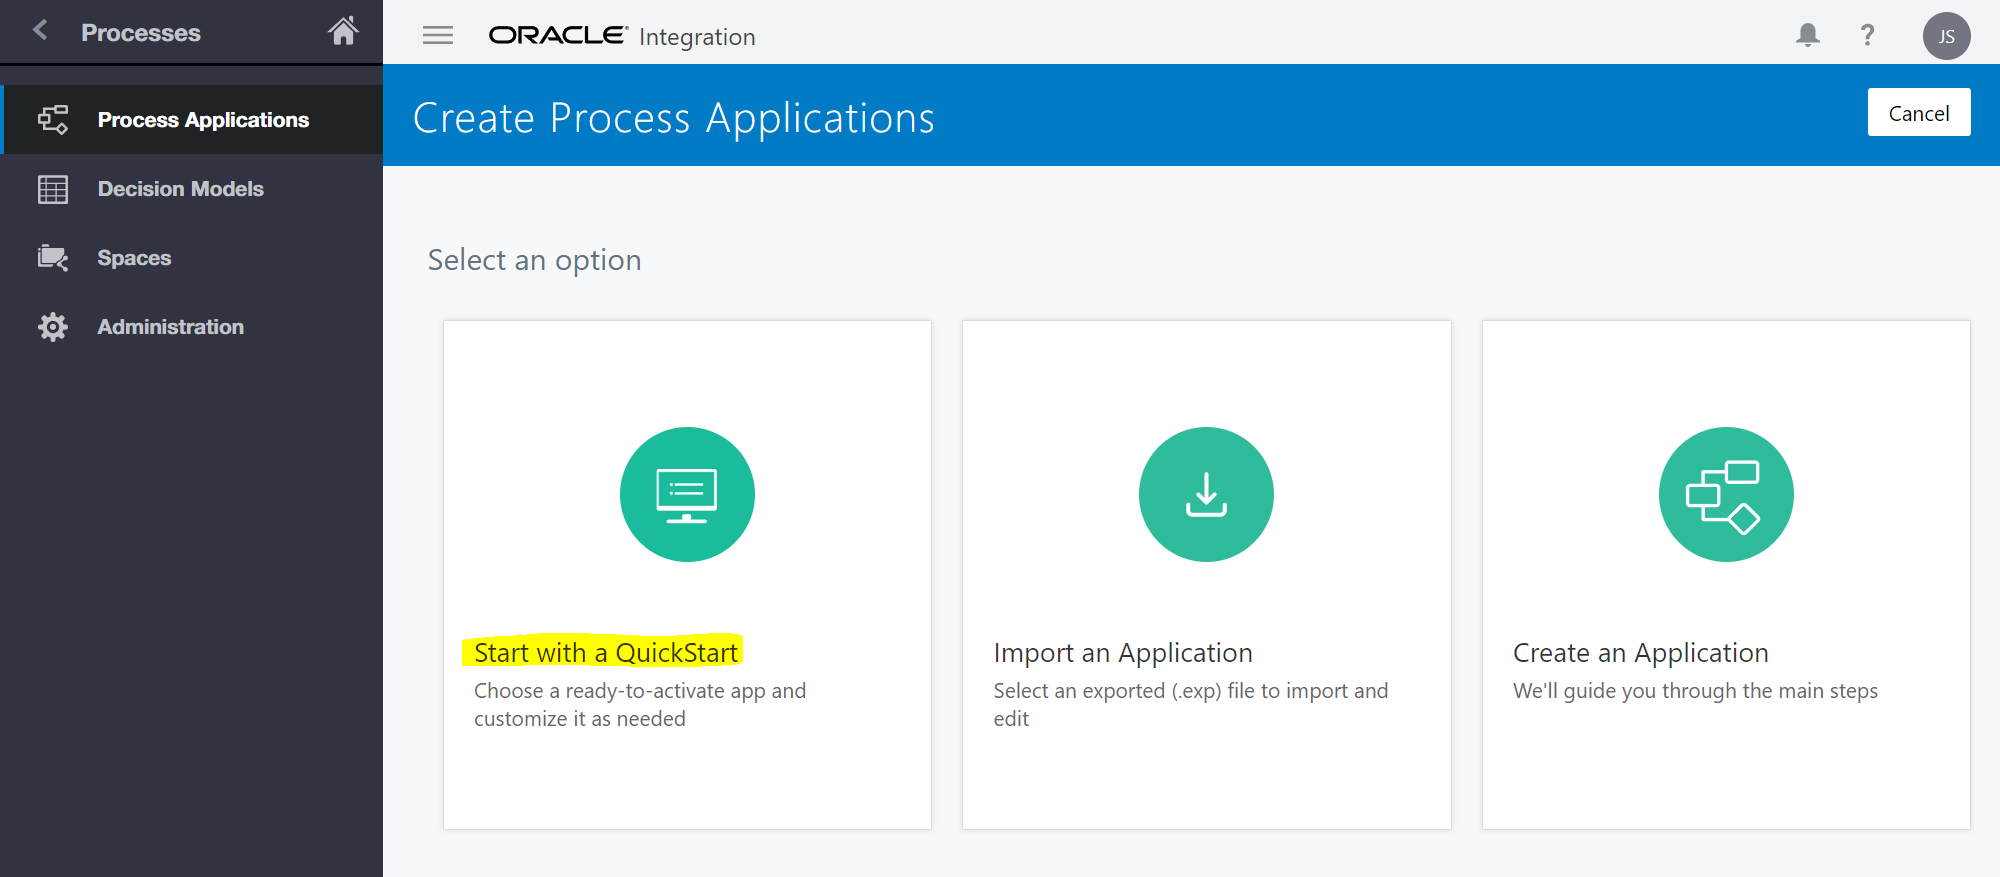
Create a new Process from Template
Select the "Create" button.
Select the "Start with a QuickStart" block.
From the Quickstart gallery find and select the template you created.
Update the name of the application you are creating and select the "Create" button.
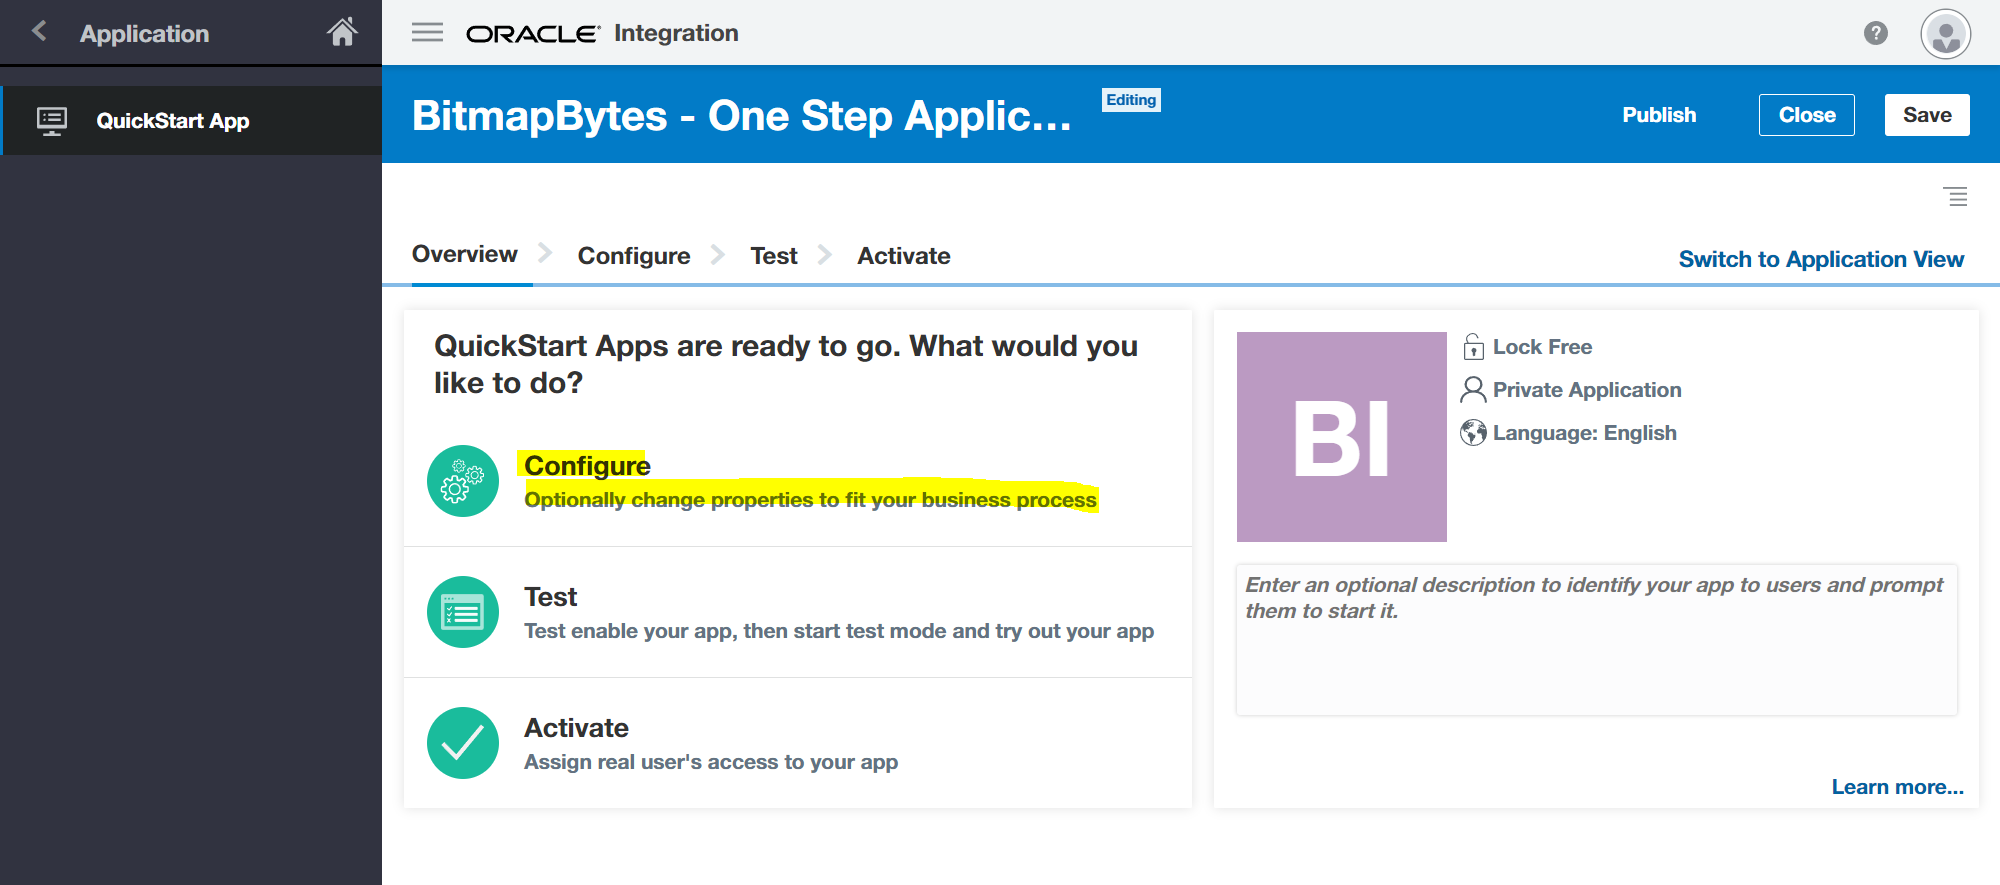
Lets configure some of the settings by select the "Configure" block.
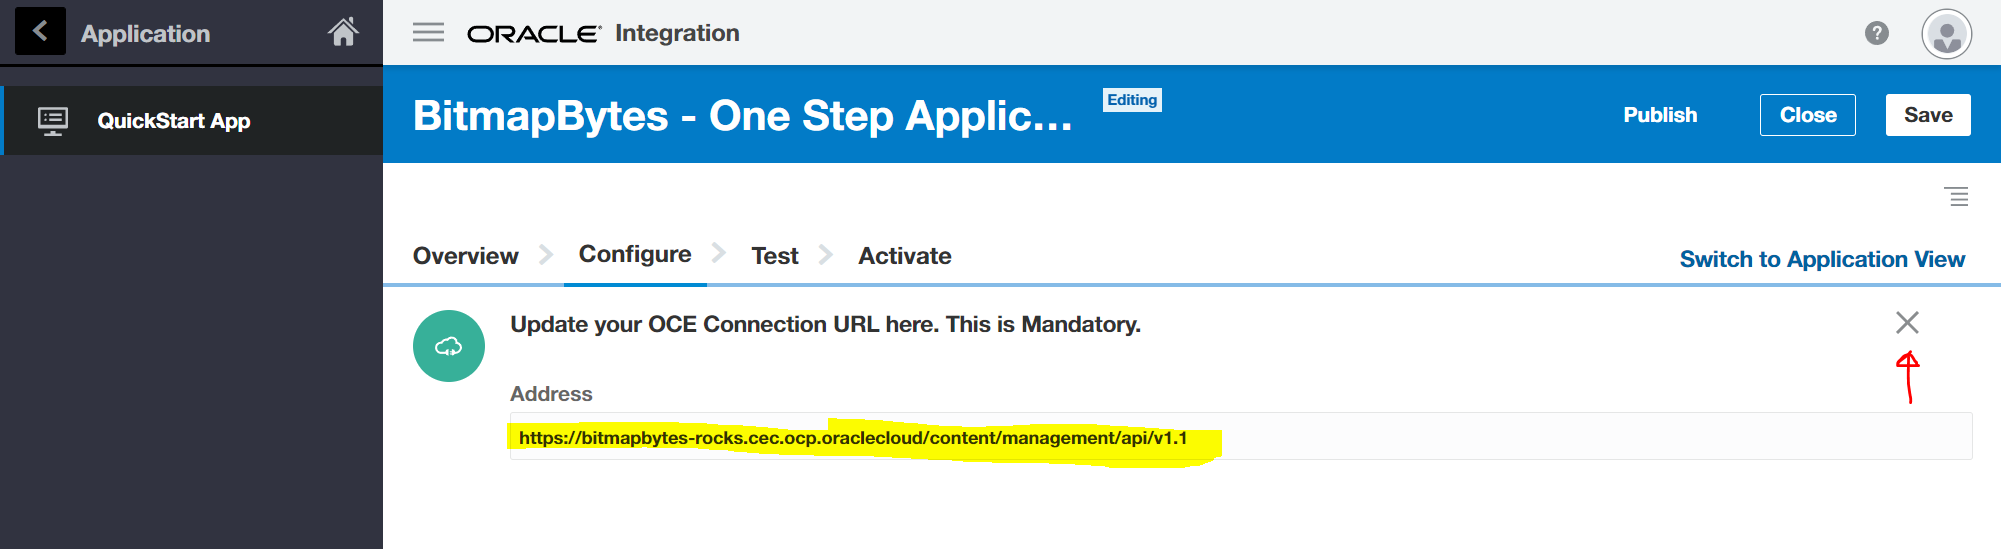
Make sure anywhere in your configuration that "OCEURL" is replaced with your instance domain. ie.. Select the title "Update your OCE Connection URL here. This is Mandatory".
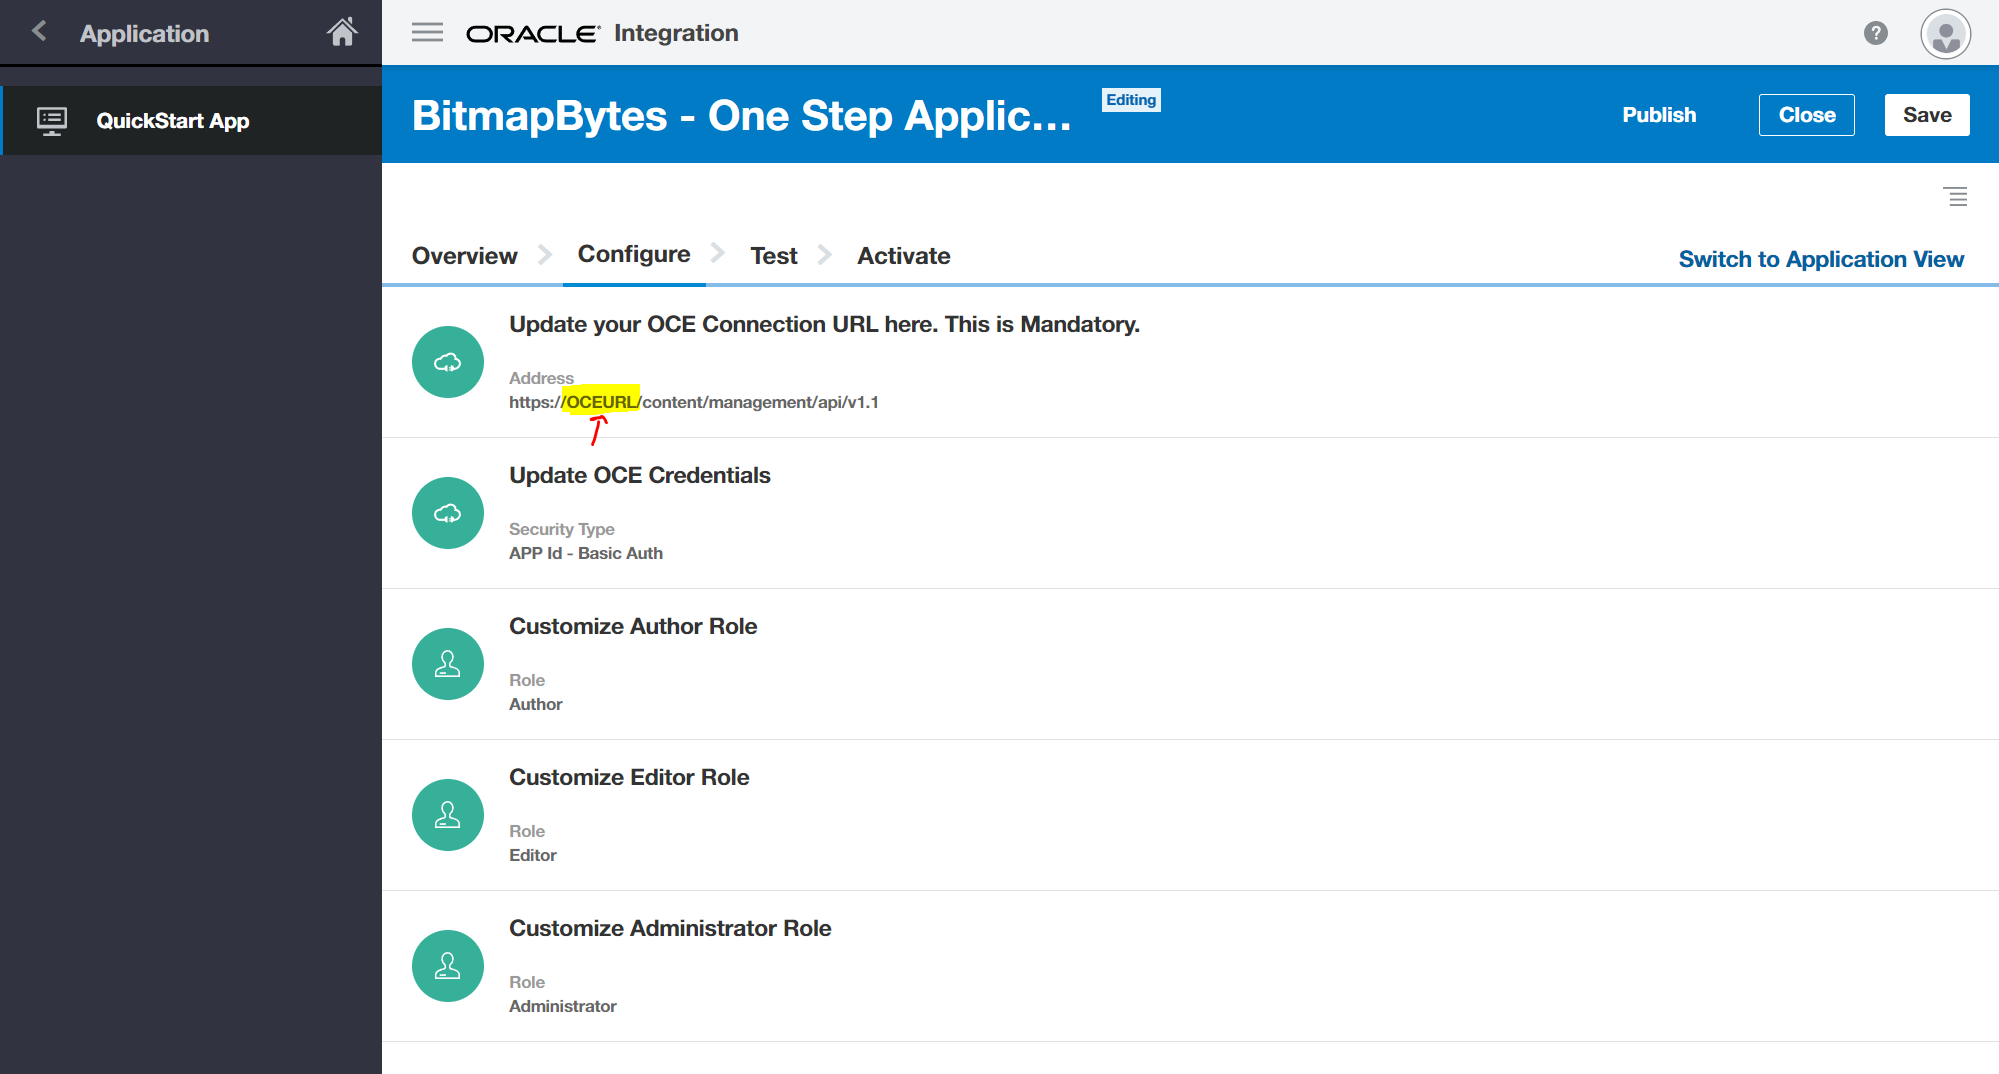
Something like this - and select the "Cross" icon which will save the configuration.
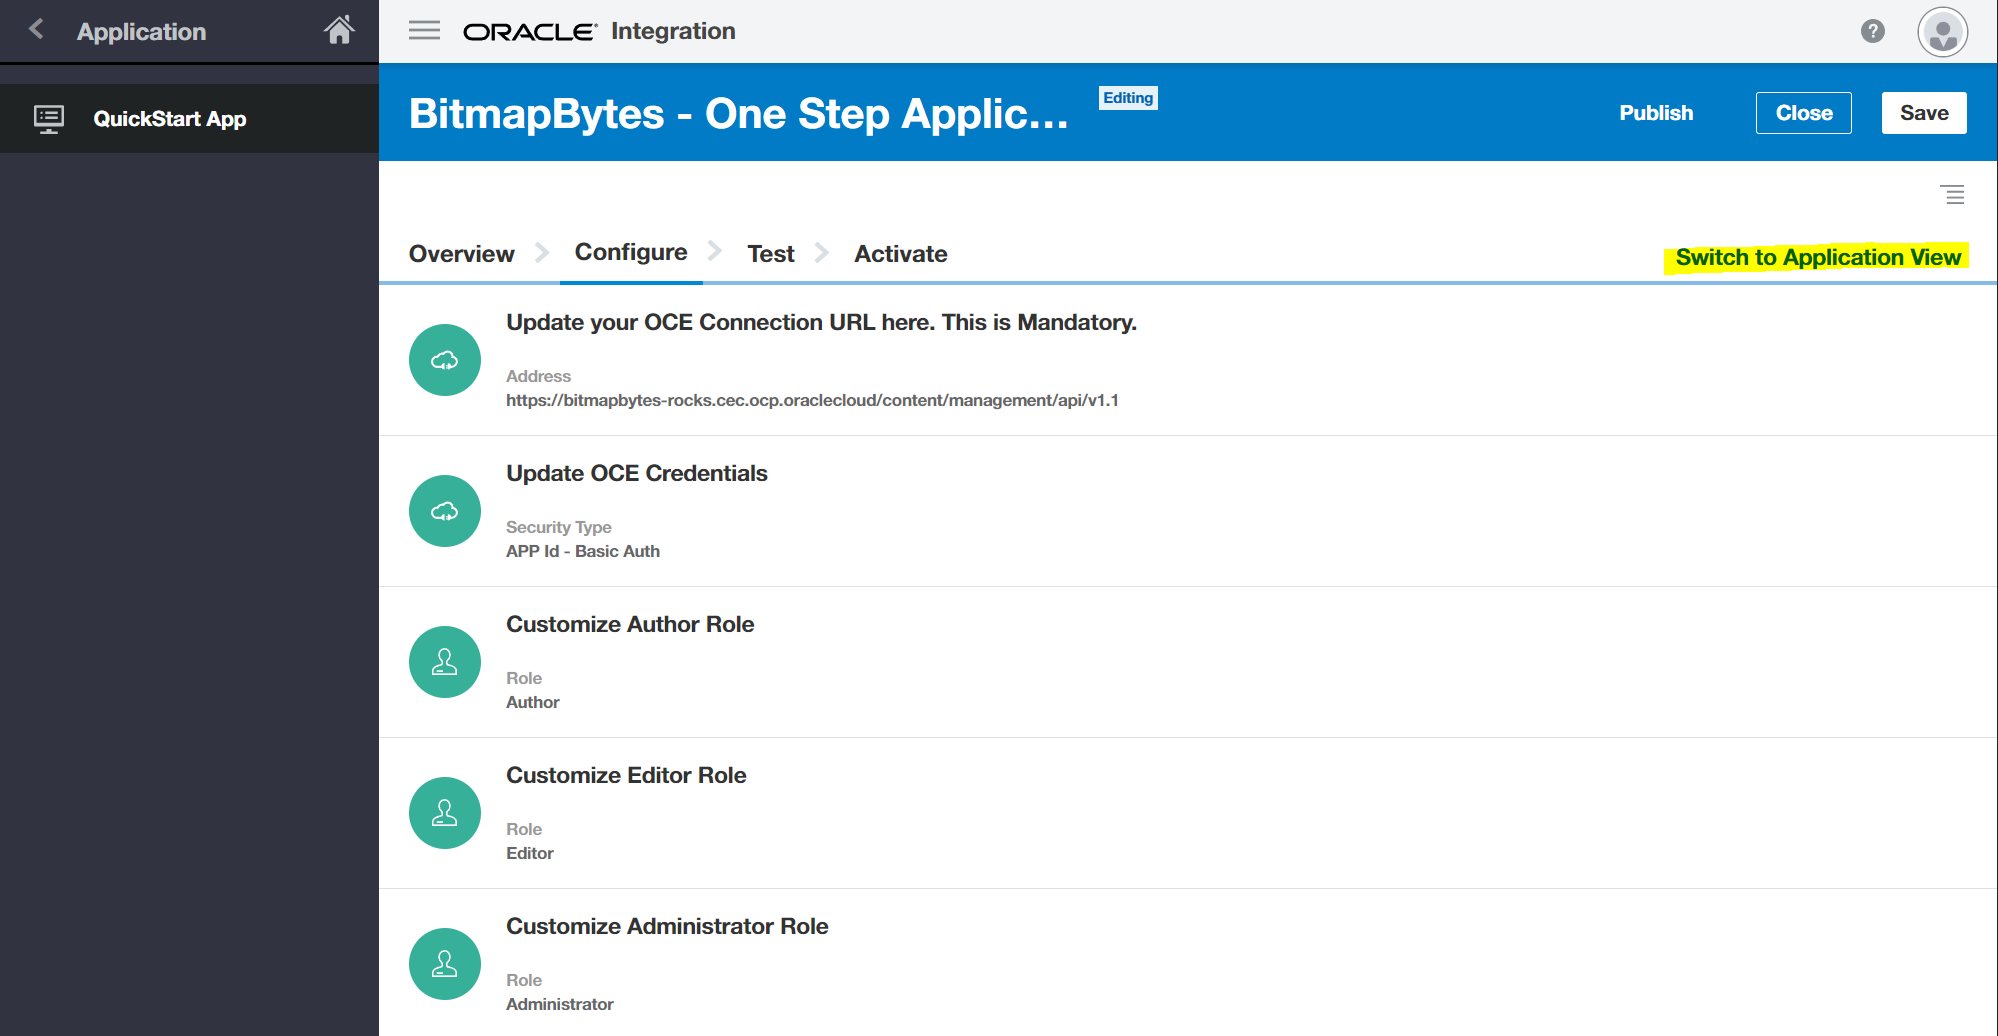
Now that we have configured the process app lets take a deeper look into the prebuilt process to do this select the "Switch to Application View" link.
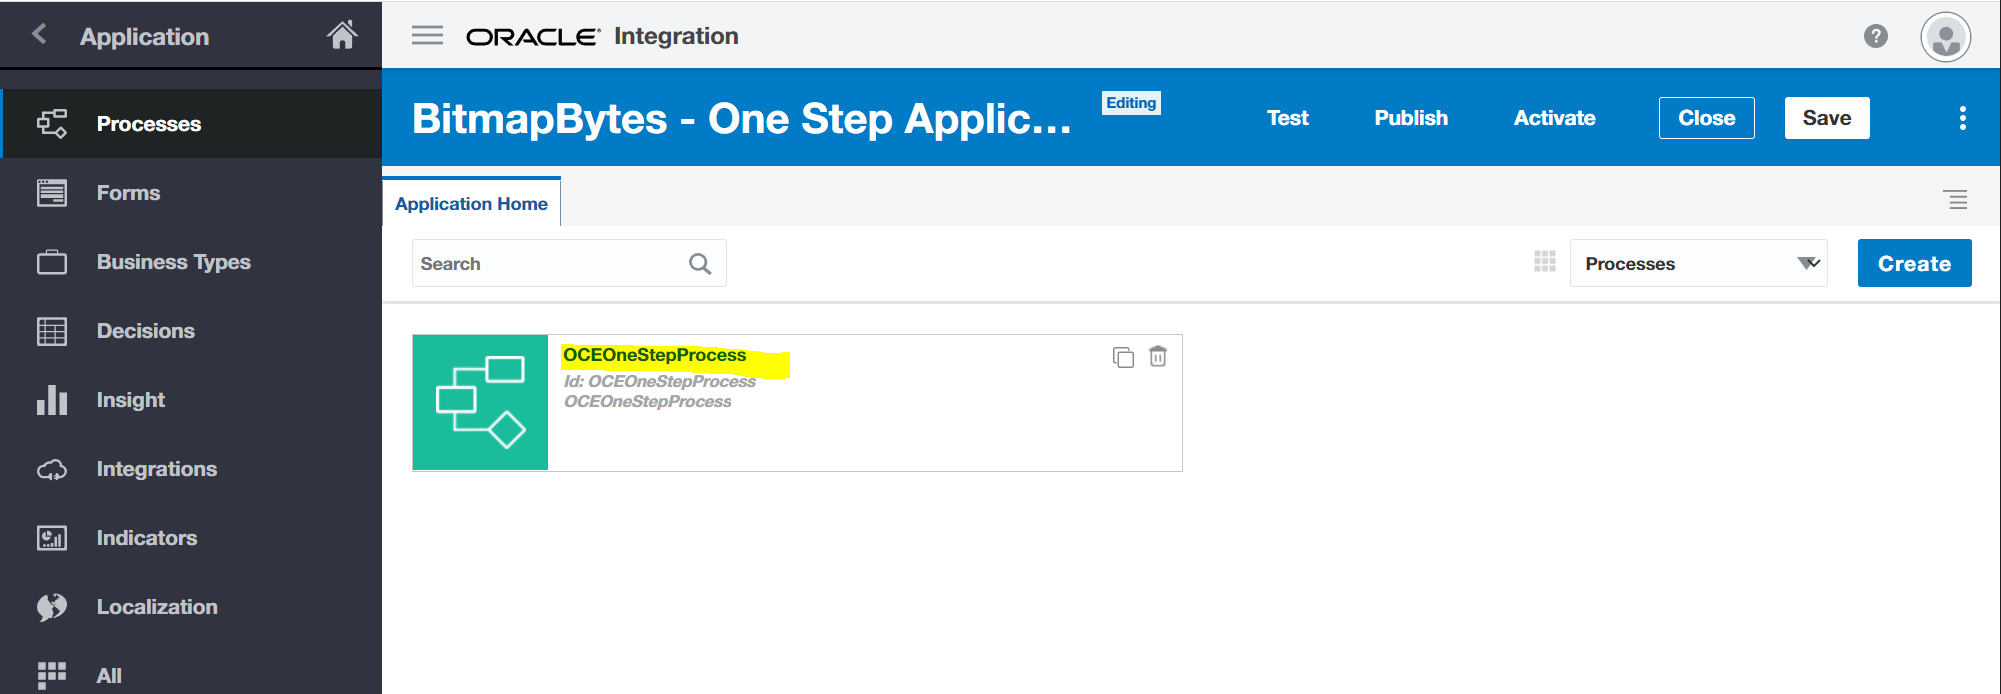
Select the application.
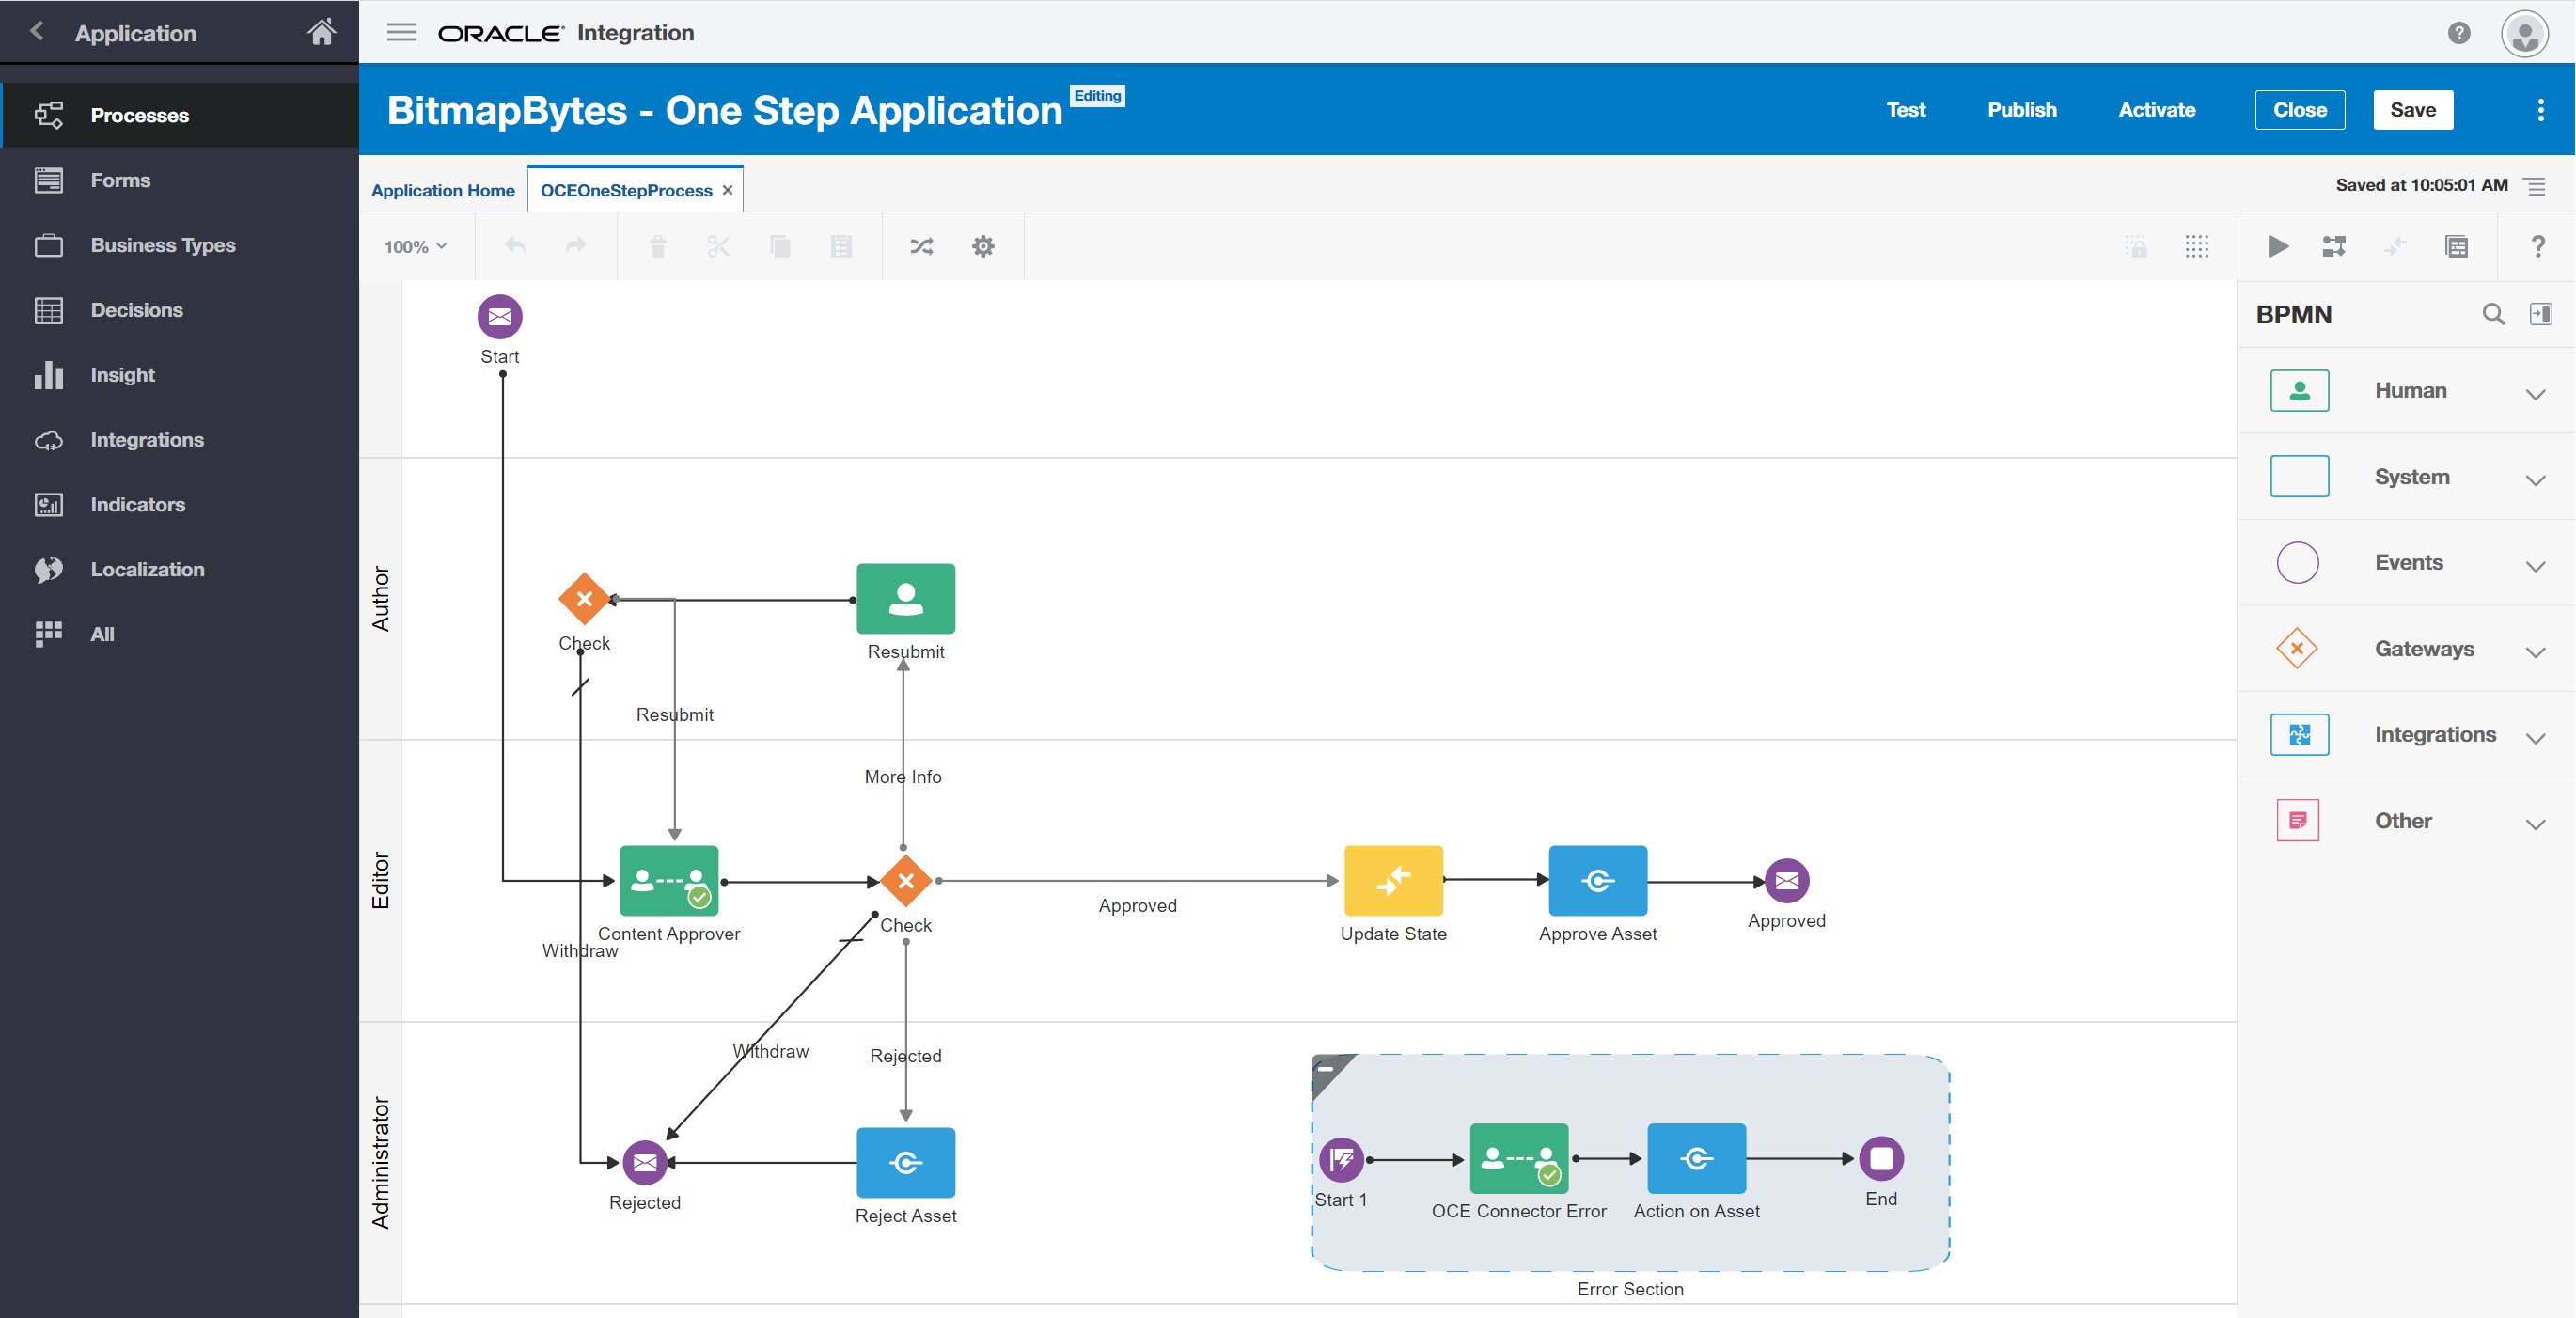
Now you can see the whole process flow and modify if needed - you'll need to make sure you validate, publish and Activate if you do update it.
Publish & Activate Process
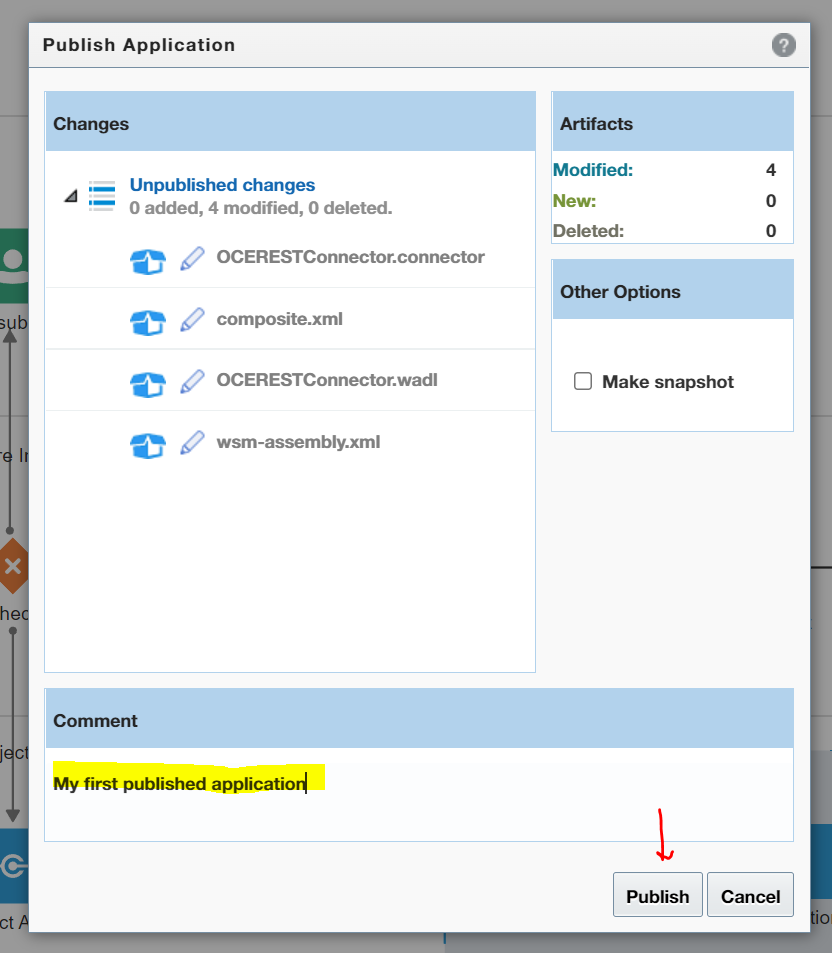
Select the "Publish" button.

You will need to add a comment and then select the "Publish" button.
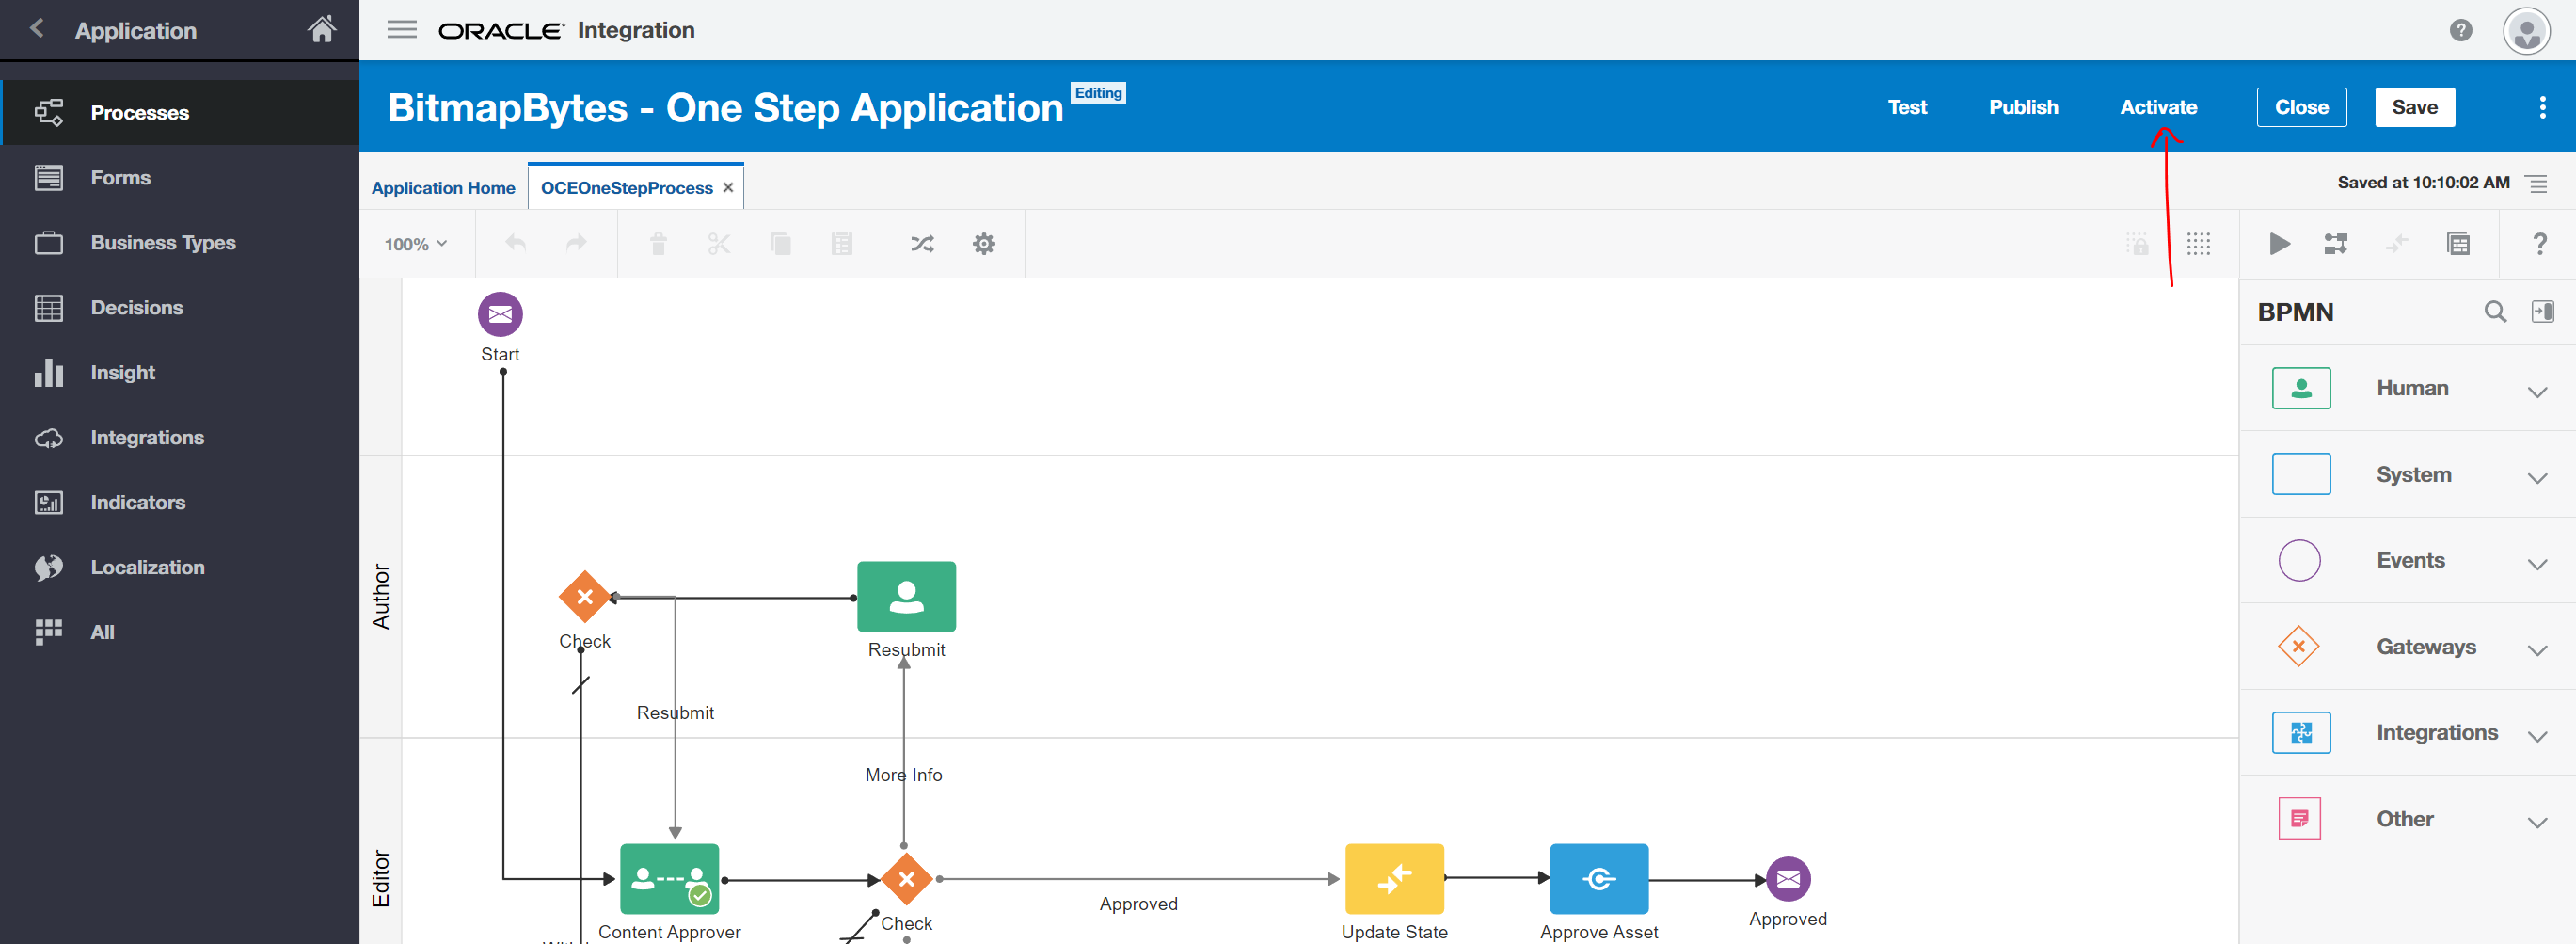
Now lets activate the published flow and assign a version.
Select the "Activate" button.
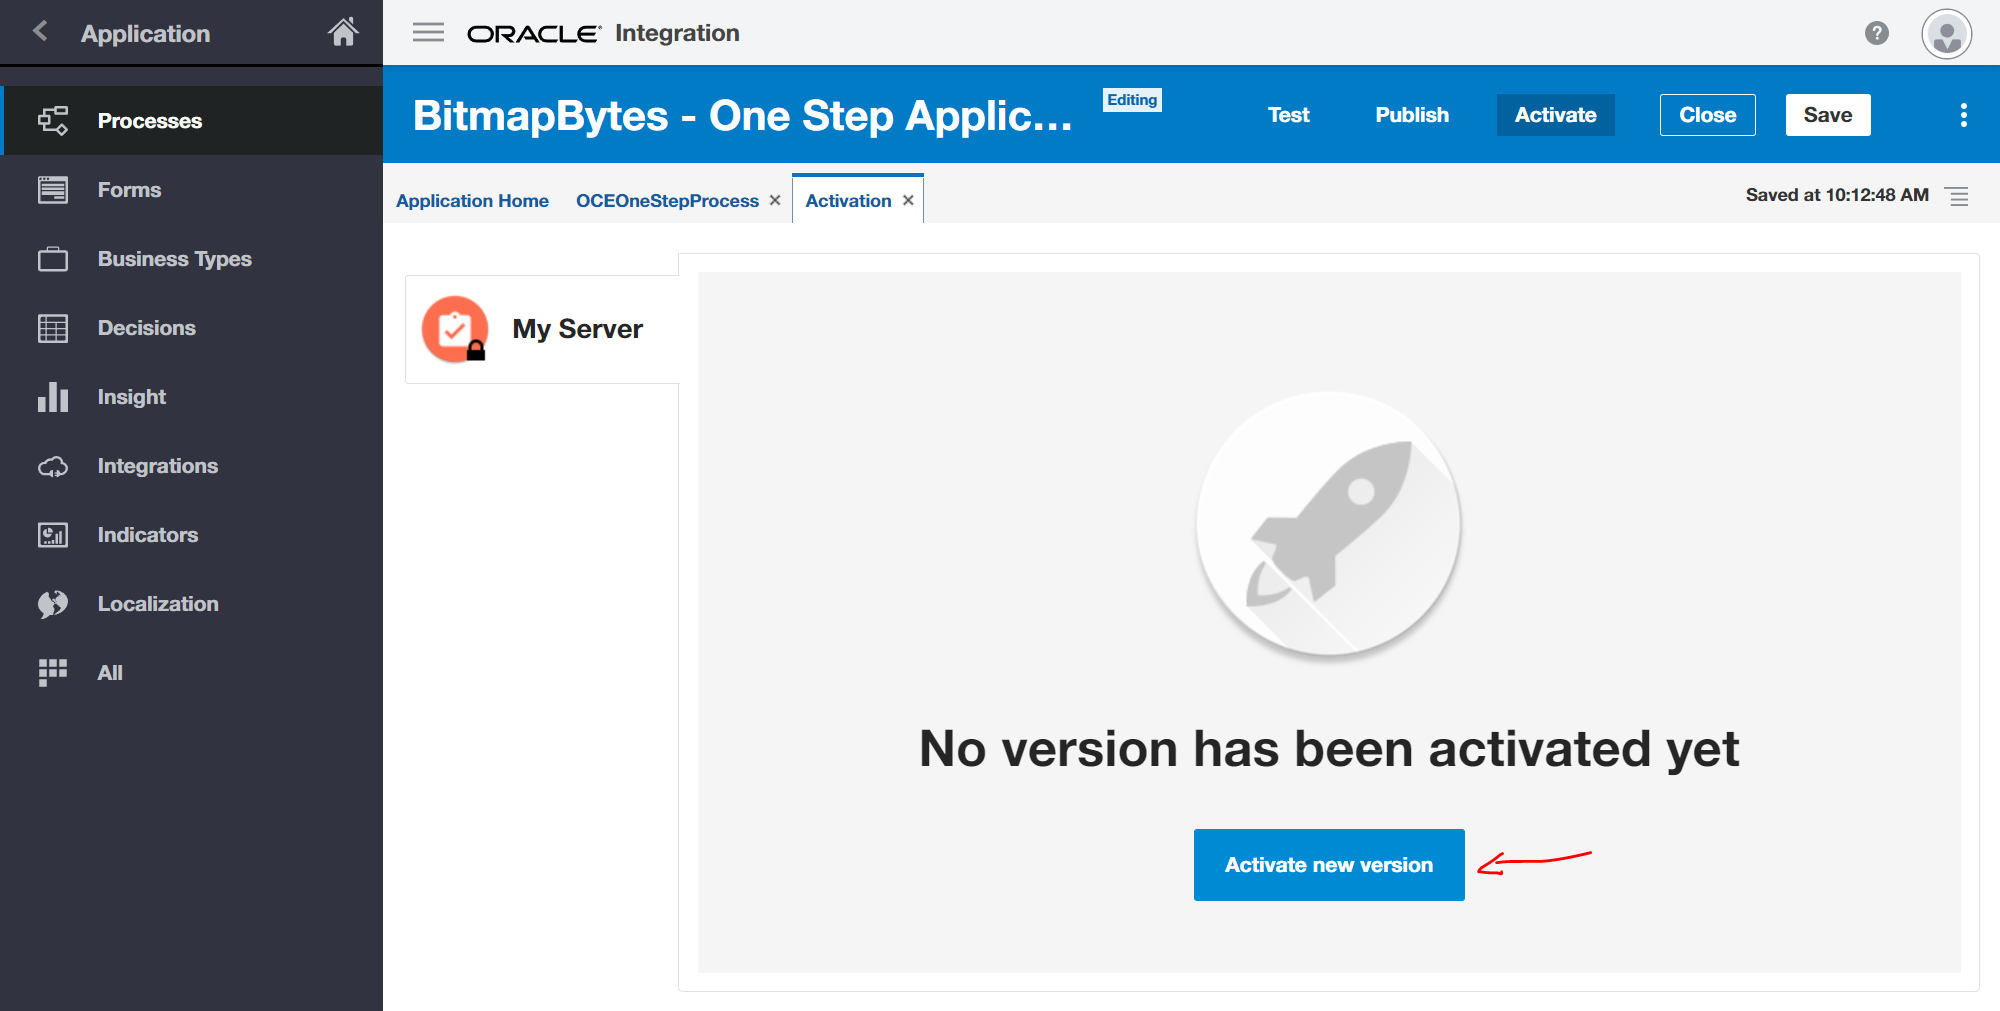
Select the "Activate new version" button.
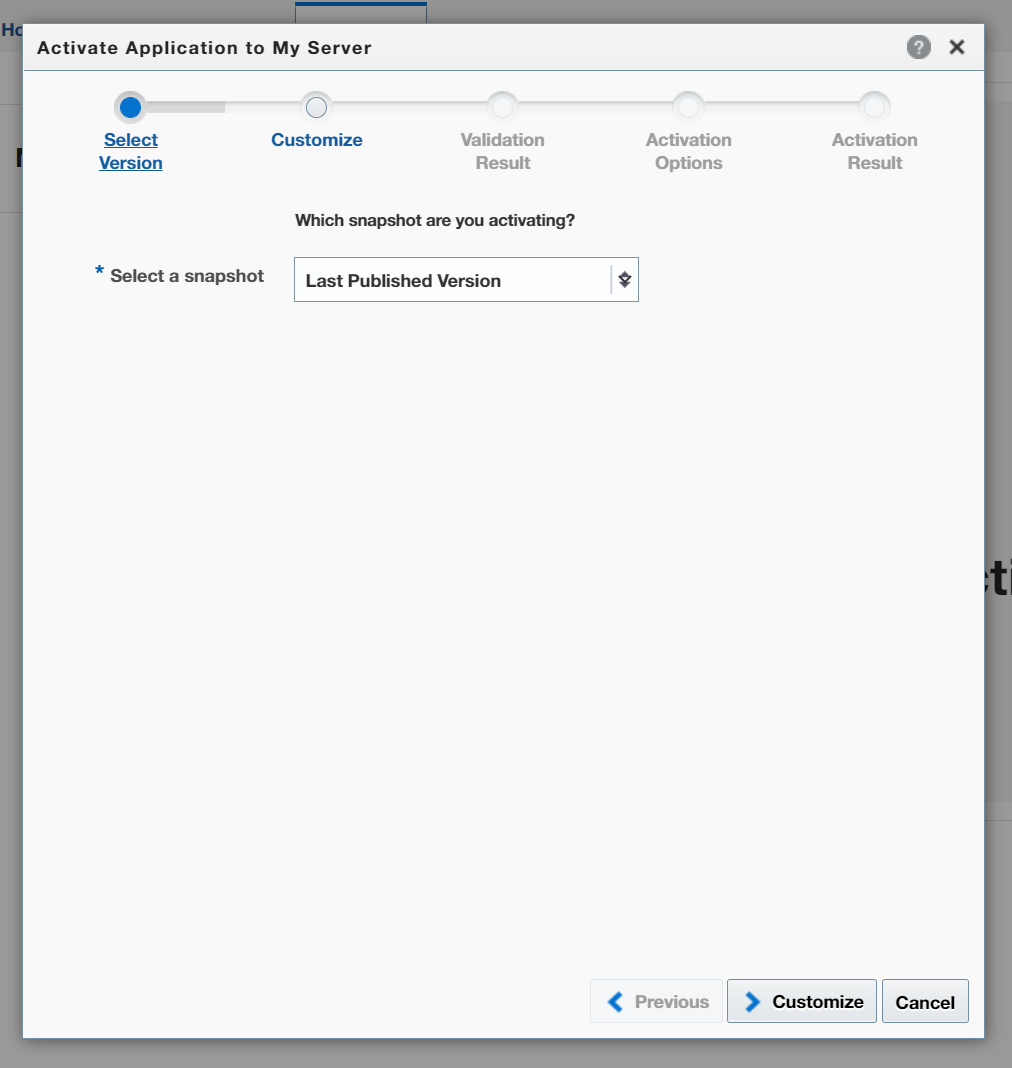
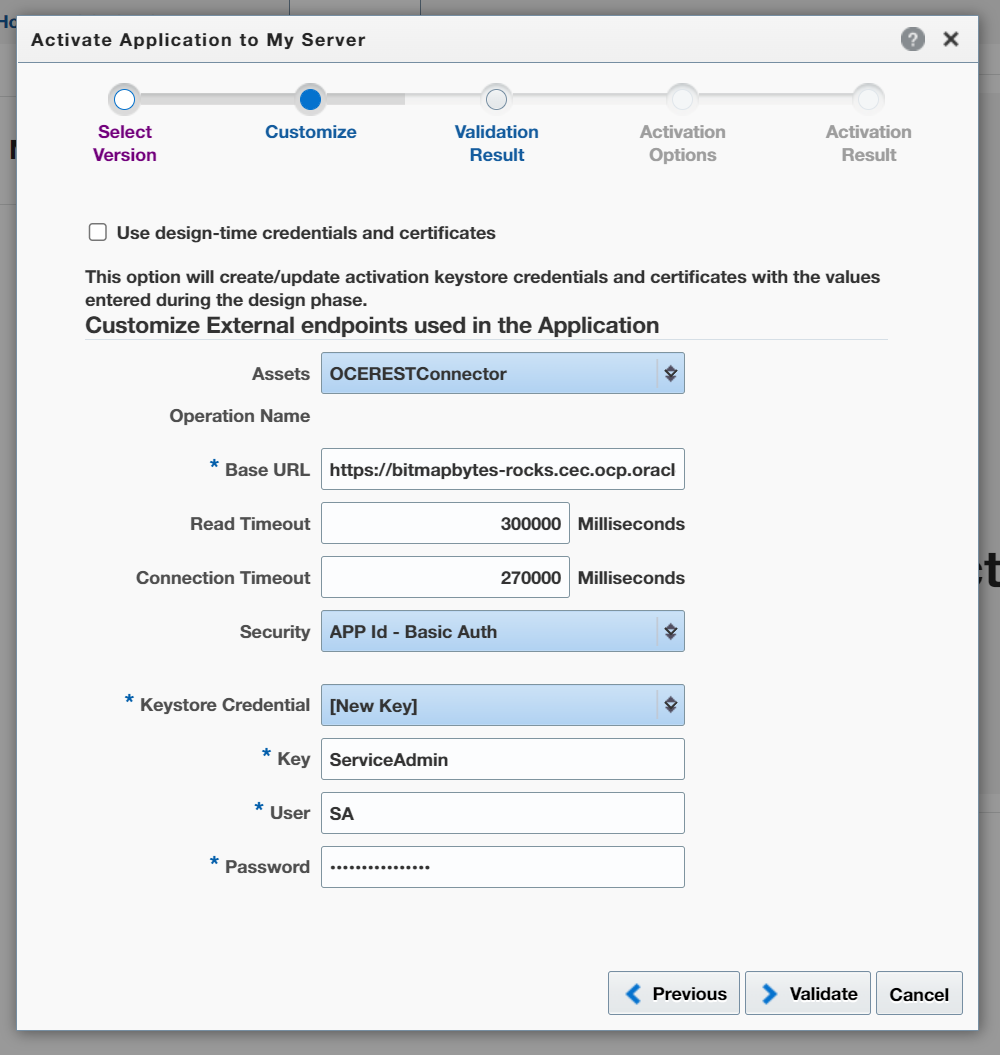
From the modal select the "Customize" button.
Select a Key if you have one defined in the "Keystore Credential" or create a new one and add your service admin account.
Select the "Validate" button.
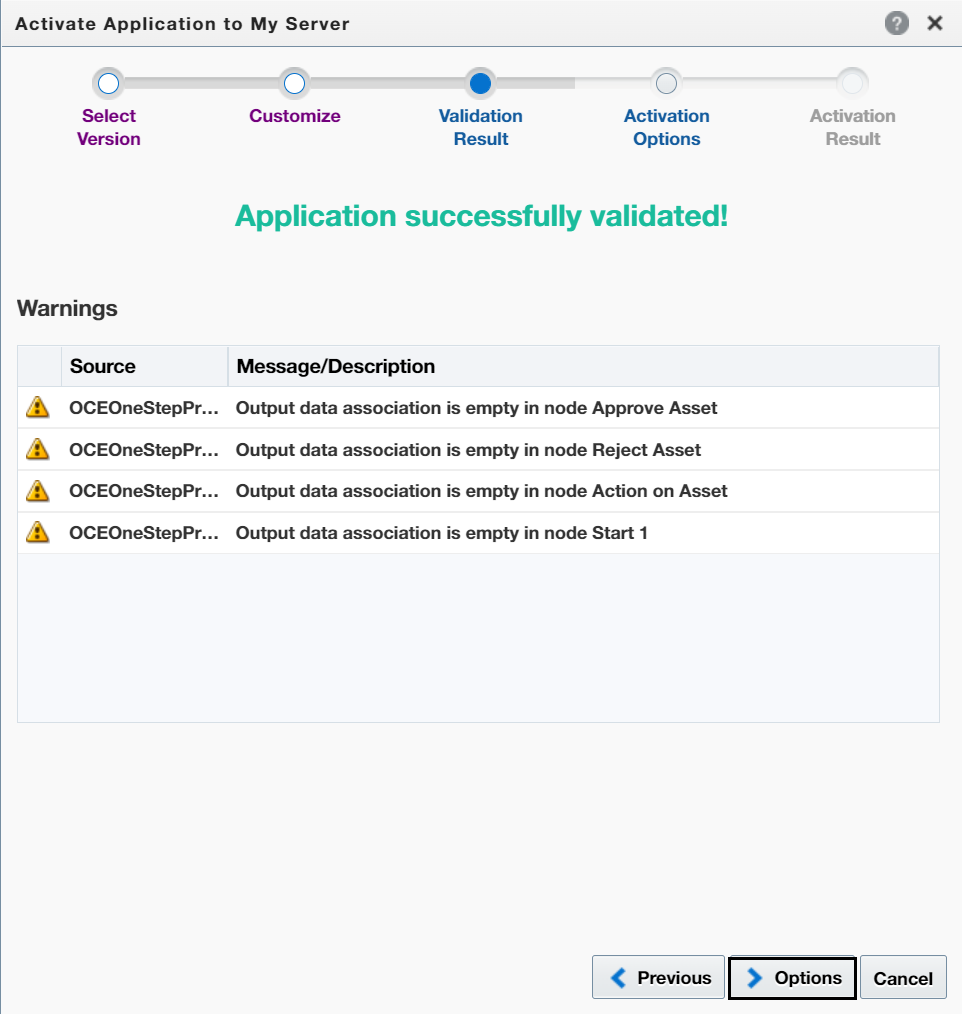
You can ignore warnings select the "Options" button.
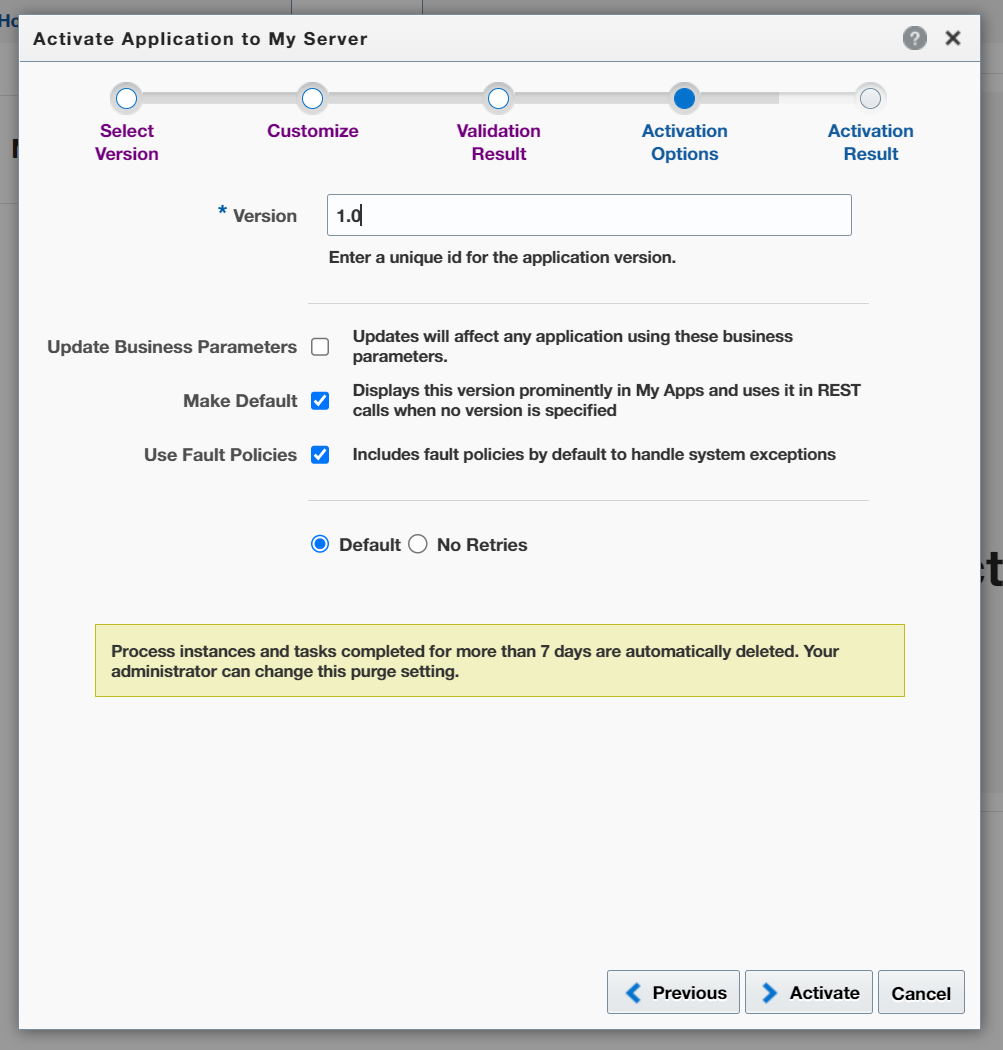
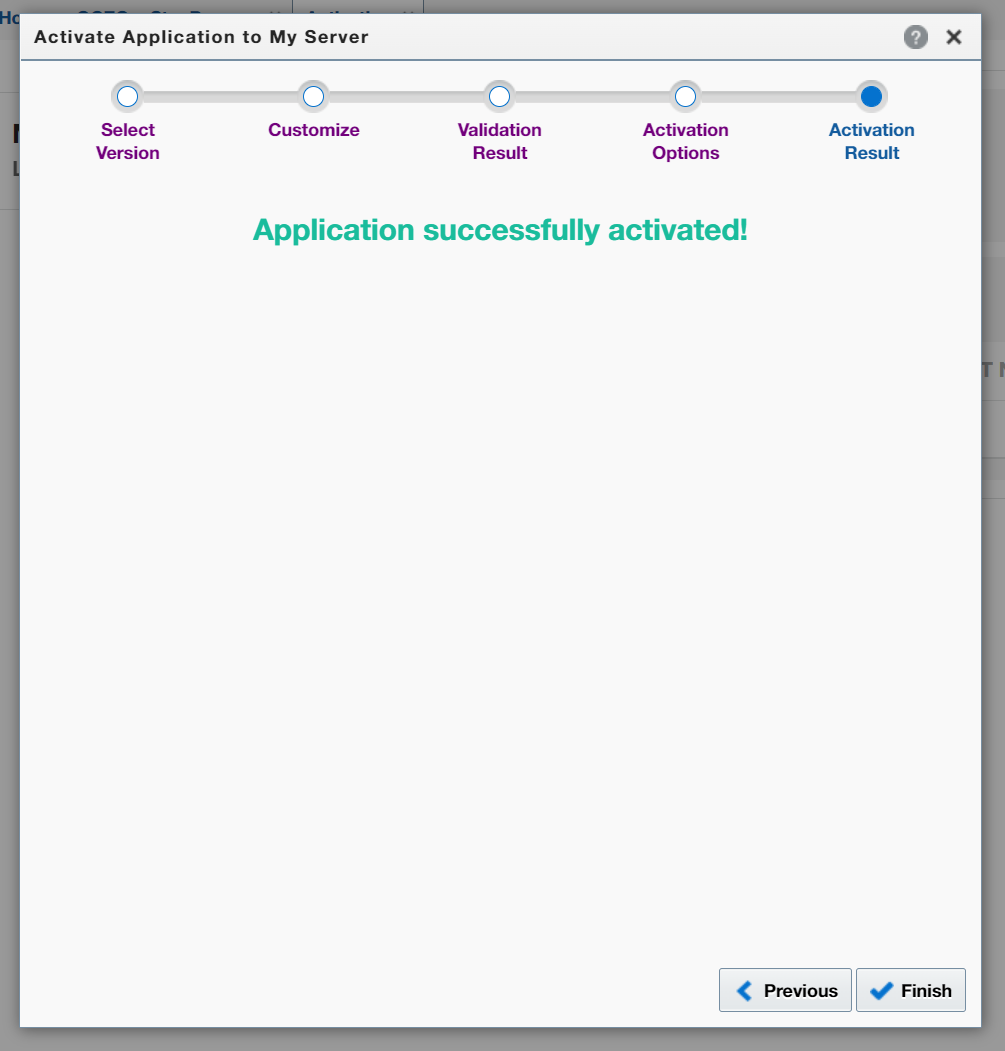
Enter your version number ie "1.0" and select the "Activate" button.
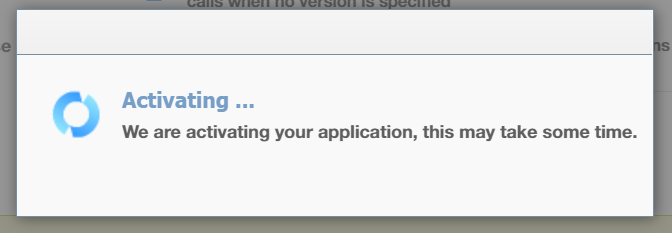
It will take a minute or so to activate.
When the application has successfully been activated - Select the "Finish" button.
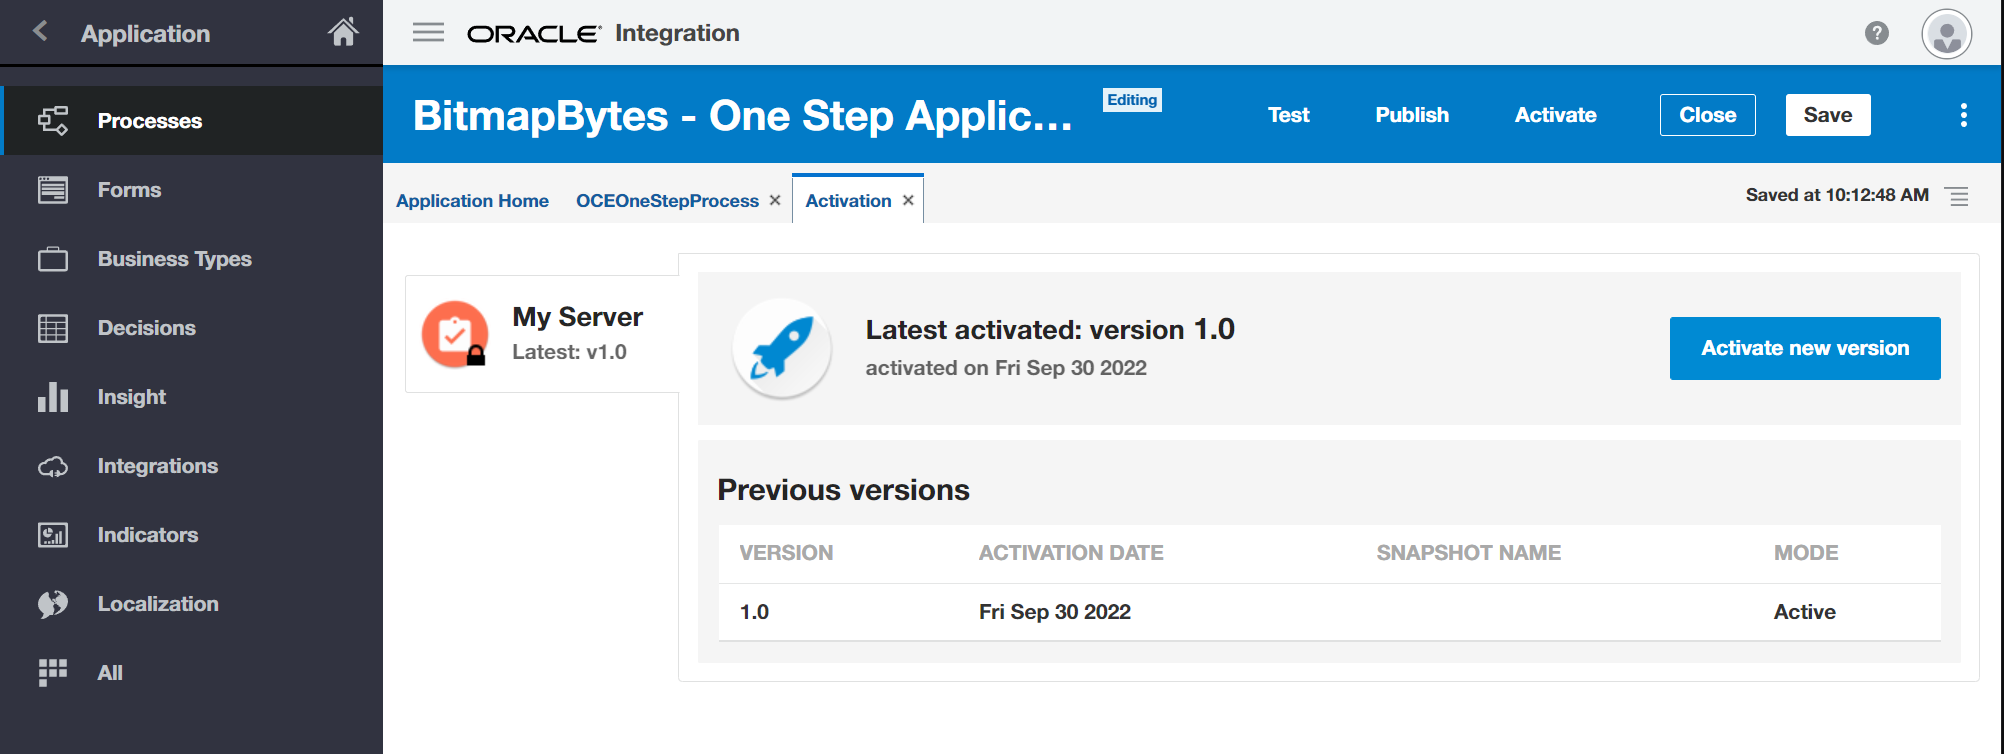
You will see your latest version listed here.
We can now go and configure OCM assets to use this process.
Configure an OCM Asset to use new process workflow.
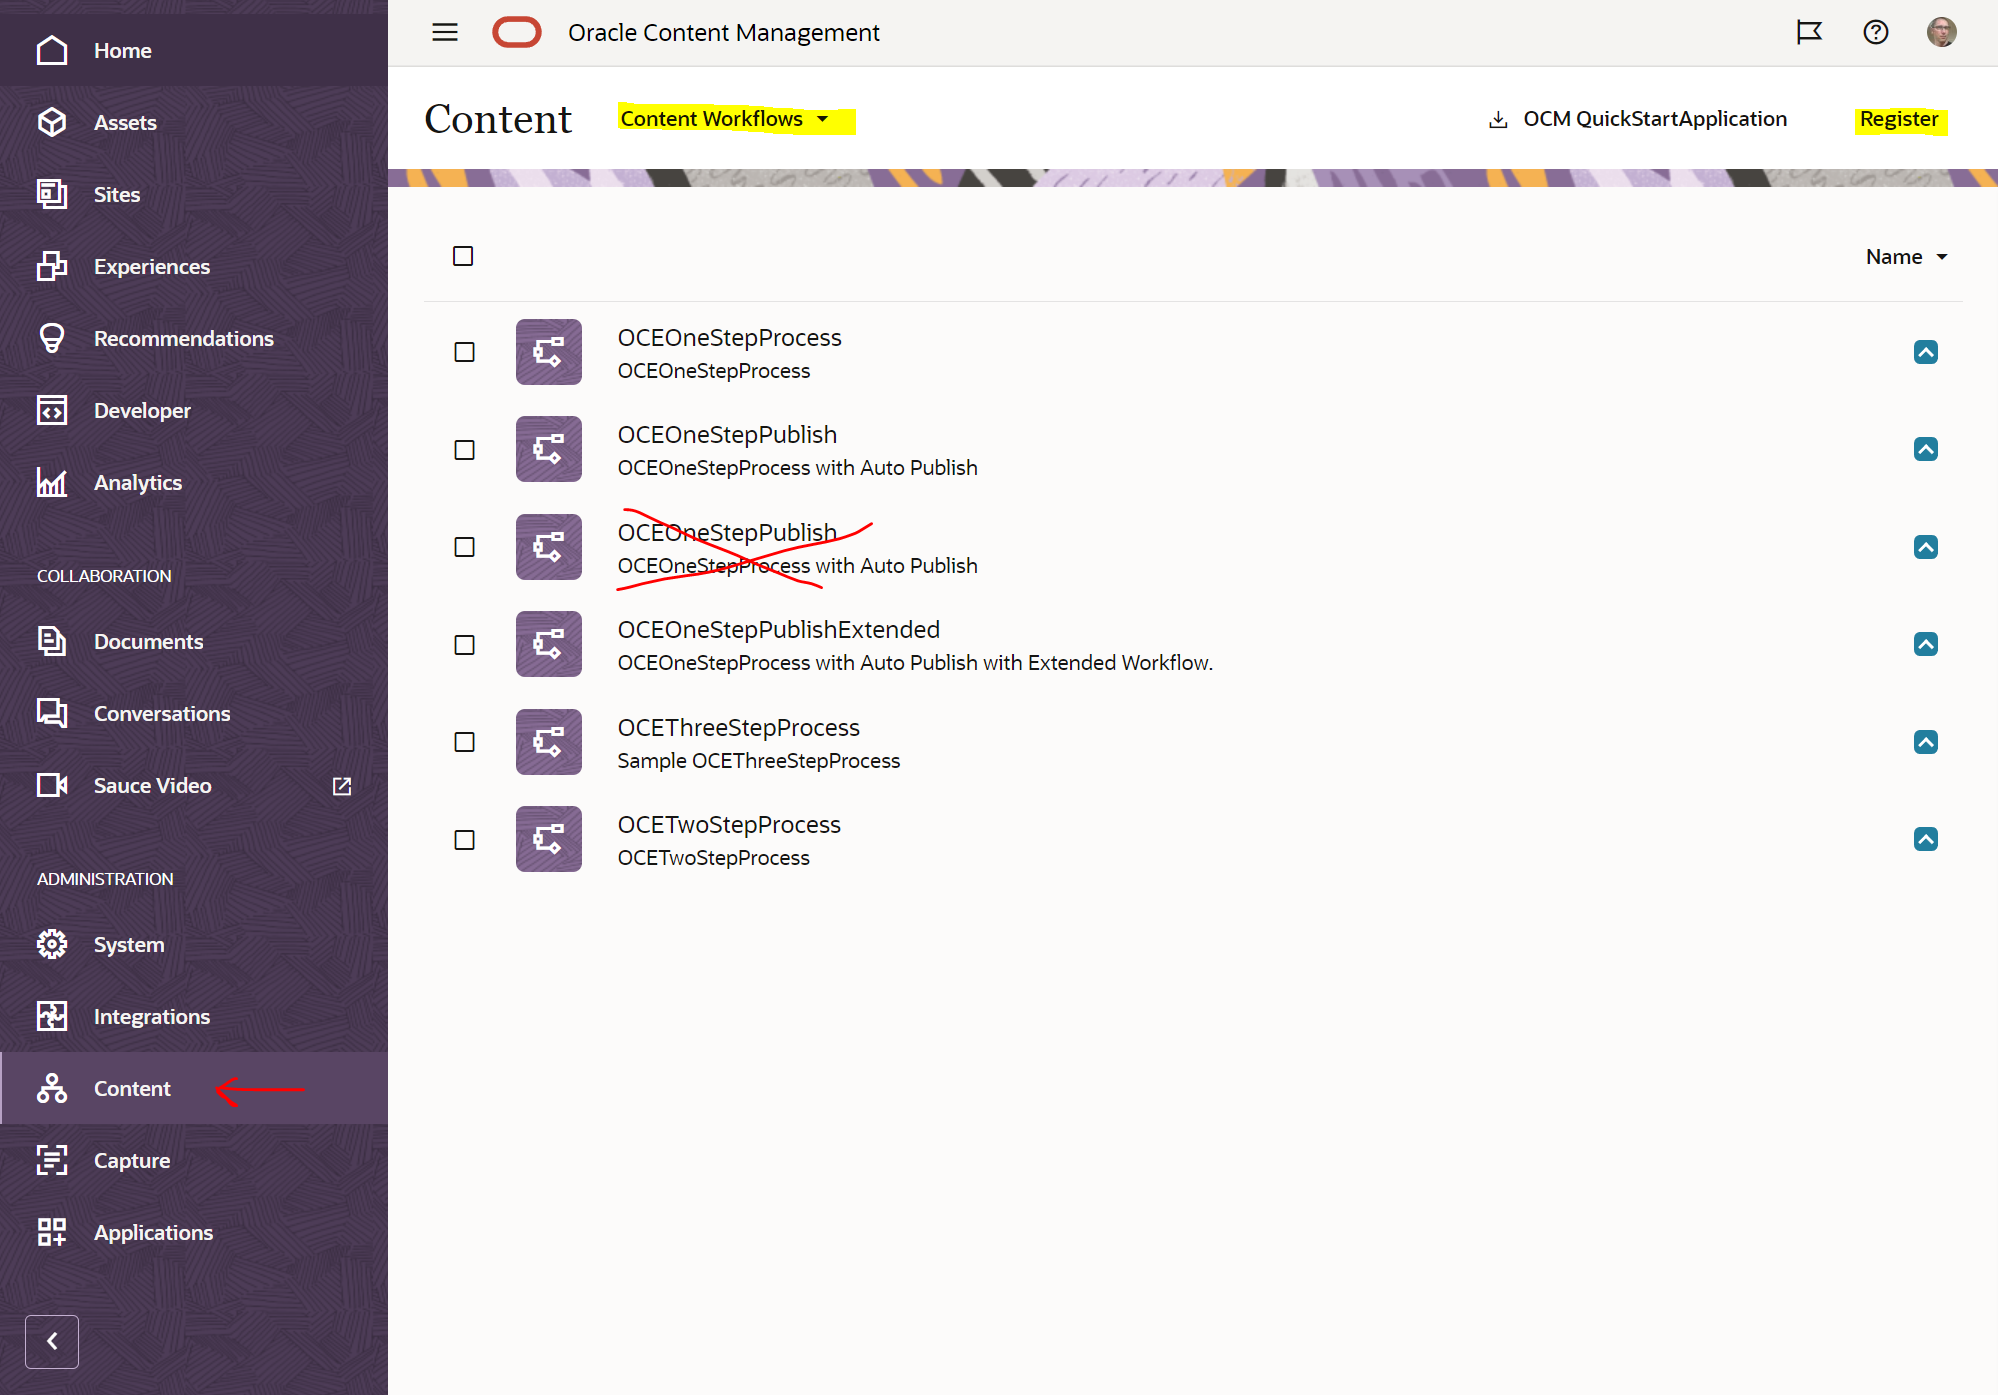
Launch Oracle Content Management head over to "Content" >> "Content Workflows" and select the "Register" button.
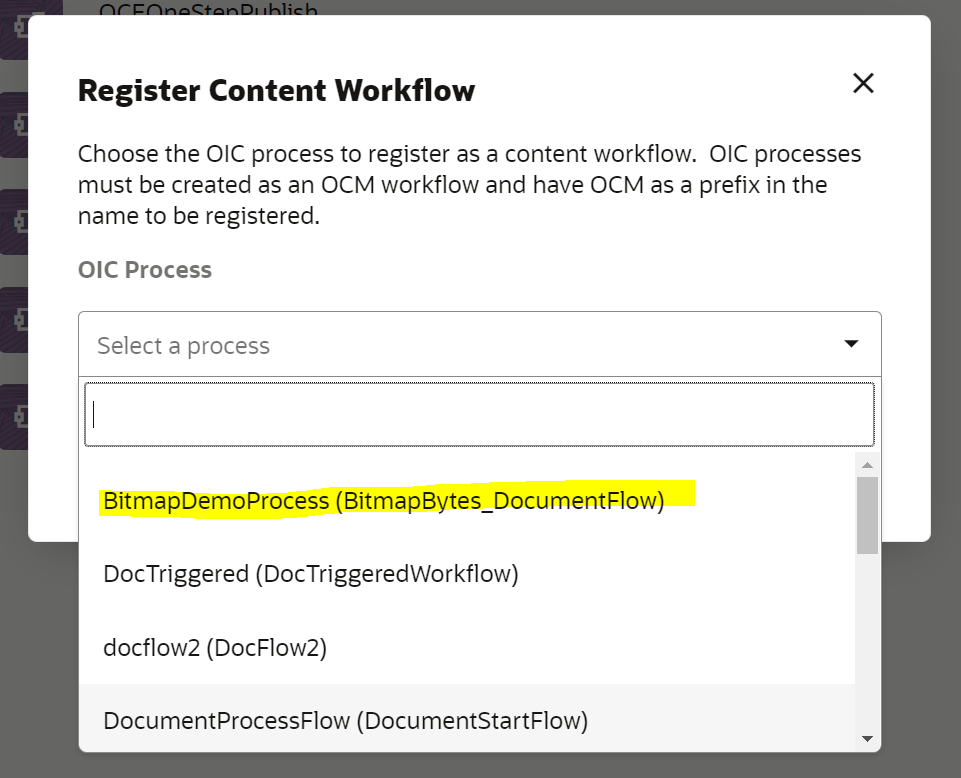
In the modal select the process you created to import it and make it available.
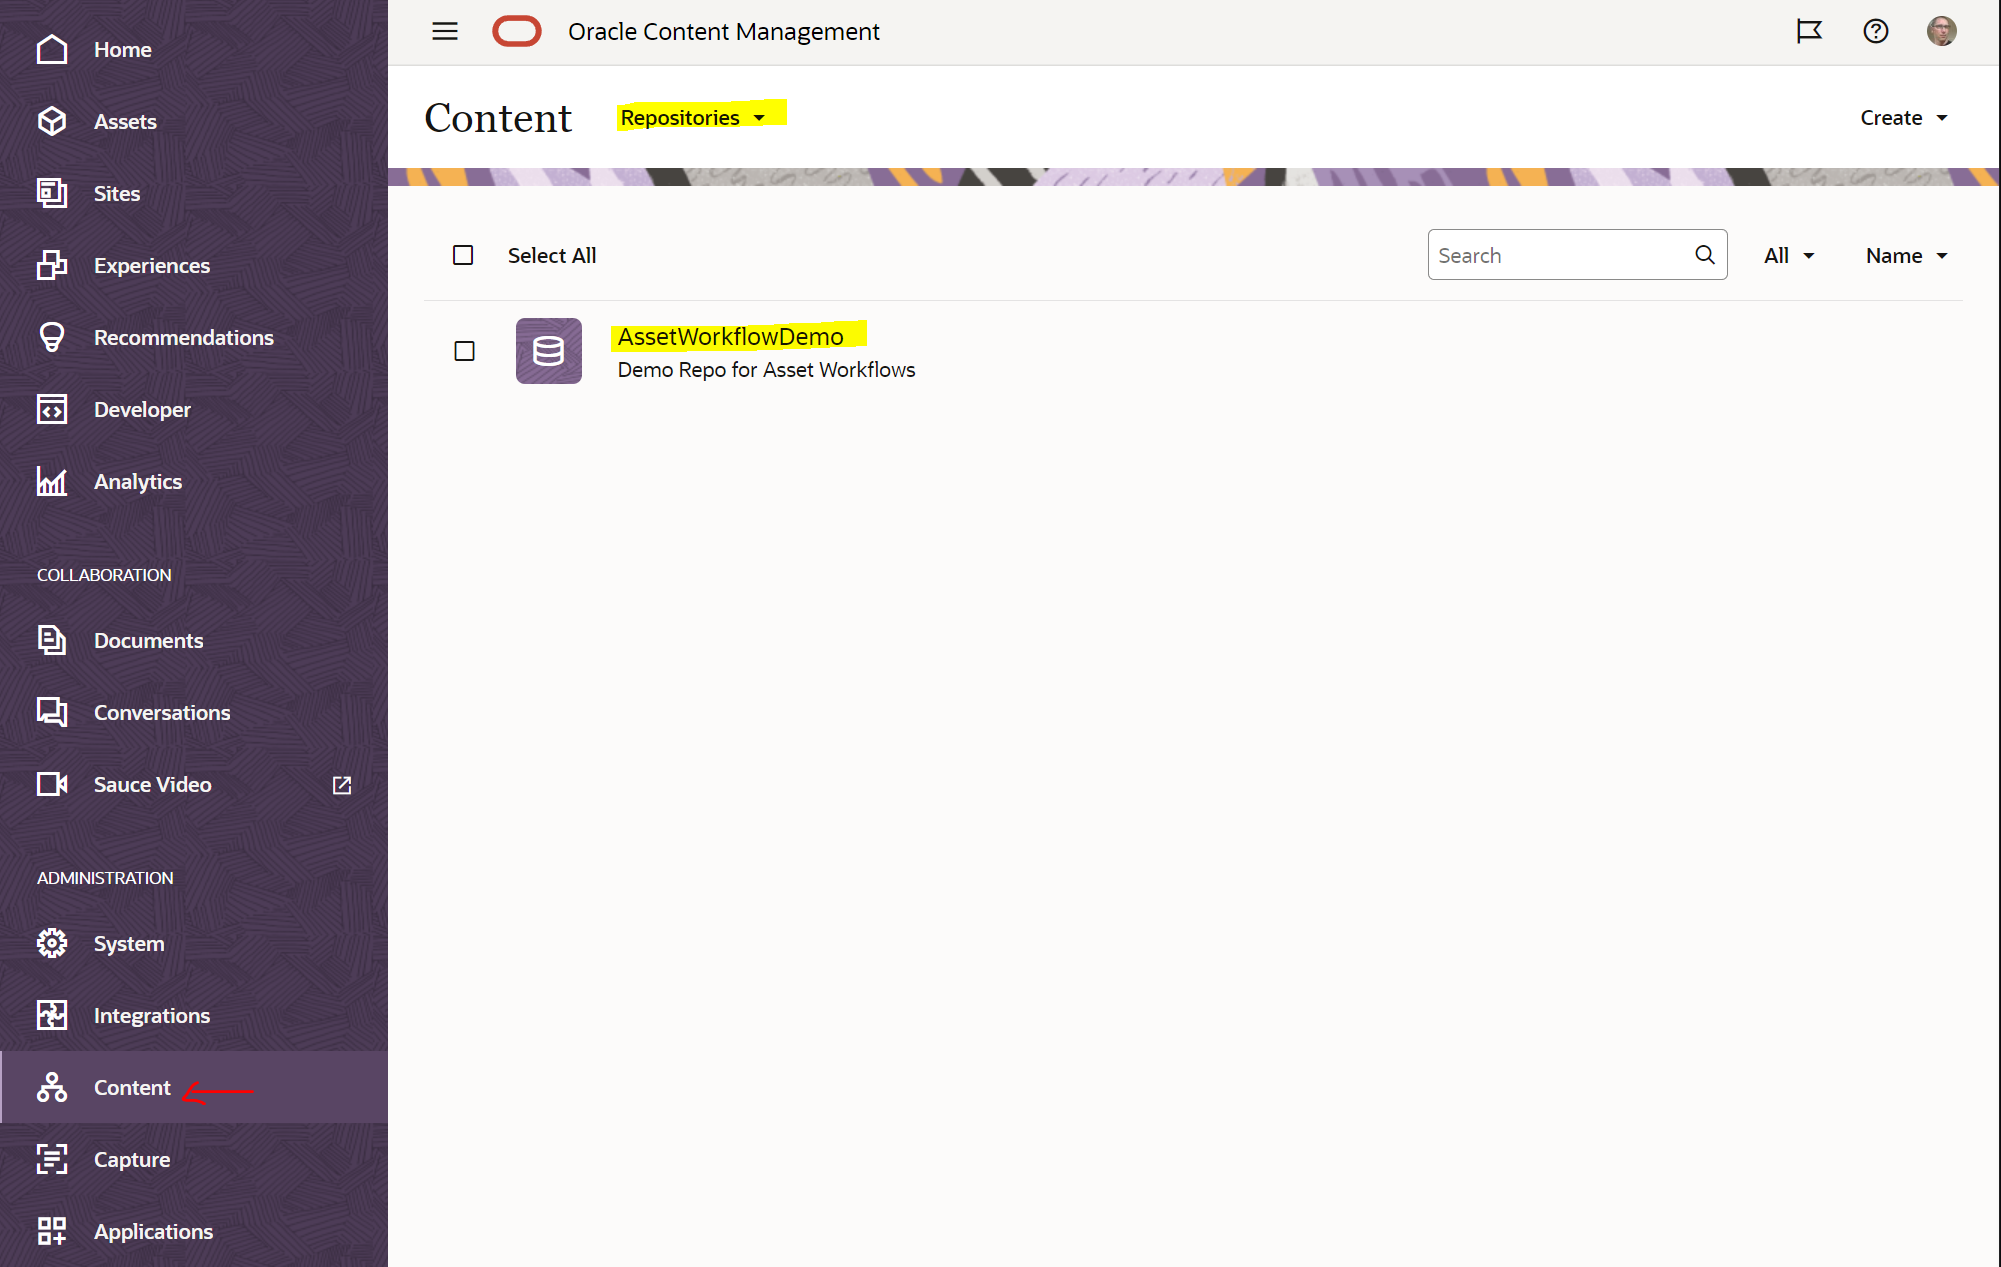
Next go into your repositories and create a new repository or select an existing one you would like to assign workflows against an asset.
"Content" >> "Repositories" select repository.
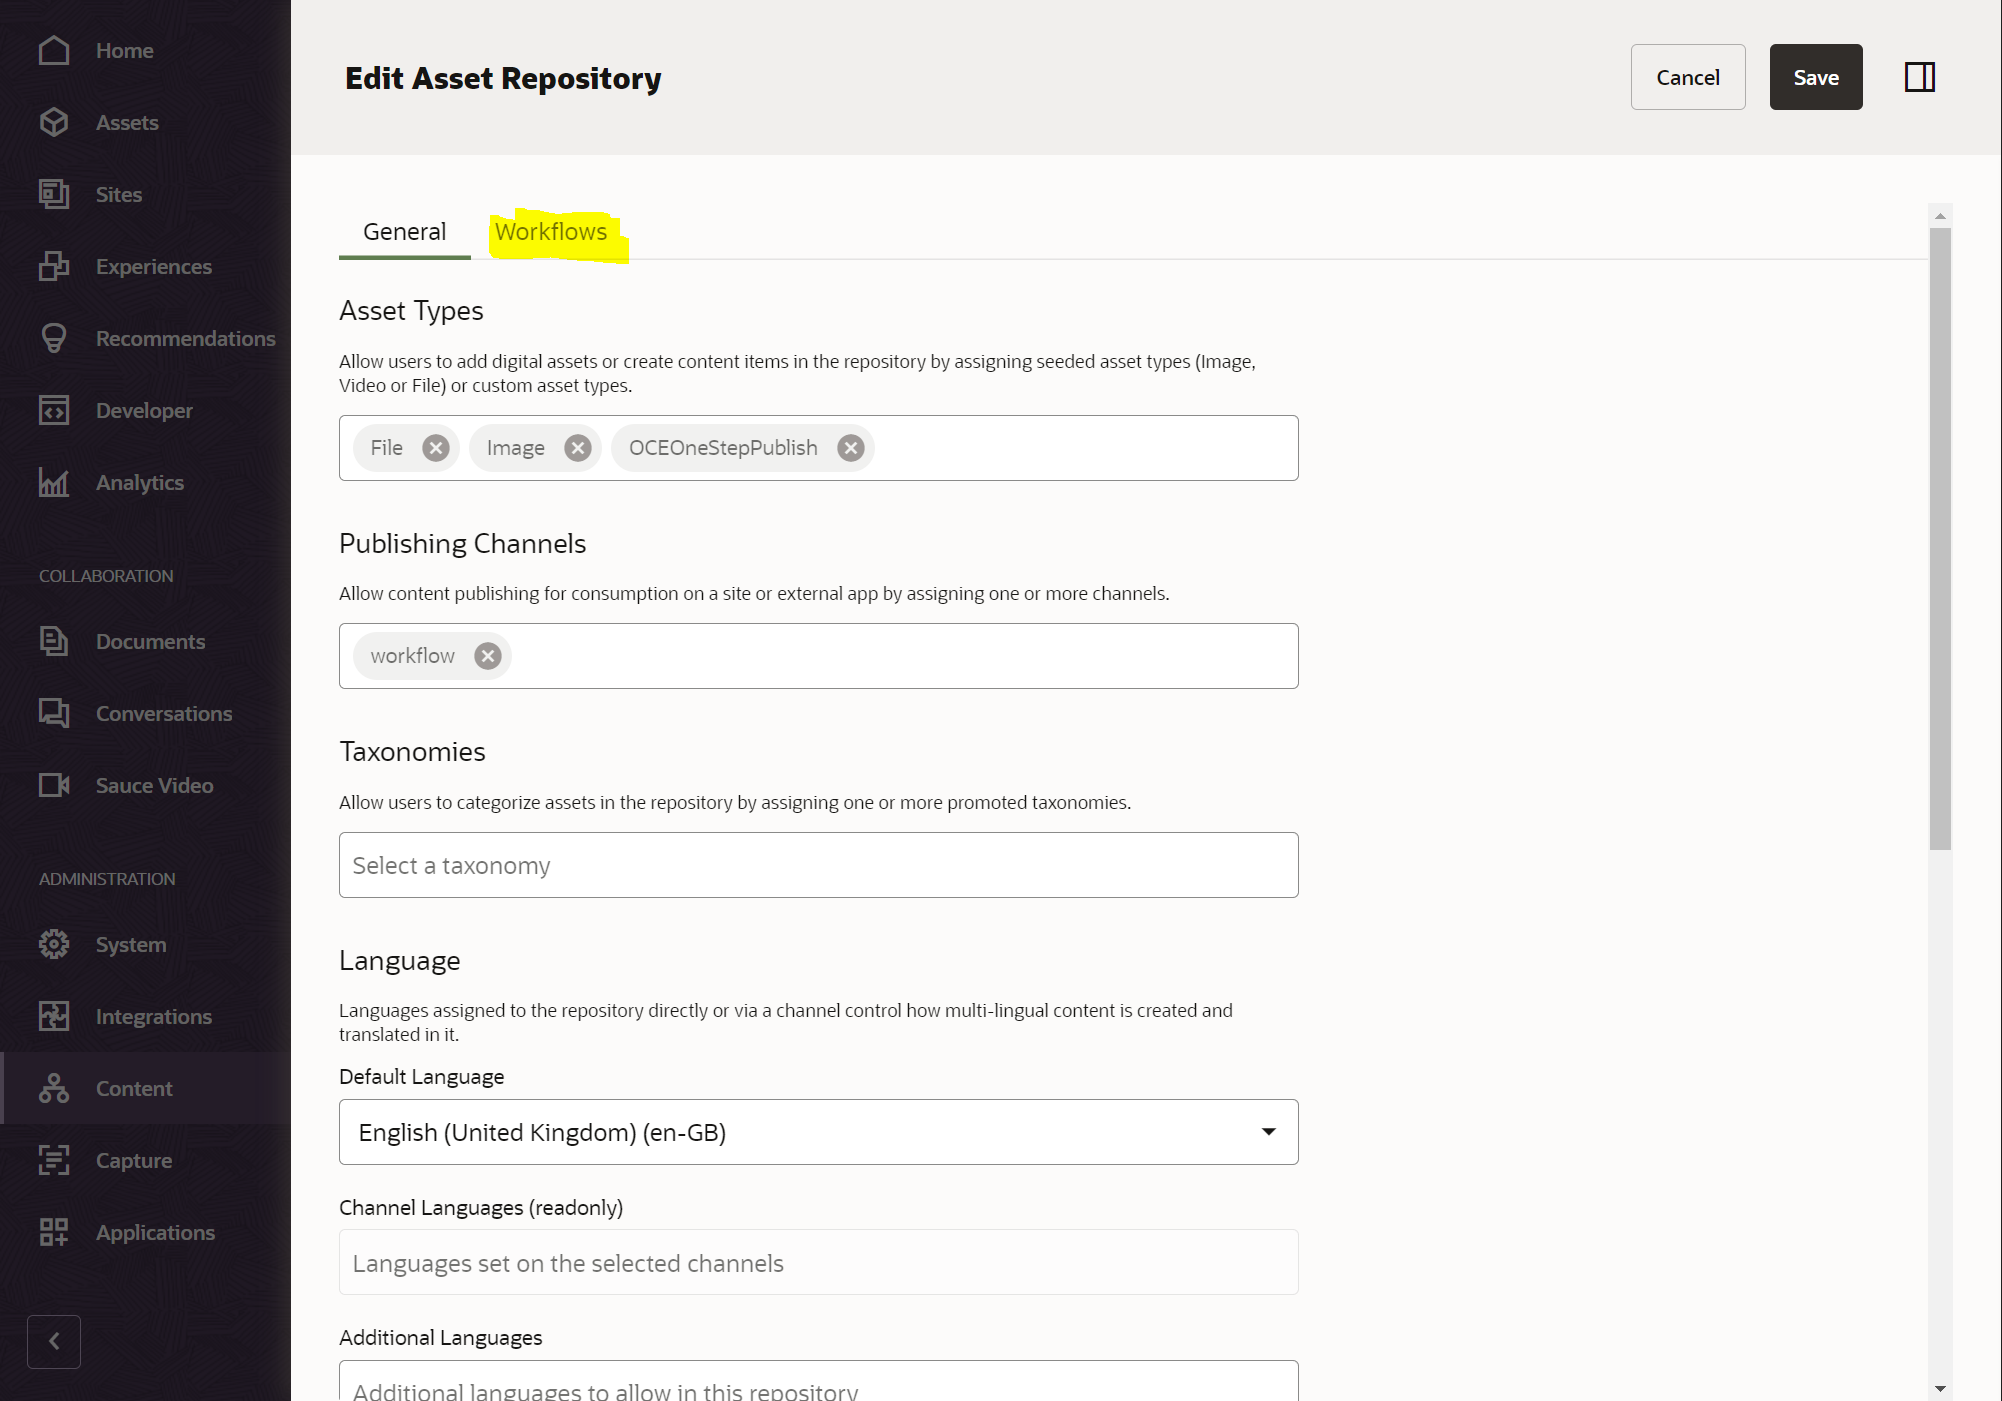
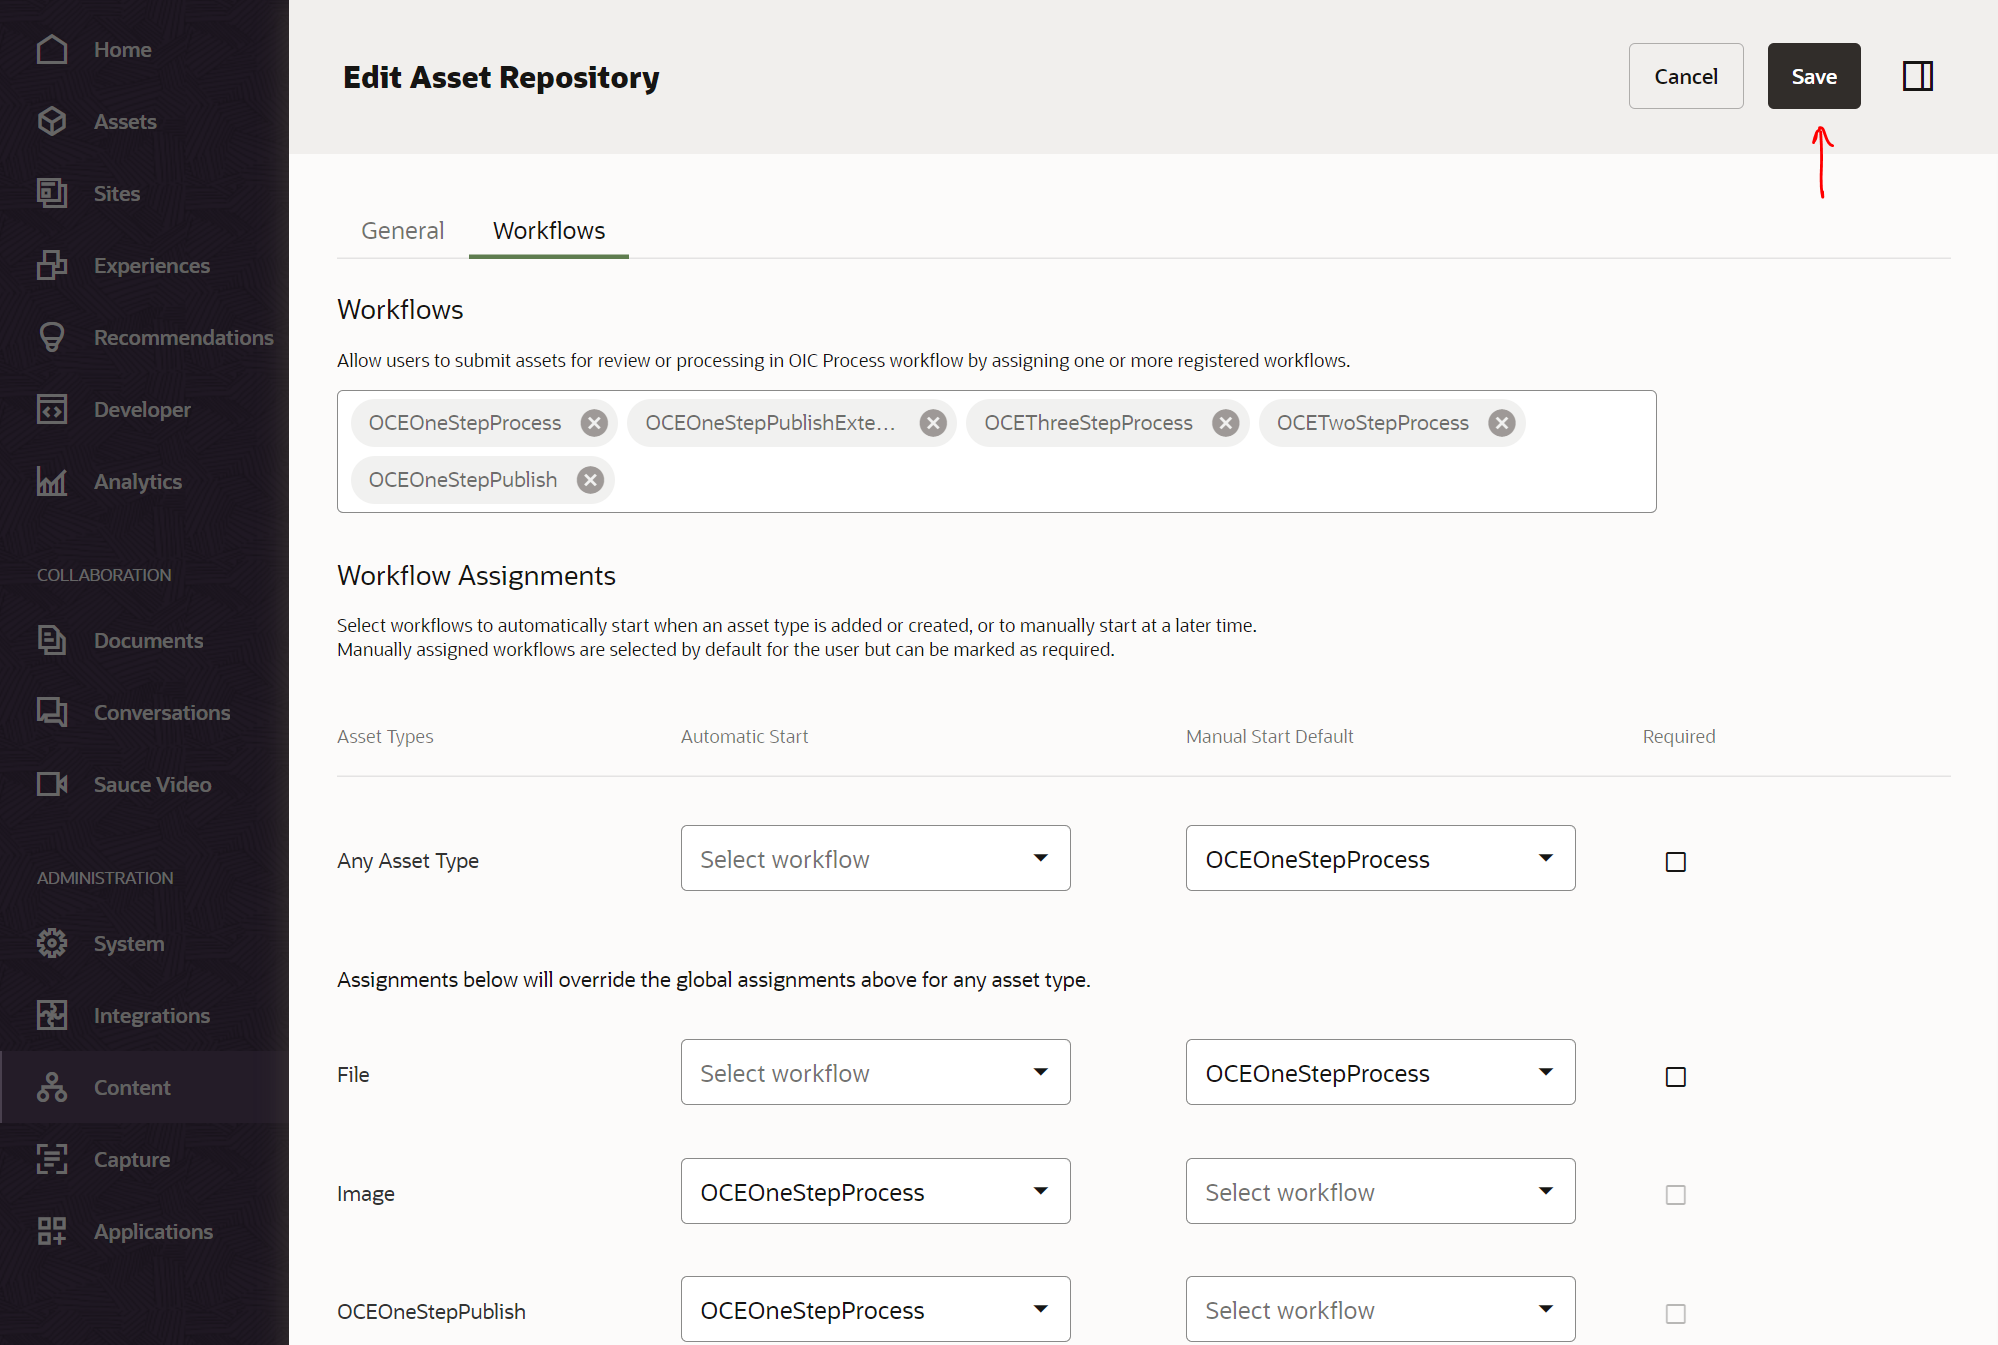
Select the "Workflows" tab in your repository
Search and add the workflow you registered.
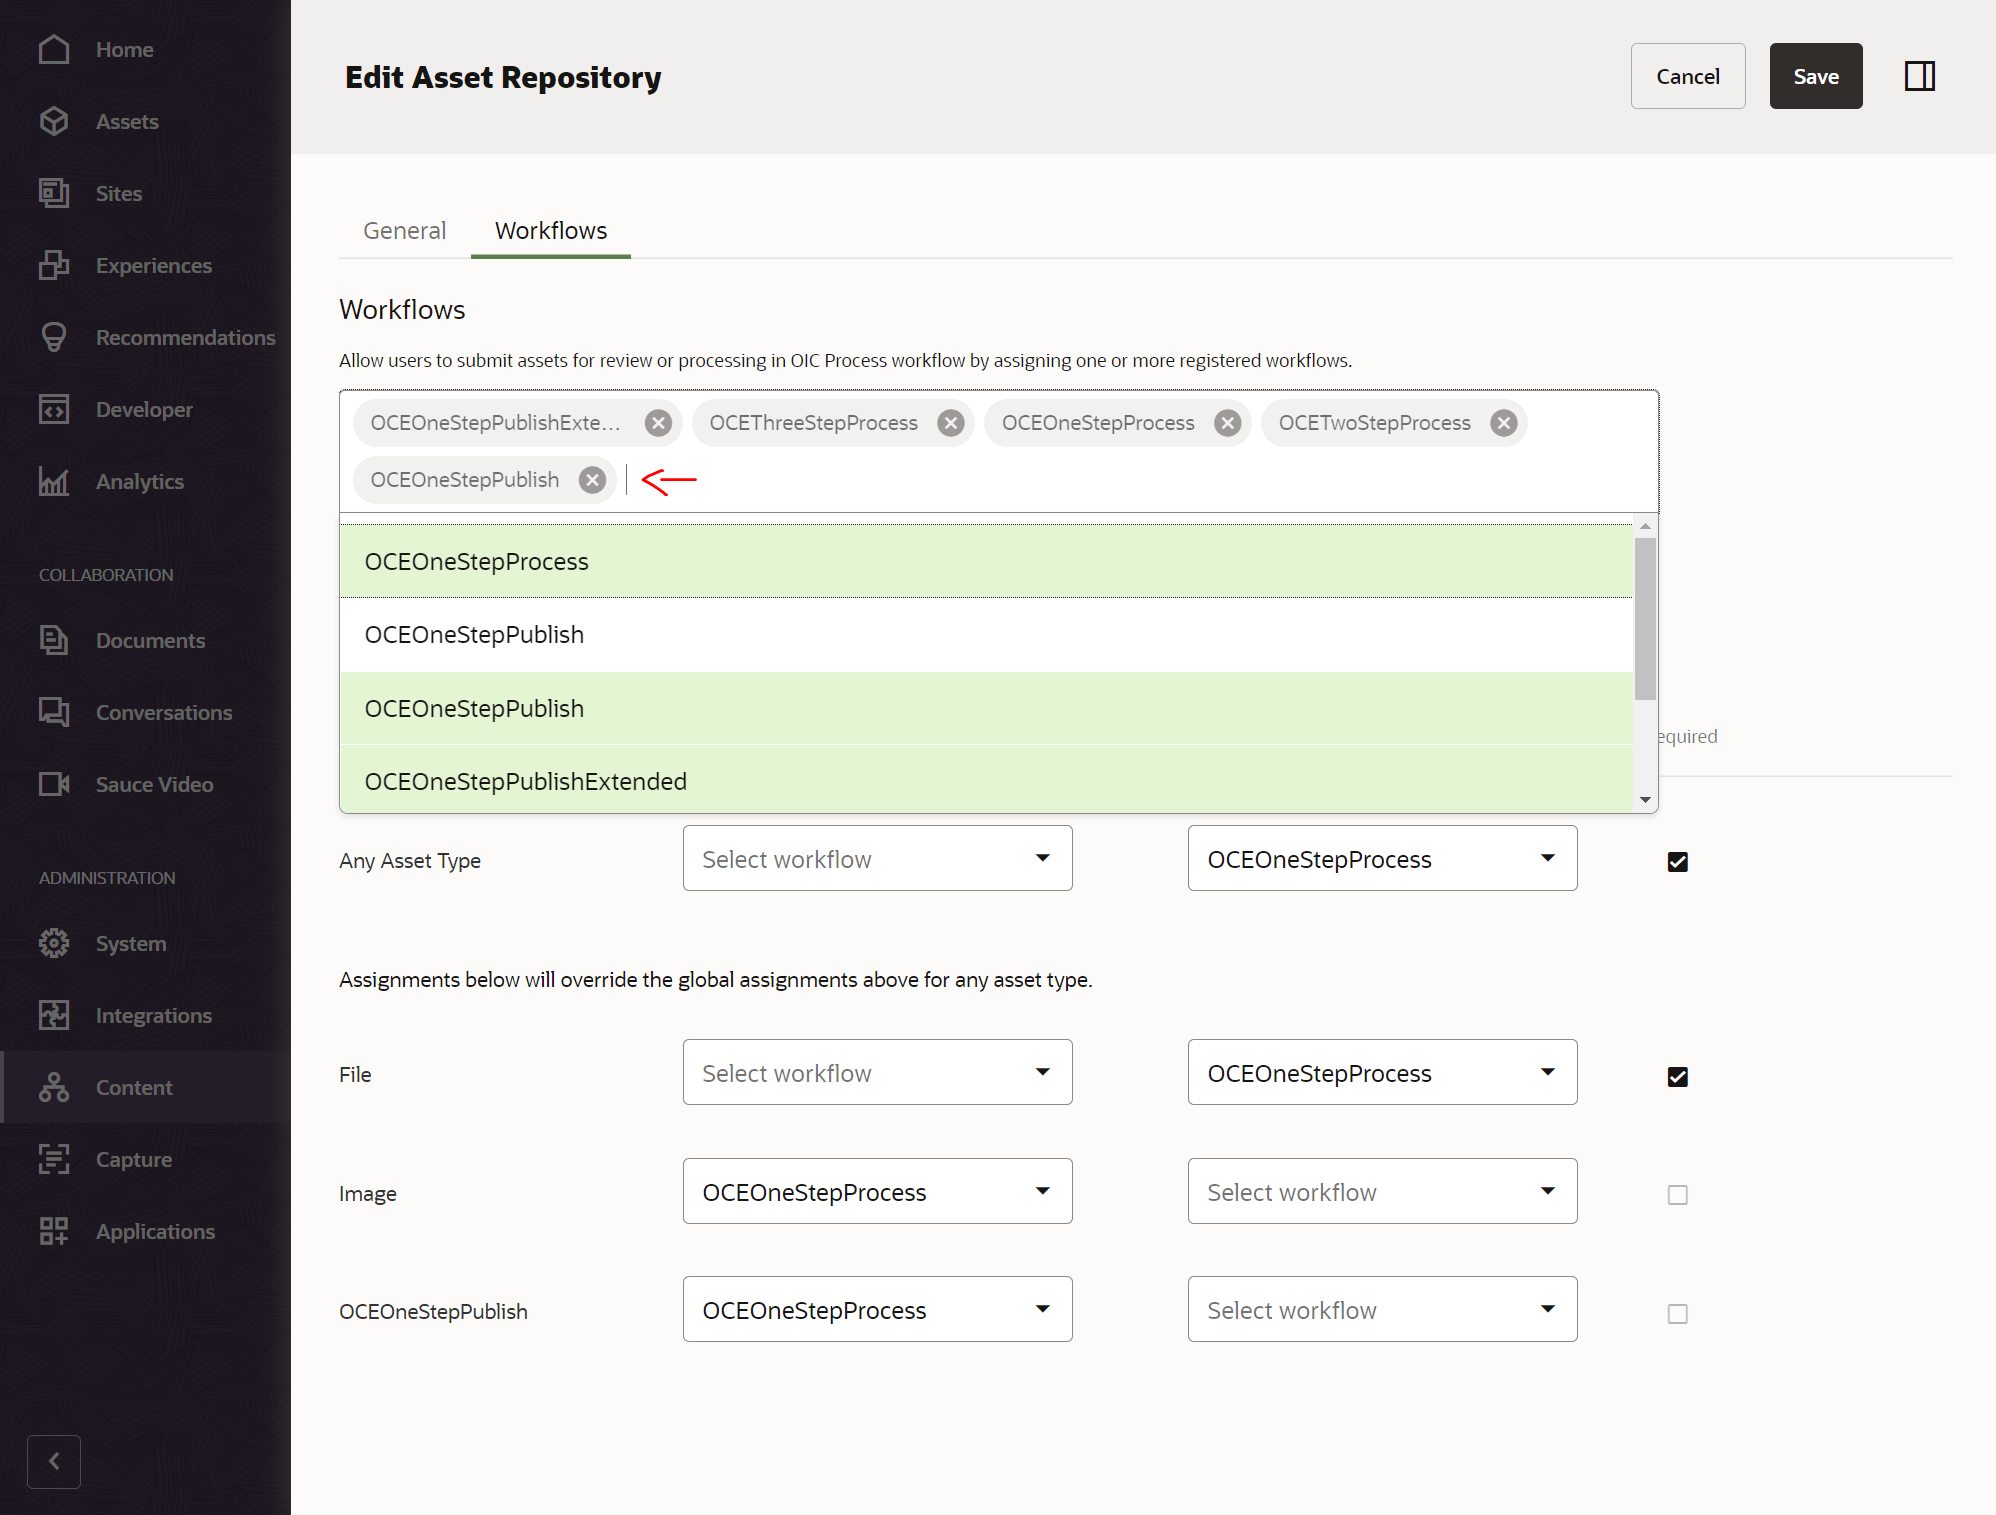
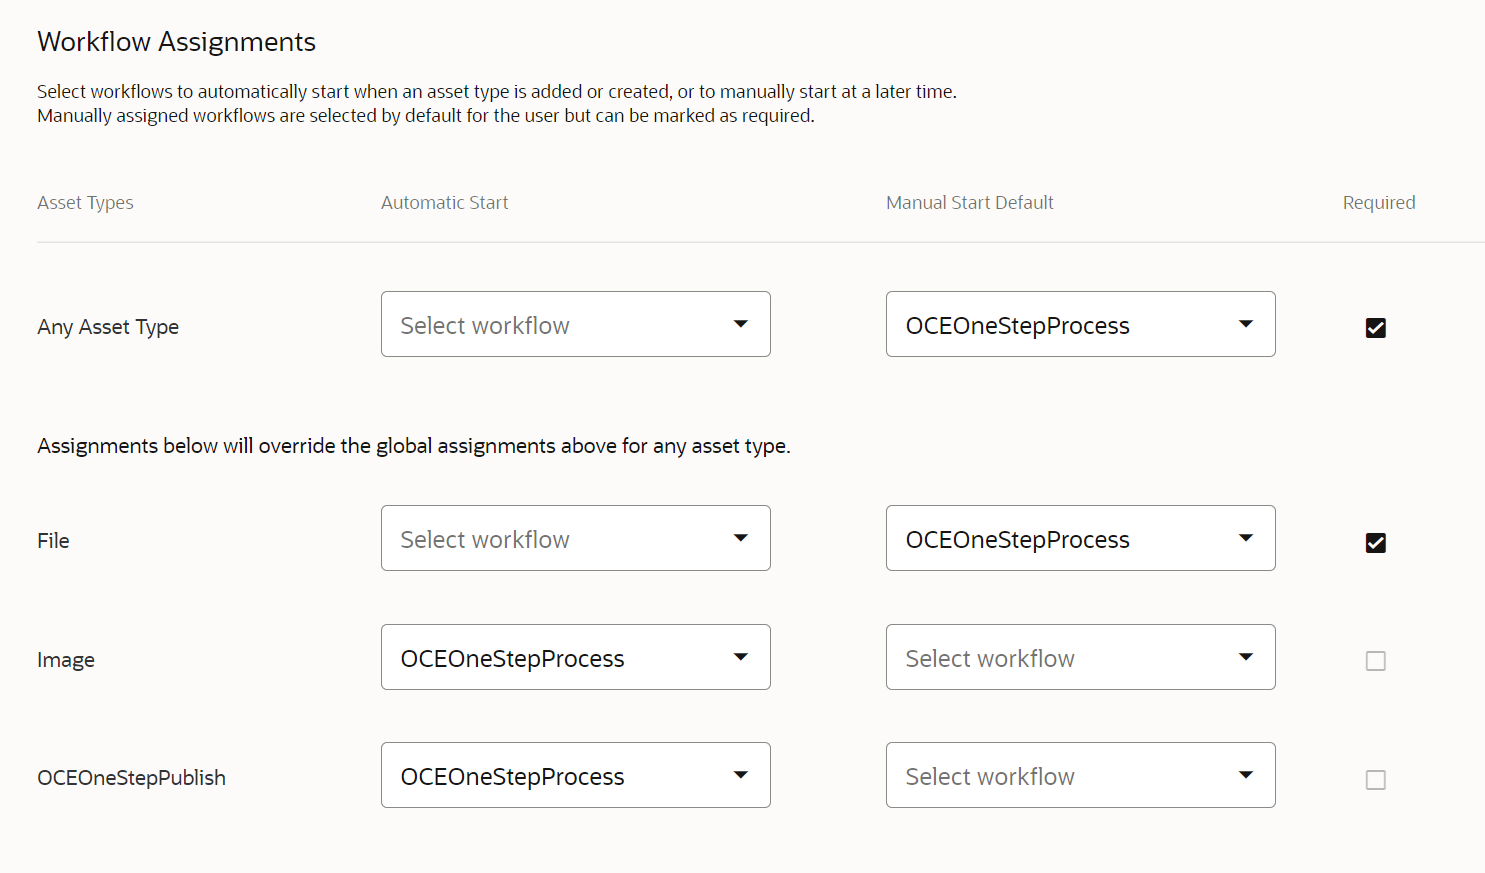
Within the workflow assignments under assets you have the following options.
You can:
- Define a workflow against any asset or target a specific asset type.
- Automatically trigger a workflow when a new asset or revision is created.
- Allow editors to manually trigger the workflow from the OCM Assets.
- With the "Required" flag the editor can only choose the selected workflow - if not required they can select from the list of available workflows that have been added to the repository.
Save the repository and go into assets and open the repository when you have defined your workflows against asset types.
You can now test out your workflow.
In the next post I'll be taking a closer look at the new integrated features that allow you to manage your workflow assets directly within Oracle Content Management.